FMC Setup & Installation
How to setup your Frontier Management Cluster (FMC)
Cluster API (CAPI) Across Different Infrastructure Providers
To allow your organization to deploy workload clusters across different infrastructure providers, you as the frontier administrator are required to configure multiple prerequisites before install Frontier services to your management cluster. The three currently supported infrastructure providers for FKP are:
We will gather required key information from each of these providers to be saved as environment variables to complete the Frontier services installation.
AWS FKP Configuration
To complete the AWS part of the installation, you will need to begin by downloading the AWS Command-Line Interface (CLI). This will be a required tool when installing FKP services into your Kubernetes cluster. The command used will depend on the CPU architecture of the nodes running in your cluster.
For Ubuntu - x86:
curl "https://awscli.amazonaws.com/awscli-exe-linux-x86_64.zip" -o "awscliv2.zip"
unzip awscliv2.zip
sudo ./aws/install
For Ubuntu - ARM:
curl "https://awscli.amazonaws.com/awscli-exe-linux-aarch64.zip" -o "awscliv2.zip"
unzip awscliv2.zip
sudo ./aws/install
To confirm the installation of the AWS CLI, run the following command to fetch the application version:
aws --version
Once the installation of the CLI is confirmed, we will need to retrieve some required information for Frontier services from your organization FKP AWS account:
- AWS Access Key ID
- AWS Secret Access Key
AWS Access Key with Secret
To fetch this information, log into your AWS Console with the account you plan on using for your FMC cluster. When you are authenticated, locate the account navigation menu on the top-right corner of your console screen.
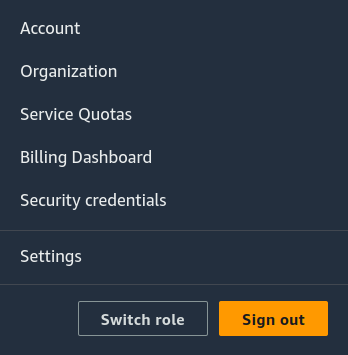
Click on “Security Credentials”. You will be confronted with your account’s security credential menu. Scroll down until you see the Access Keys section.
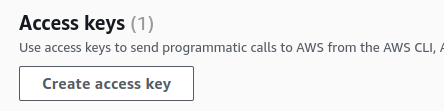
Click on the “Create Access Key” button. You will be redirected to an access key selection menu.
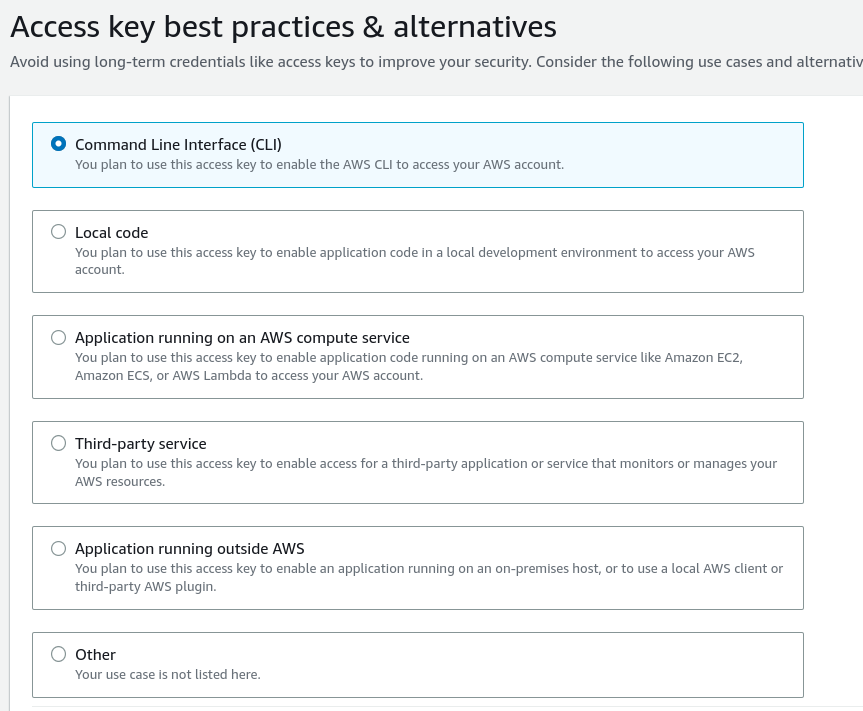
The access key you will create will be for the AWS CLI. Navigate to the next part of the form, you will come across an access key description menu.
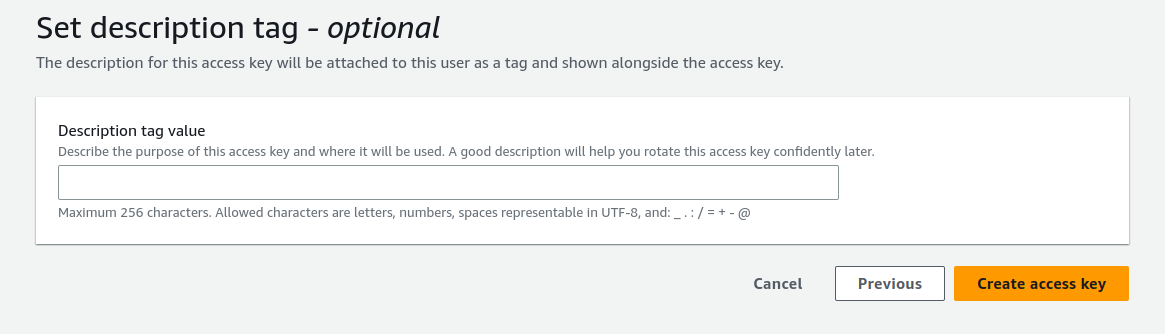
You can add a description tag in case you need help labeling your access keys pending on what other uses you have with your account. Click the “Create Access Key” button when ready.
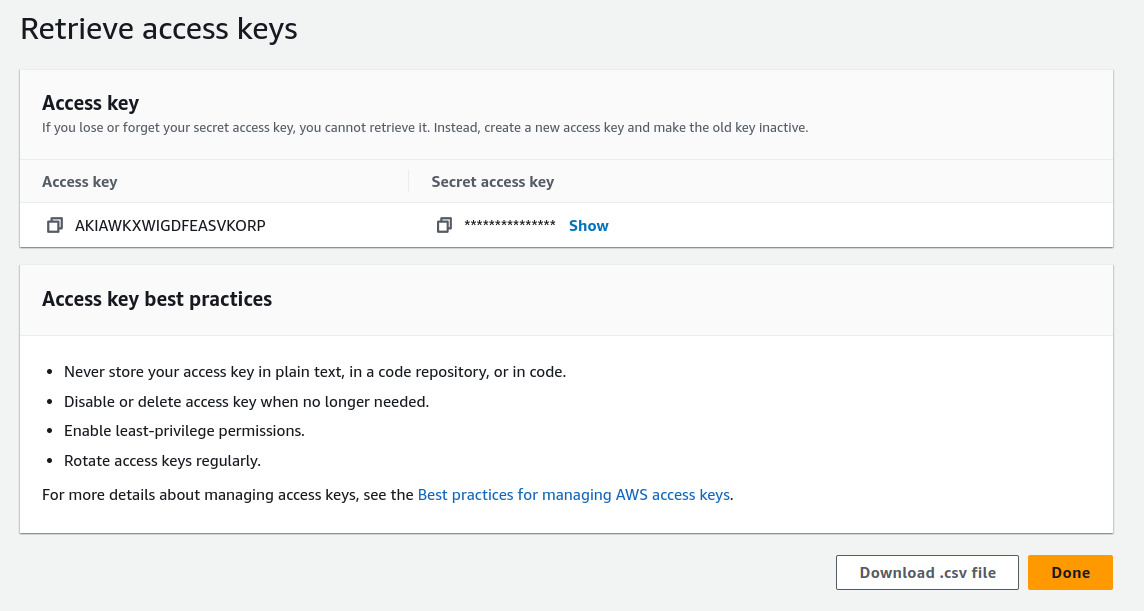
You have successfully generated a new AWS access key. You will need the access key secret and ID for your cluster.
Declare the AWS Environment Variables
Go back to your cluster’s control plane node command line and establish these two environment variables.
export AWS_ACCESS_KEY_ID=<aws-access-key-id>
export AWS_SECRET_ACCESS_KEY=<aws-access-key-secret>
Fill in the required values for aws-access-key-id and aws-access-key-secret based off the AWS access key you just generated. You can confirm the declared values by echo. This satisfies the requirements for the AWS Frontier CAPI controller.
Azure FKP Configuration
To complete the Microsoft Azure part of the installation, you will need to begin by downloading the Azure Command-Line Interface (CLI). This will be a required tool when installing FKP services into your Kubernetes cluster.
For Ubuntu:
curl -sL https://aka.ms/InstallAzureCLIDeb | sudo bash
To confirm the installation of the Azure CLI, run the following command to fetch the application version:
az version
Once the installation of the CLI is confirmed, we will need to retrieve some required information for Frontier services from your organization FKP Azure account:
- Azure Subscription ID
- Azure Tenant ID
- Azure Client ID
- Azure Client Secret
To fetch all 4 of these requirements, start by logging into your Microsoft Azure Portal.
Azure Subscription ID
Once you authenticated into your Azure Portal, you will be redirected to the home page.
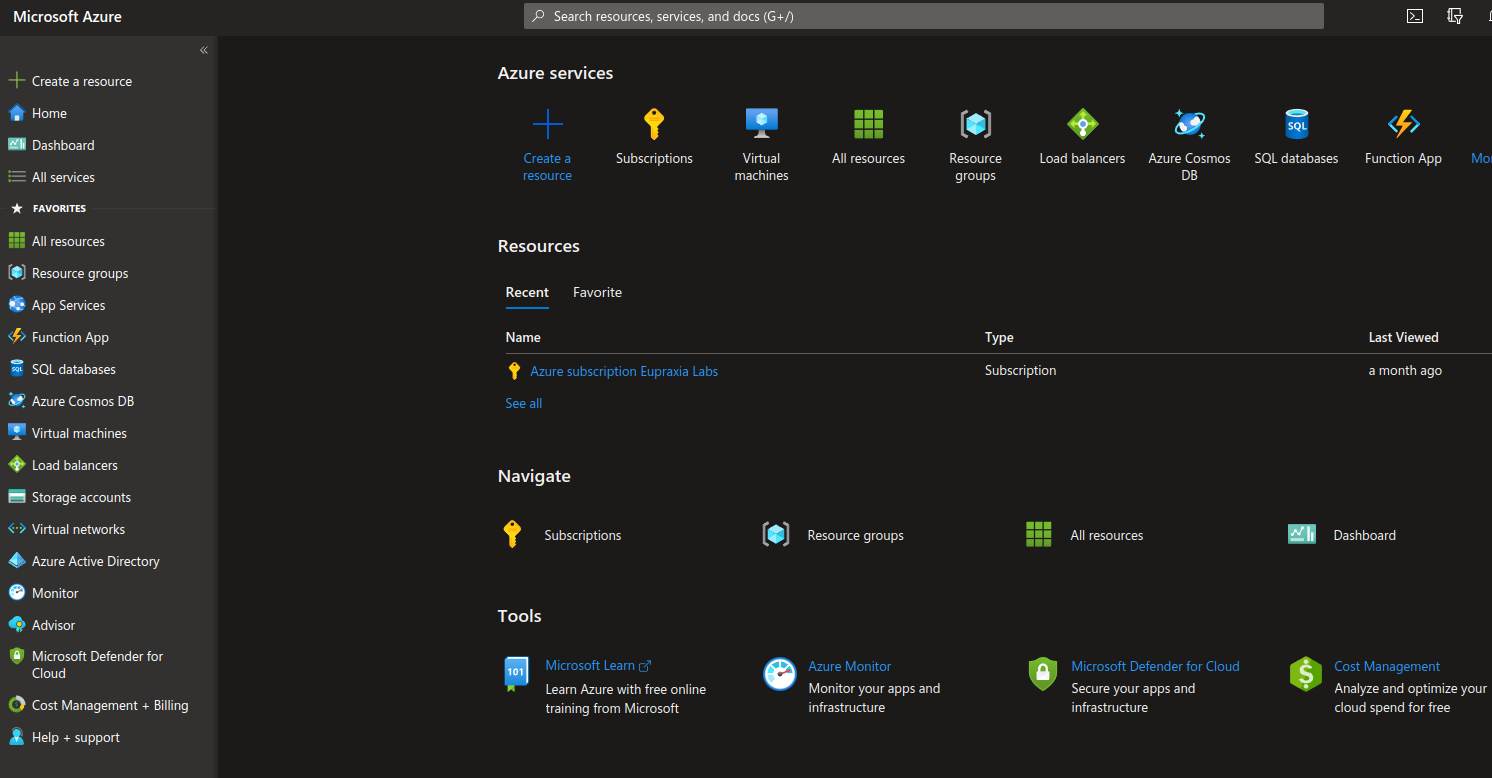
Upon the homepage, you will see that there is a subscription navigation option. If you enter it, that is where you should be able to find the Subscription ID required for the Azure FKP services.
Azure Tenant ID
Up next we will need to gather the Azure Tenant ID. We can start by navigating into “All Services”.
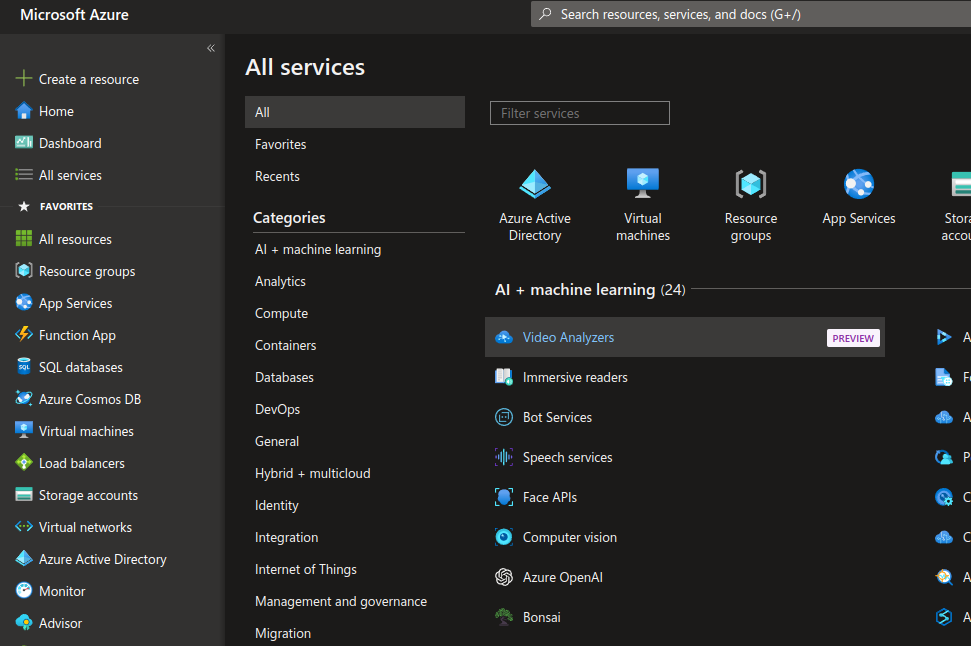
From this screen, we can click on “Azure Active Directory” off the top navigation bar of the “All Services” menu.
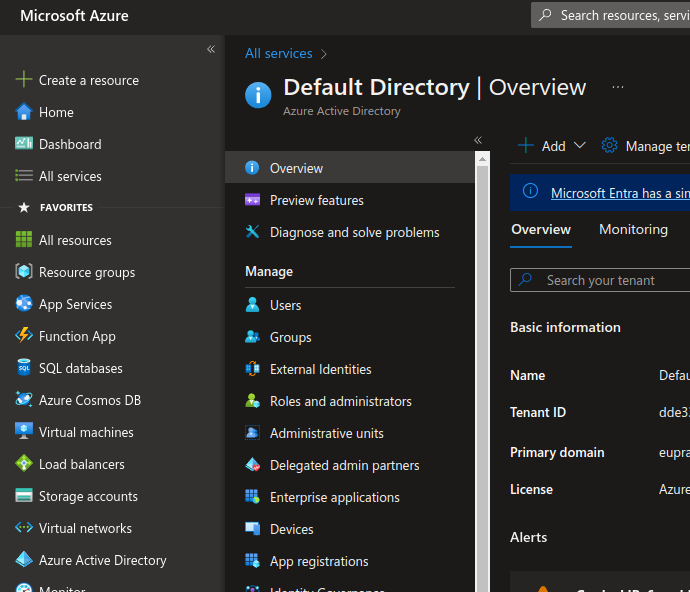
You will be able to view the Tenant ID within this webpage. In the image above, you can see the value on the right-hand side.
Azure Client ID
From the same screen, we are going to navigate to the “App registrations” option from the Default Directory side navigation bar. You will be redirected to this screen.
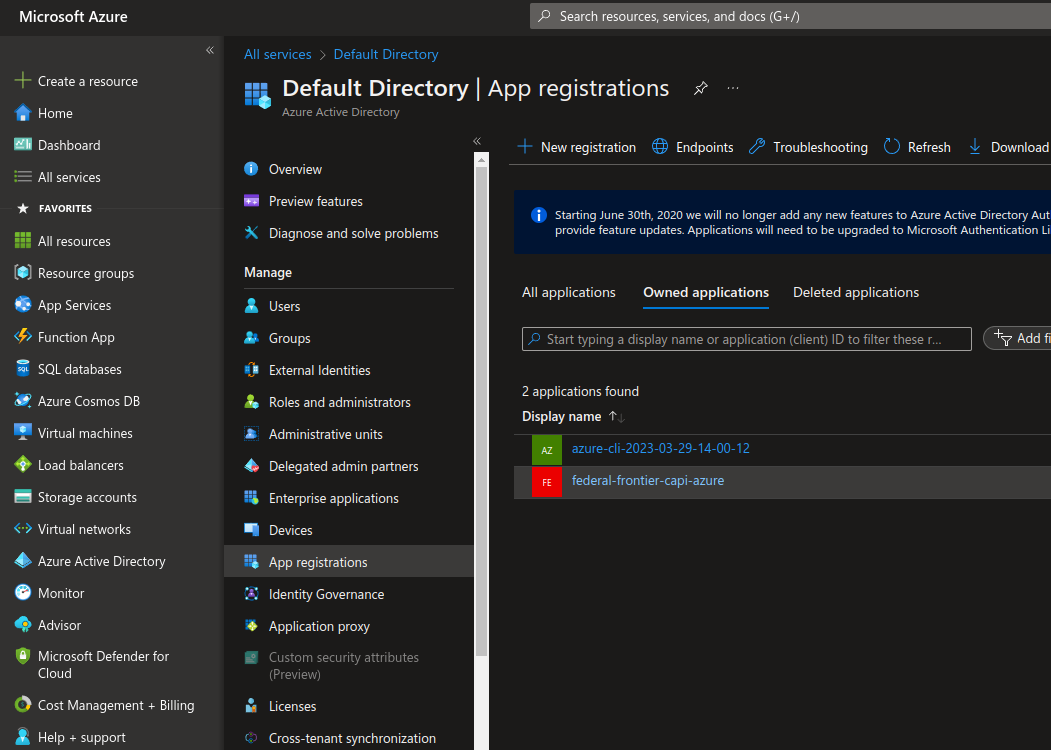
If you look among the list of all applications from the given table, you will be able to view the Client ID from one of the columns. If you do not have an application for your FKP application, then create a new one.
Azure Client Secret
To retrieve the Client Secret, you will want to click on the application of your FKP application. You will want to locate the “Certificates & Secrets” from the side navigation bar of your Azure application.
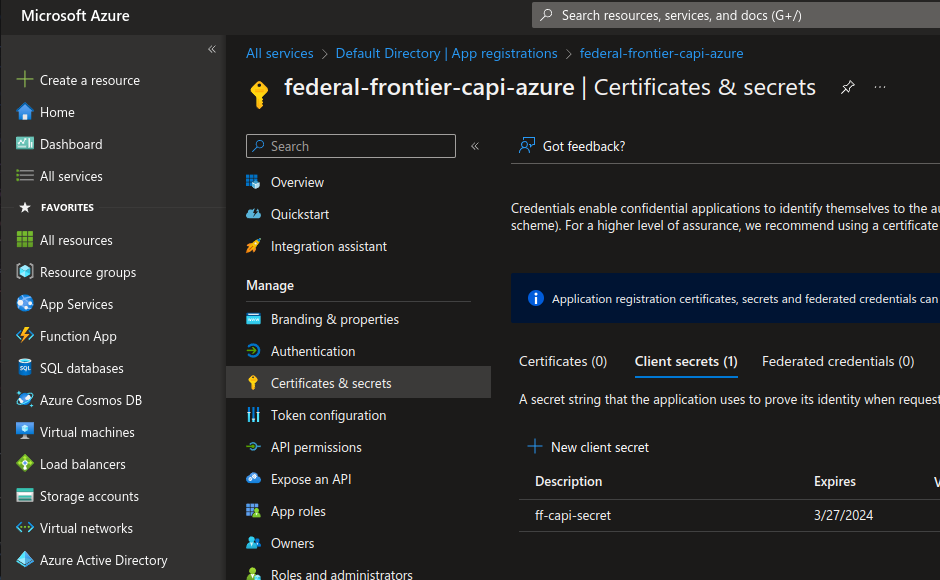
Within this screen, you will find the secret of your client. Retrieve the value of your secret upon creation. You will not be able to retrieve the value again unless you create another.
Declare the Azure Environment Variables
Go back to your cluster’s control plane node command line and establish these four environment variables.
export AZURE_SUBSCRIPTION_ID=<azure-subscription-id>
export AZURE_TENANT_ID=<azure-tenant-id>
export AZURE_CLIENT_ID=<azure-client-id>
export AZURE_CLIENT_SECRET=<azure-client-secret>
Fill in the required values for azure-subscription-id, azure-tenant-id, azure-client-id, and azure-client-secret based off the AWS access key you just generated. You can confirm the declared values by echo. This satisfies the requirements for the Azure Frontier CAPI controller.
Run the Installation
Once you have all nodes running on your Kubernetes cluster, you can run the FKP FMC installation script provided to your organization. This may take a few minutes. If there are any missing environment variables, the installation will fail and will be left incomplete.
Confirm the Installation
Once your initial installation is complete, we can confirm all CAPI infrastructure providers are running using the following commands below:
For MAAS:
kubectl get pods -n capmaas-system
For AWS:
kubectl get pods -n capa-system
For Azure:
kubectl get pods -n capa-system
You should be able to view this expected output, with all CAPI infrastructure provider pods in the running state:
For MAAS:
NAME                                         READY   STATUS    RESTARTS   AGE
capmaas-controller-manager-8b7f484c5-pbjlz   2/2     Running   0          9m11s
For AWS:
NAME                                      READY   STATUS    RESTARTS   AGE
capa-controller-manager-9ff968867-tjzgh   1/1     Running   0          8m32s
For Azure:
NAME                                       READY   STATUS             RESTARTS          AGE
capz-nmi-9gww5                             1/1     Running            0                 6m27s
capz-nmi-4444z                             1/1     Running            0                 6m27s
capz-nmi-pkx7q                             1/1     Running            0                 6m27s
capz-nmi-2h78z                             1/1     Running            0                 6m27s
capz-nmi-pl4g9                             1/1     Running            0                 6m27s
capz-controller-manager-847648f577-75wks   1/1     Running            0                 6m45s
capz-nmi-f9qzq                             1/1     Running            0                 6m27s
This will complete the foundation of the FKP FMC Cluster. To complete the full installation, you will have to implement persistent storage to the cluster. Additionally, you will have to create the authentication and Frontier API Services (FAS) server. This will be guided through the next few tutorials.