Manage Clusters using Frontier Outpost GUI
How to Manage Clusters in Frontier Outpost GUI
Clusters
Similar to the CLI, FKP personnel will be able to effectively create, manage, and destroy workload clusters from their organization’s Frontier Management Cluster (FMC).
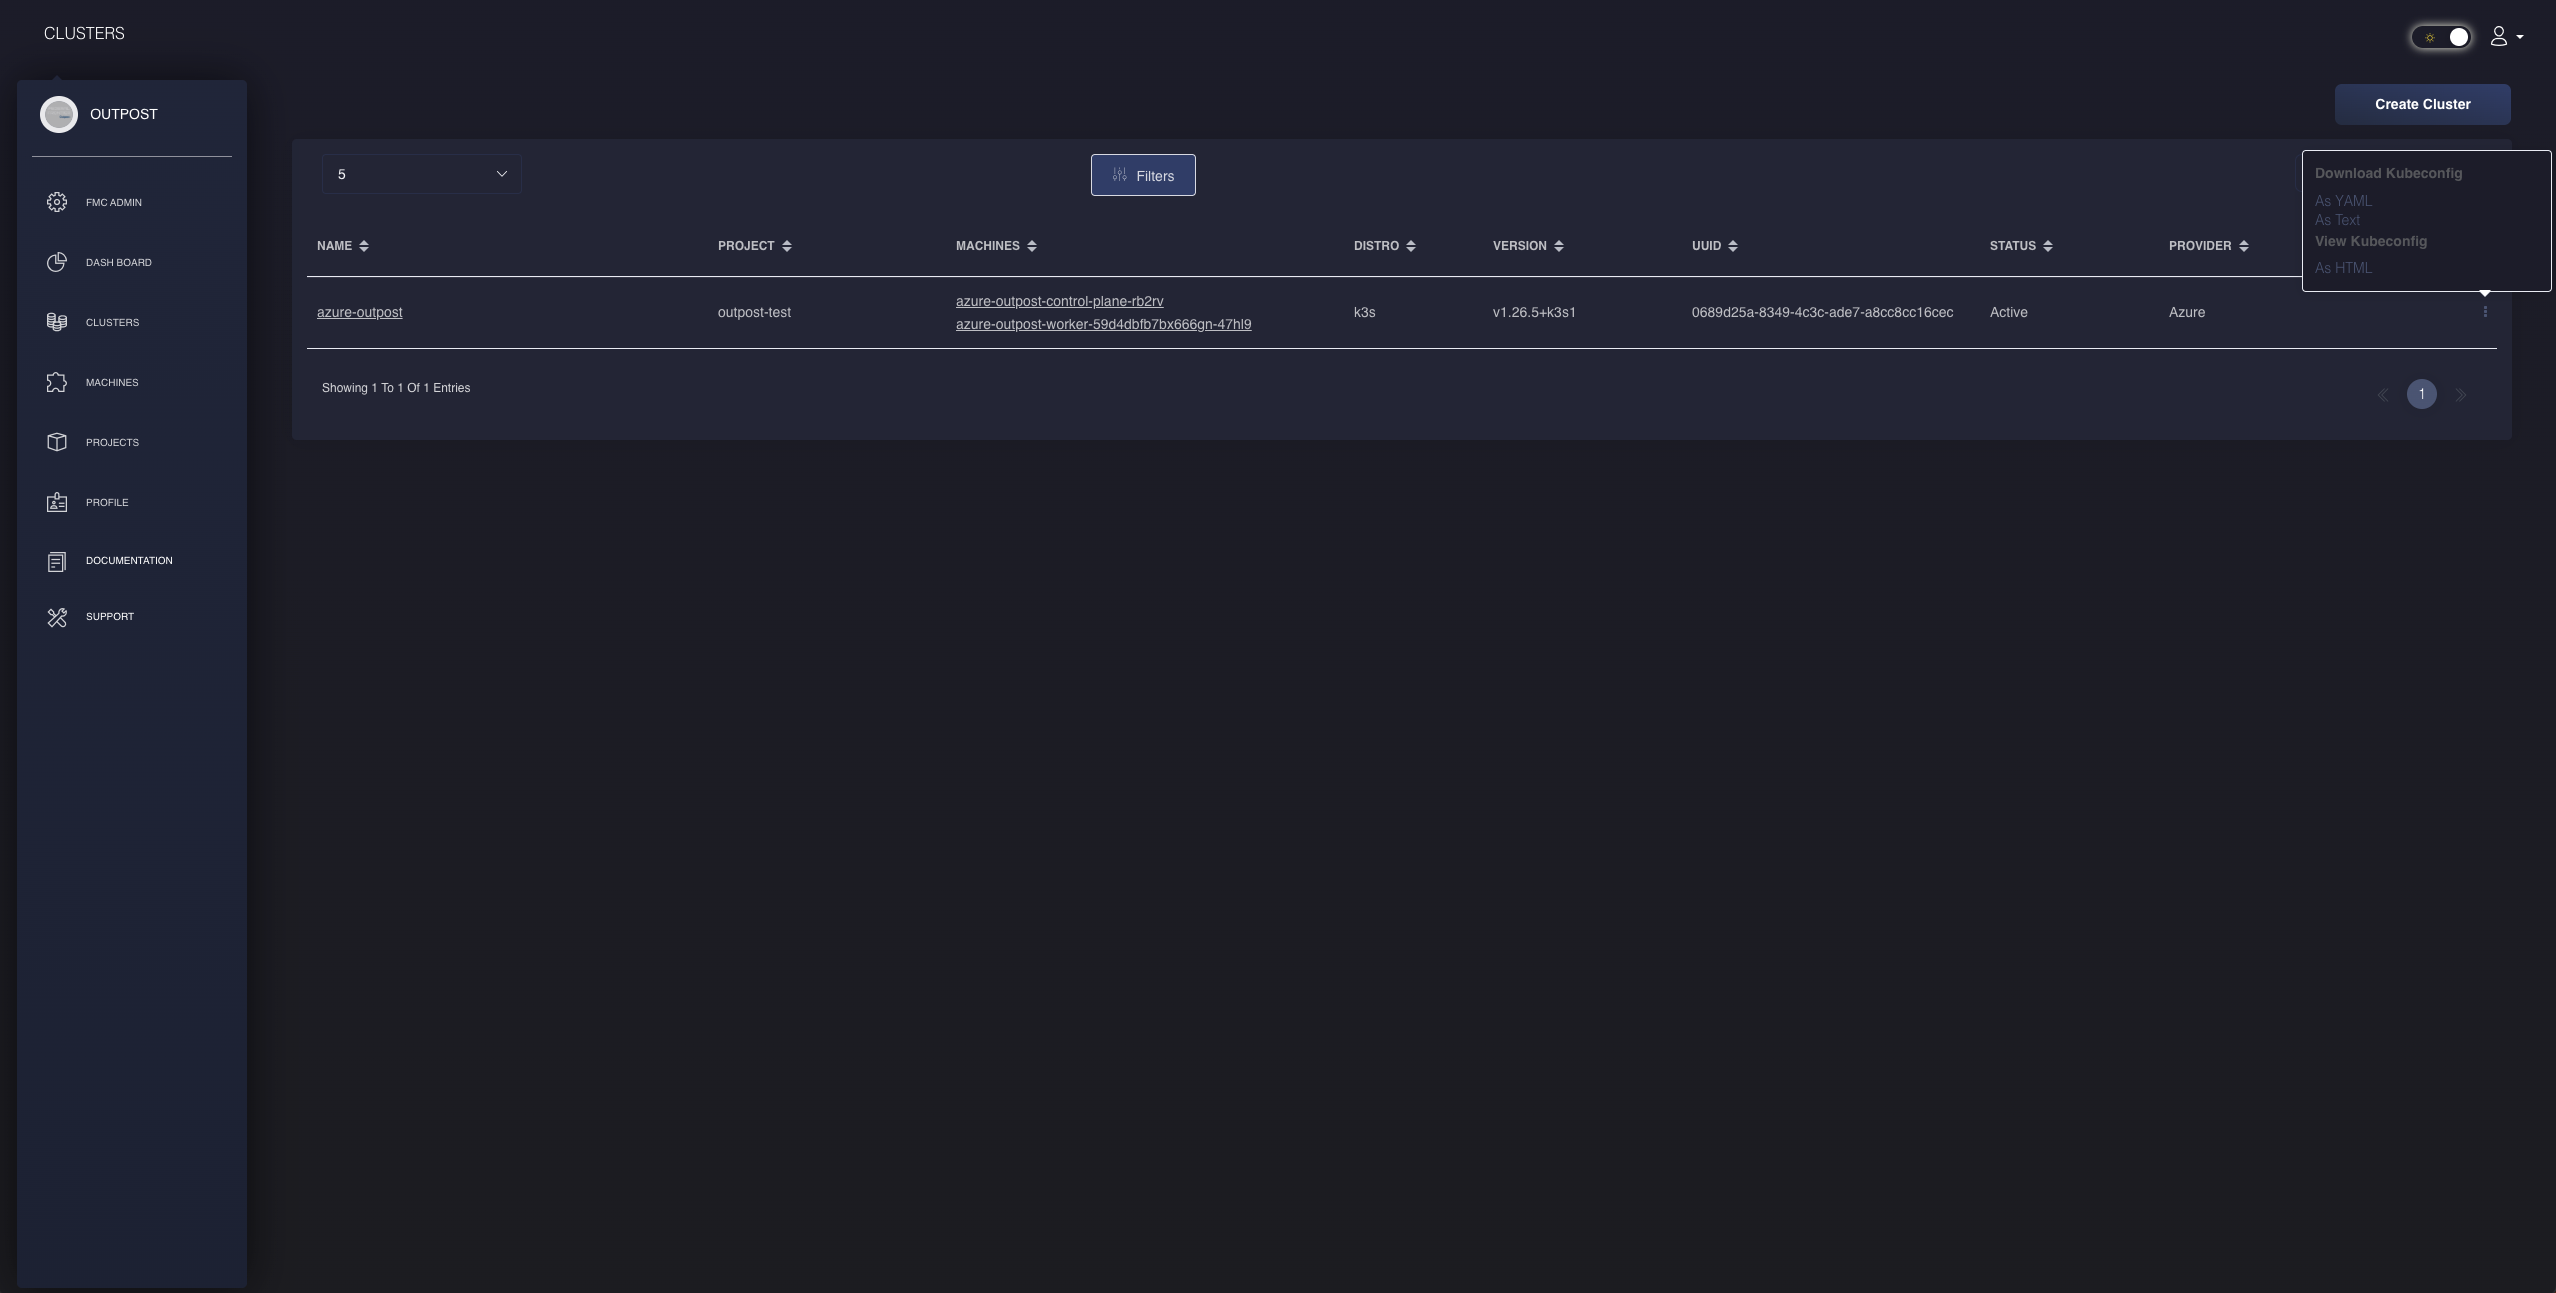
View Clusters List
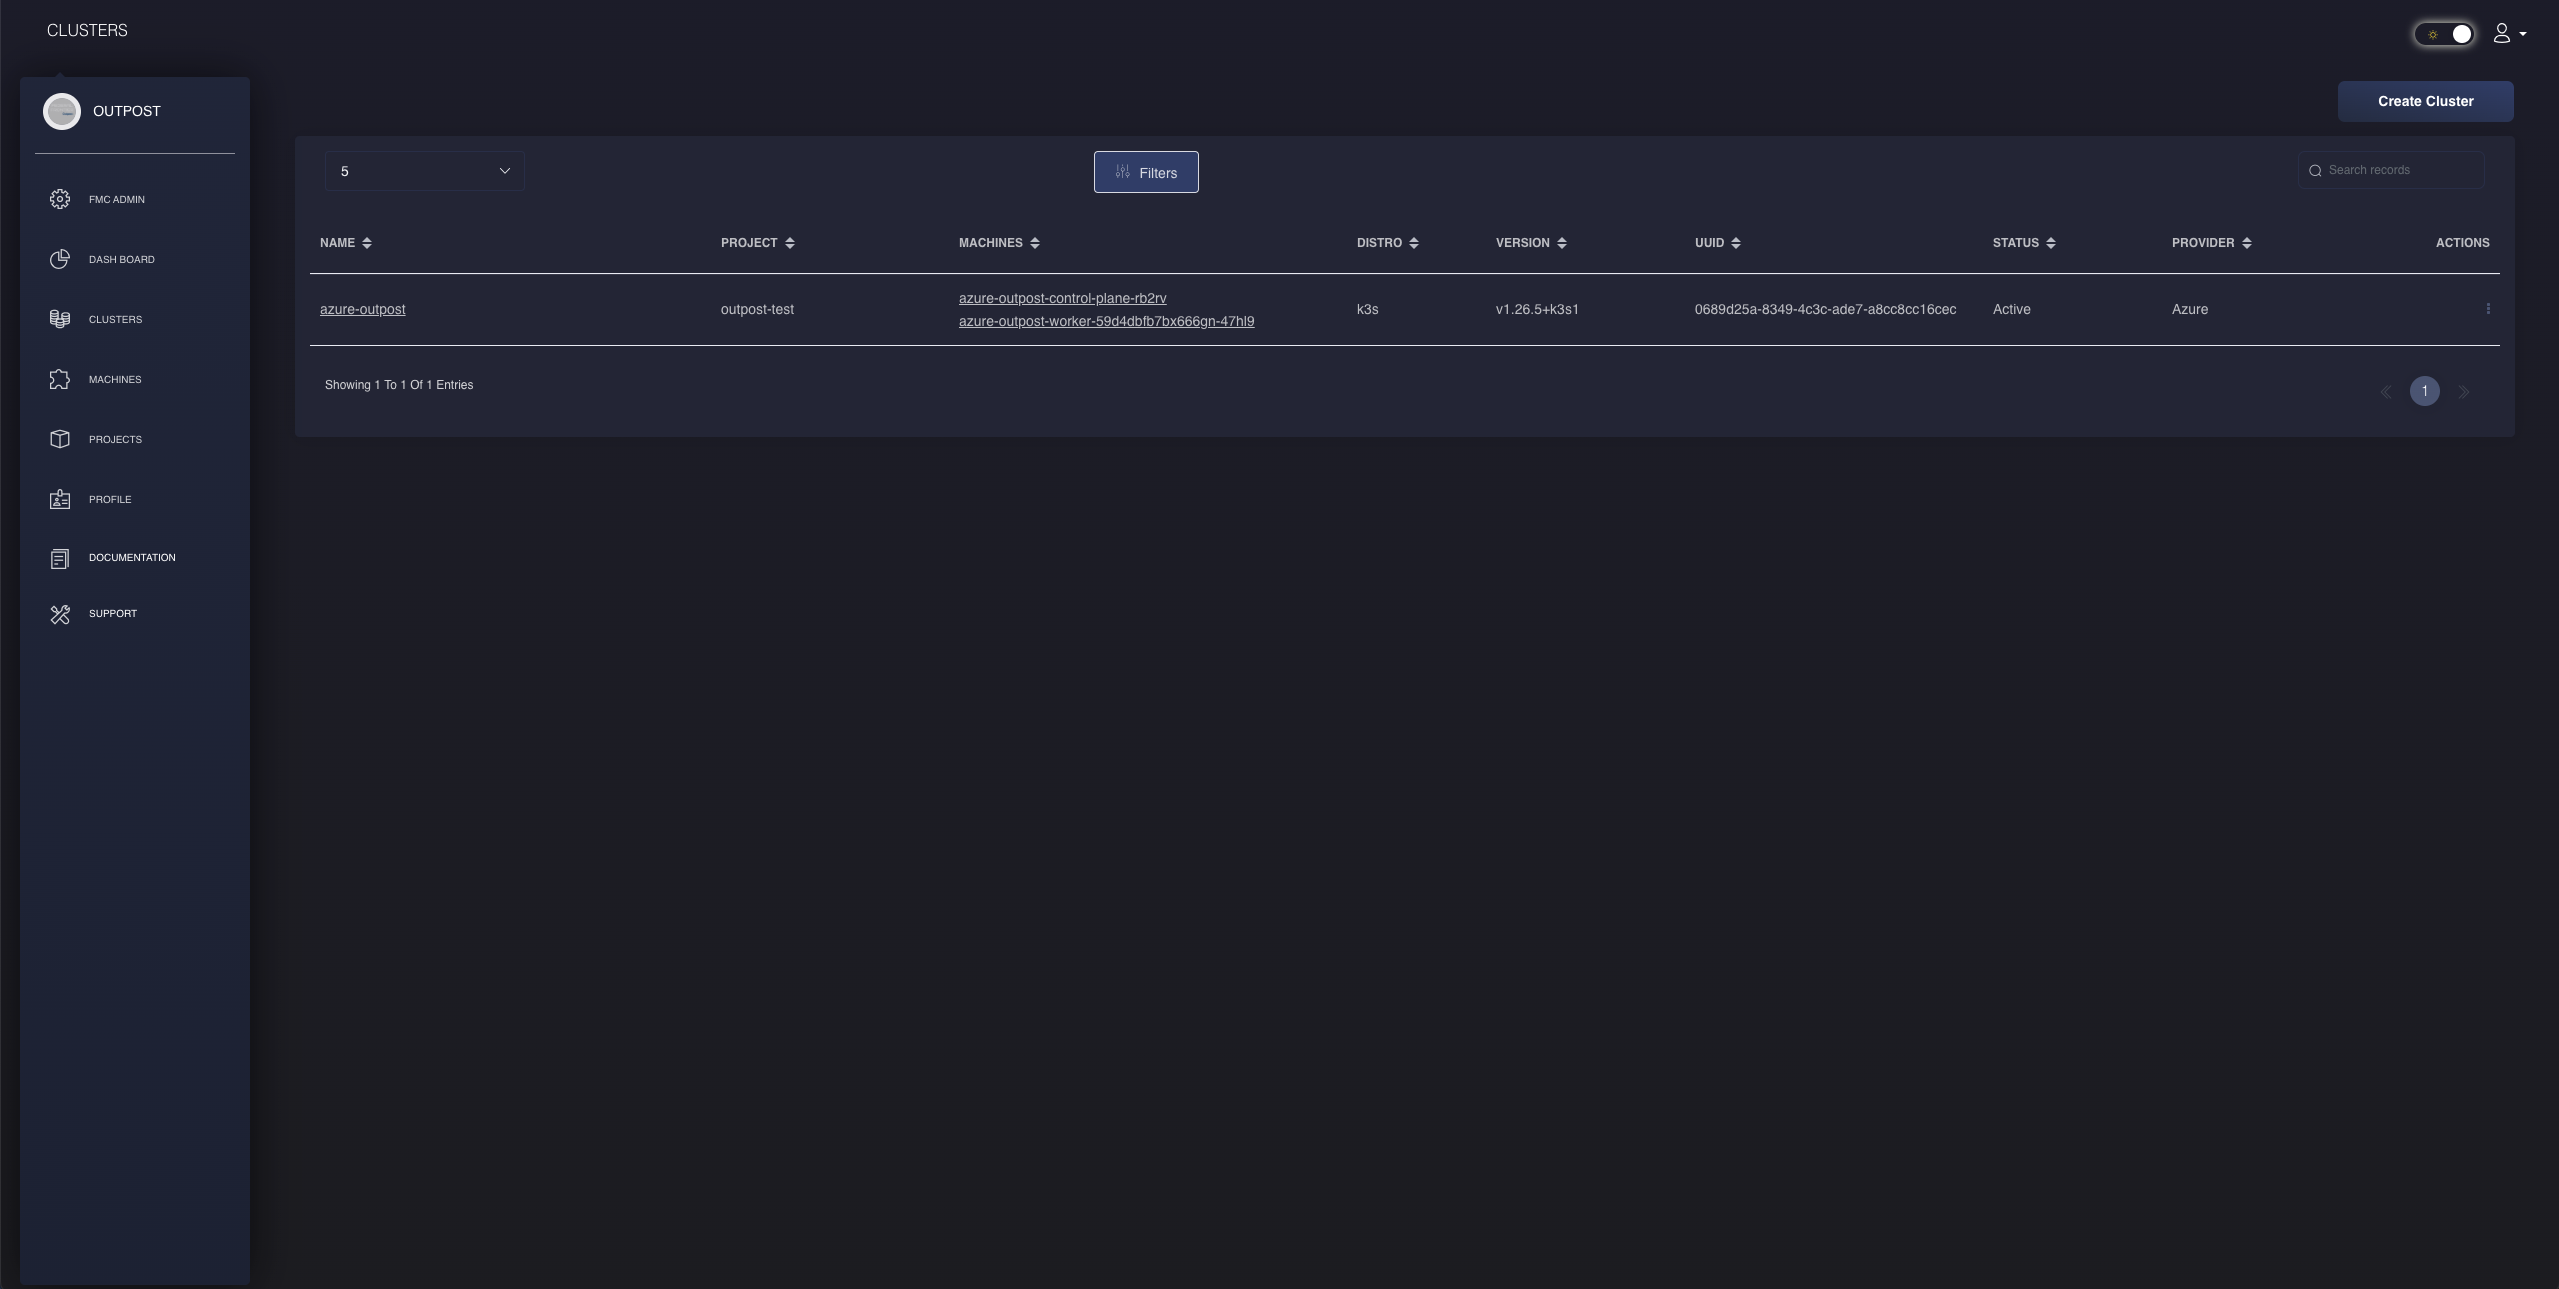
Navigating to the workload clusters using the side navigation bar, users and administrators will be able to view a list of all their current workload clusters along with details regarding their assigned projects, machines, kubernetes version, identification, and statuses. Their statuses on the list are dynamically updated and vary between three different states:
- Creating
- Active
- Deleting
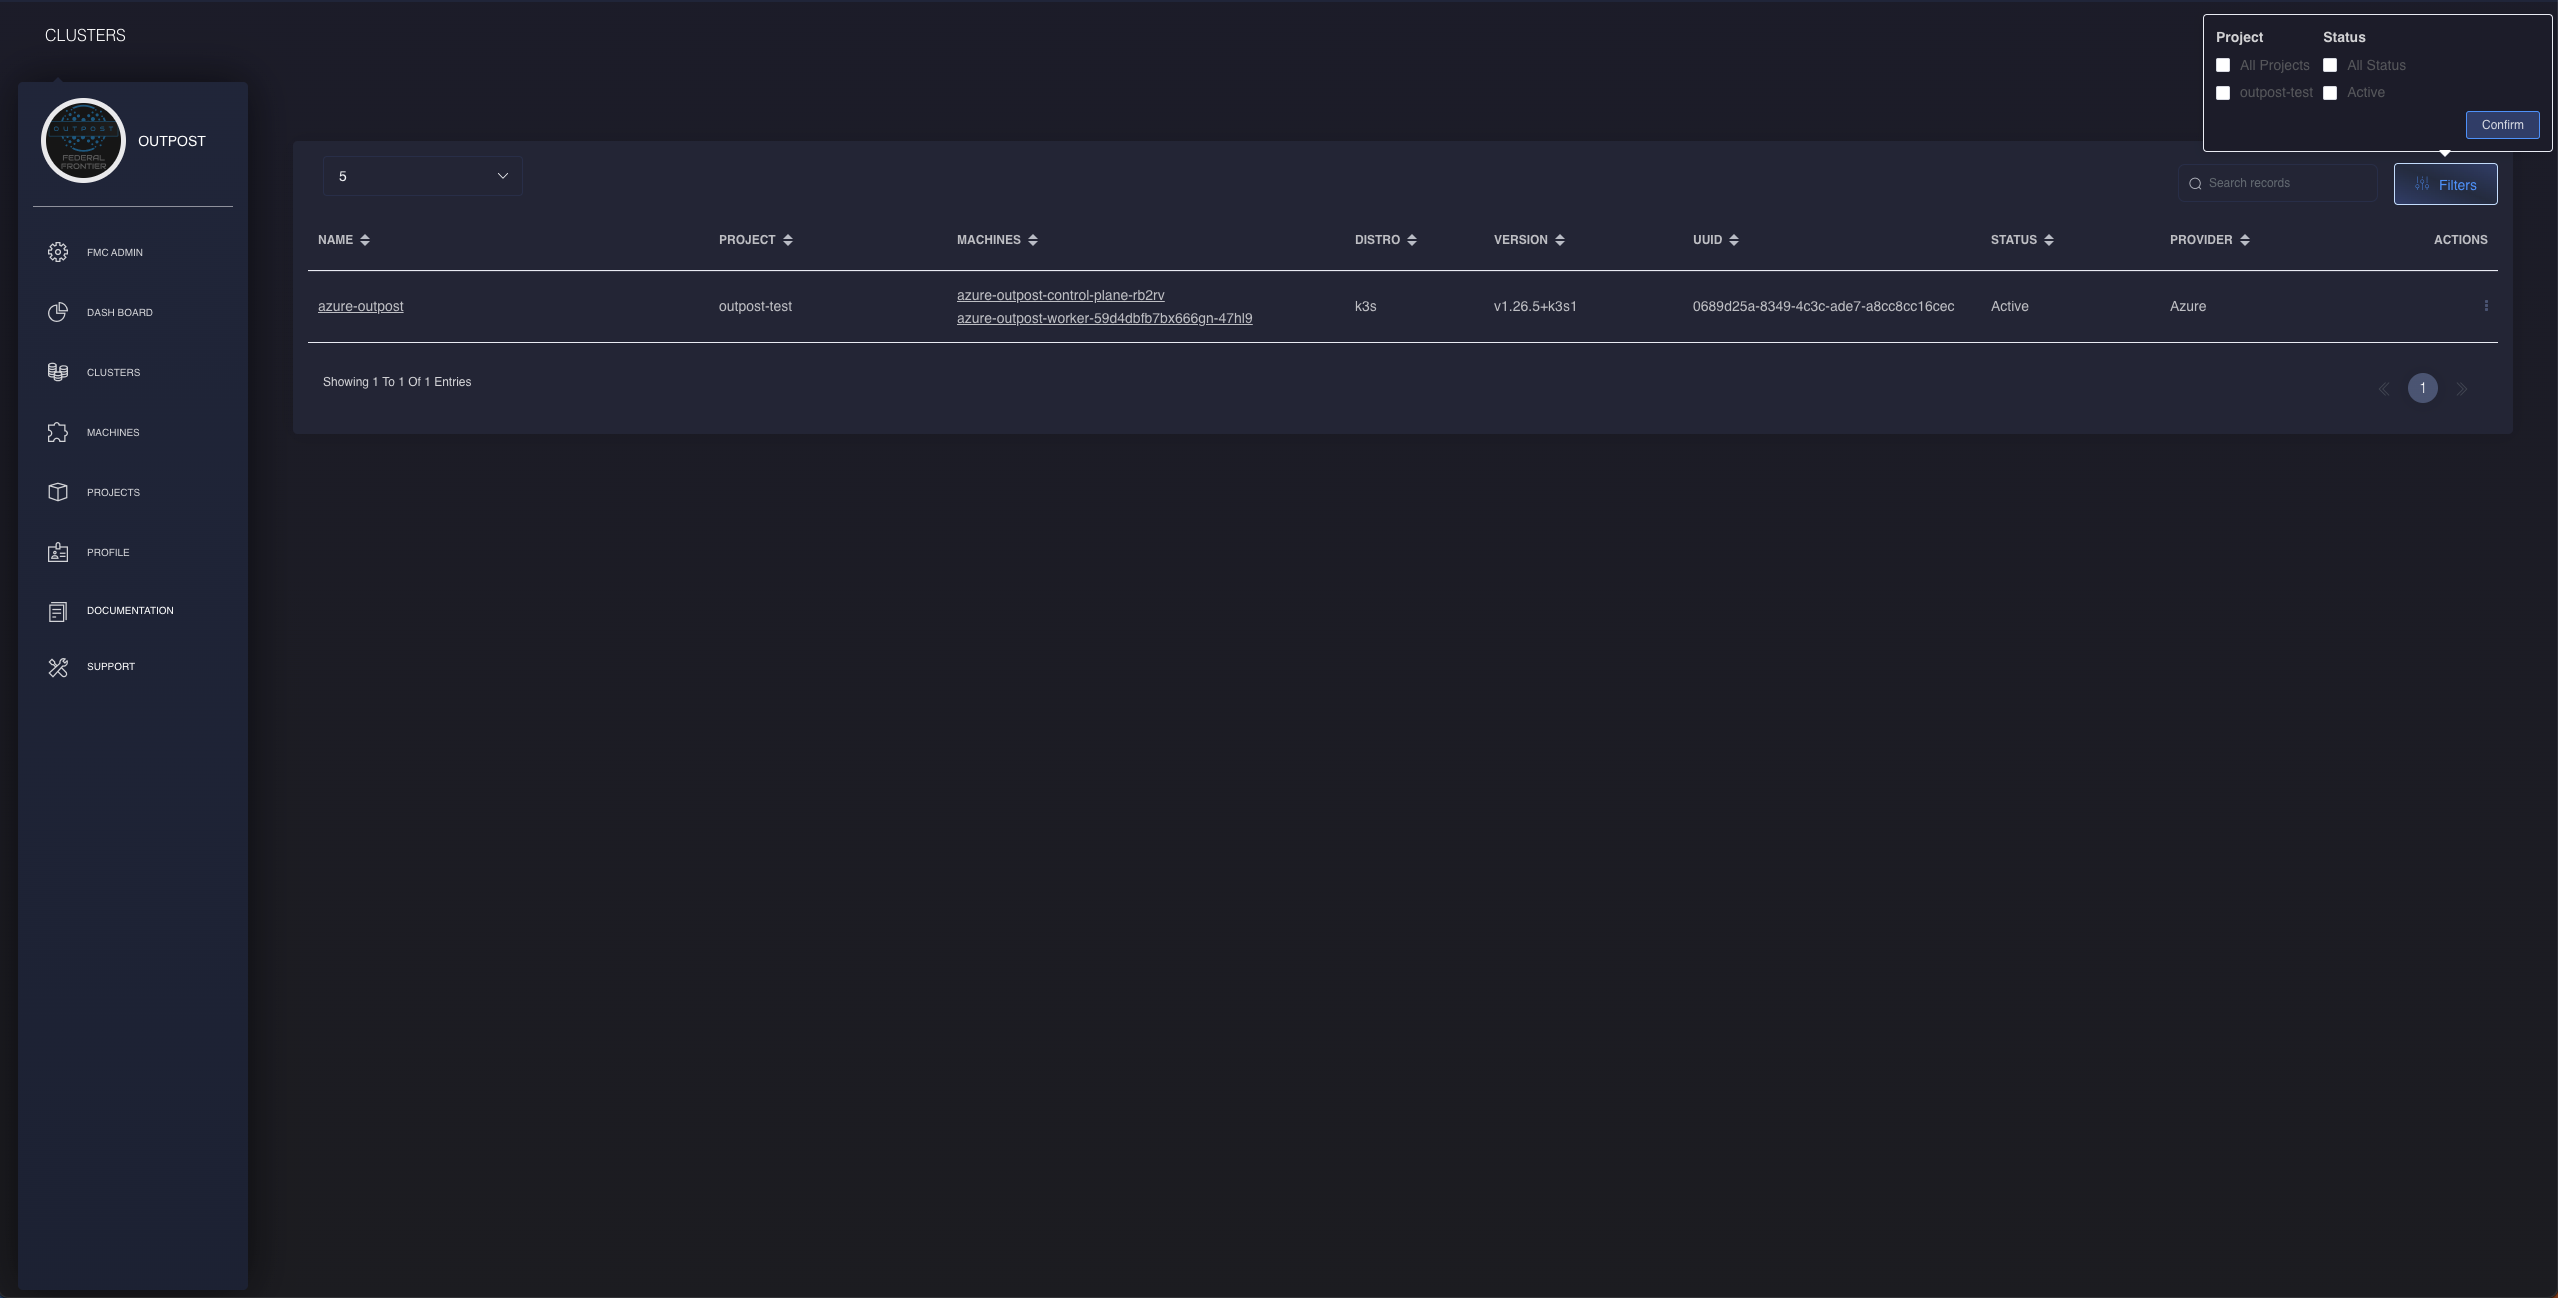
FKP users and administrators can utilize this tool to stay up-to-date with the current statuses of their workload cluster within their respective projects. Filters can be set if FKP users will only like to view clusters specifically by their respective projects or providers.
Additionally, FKP users will be able to use the action menu at the right of each row to perform tasks in managing their workload clusters through the GUI as long as they have the authorized roles and permissions. This can include the creation of clusters, fetching a detailed view of their statuses, downloading their kubeconfig file, or deleting them.
View Specific Cluster Details
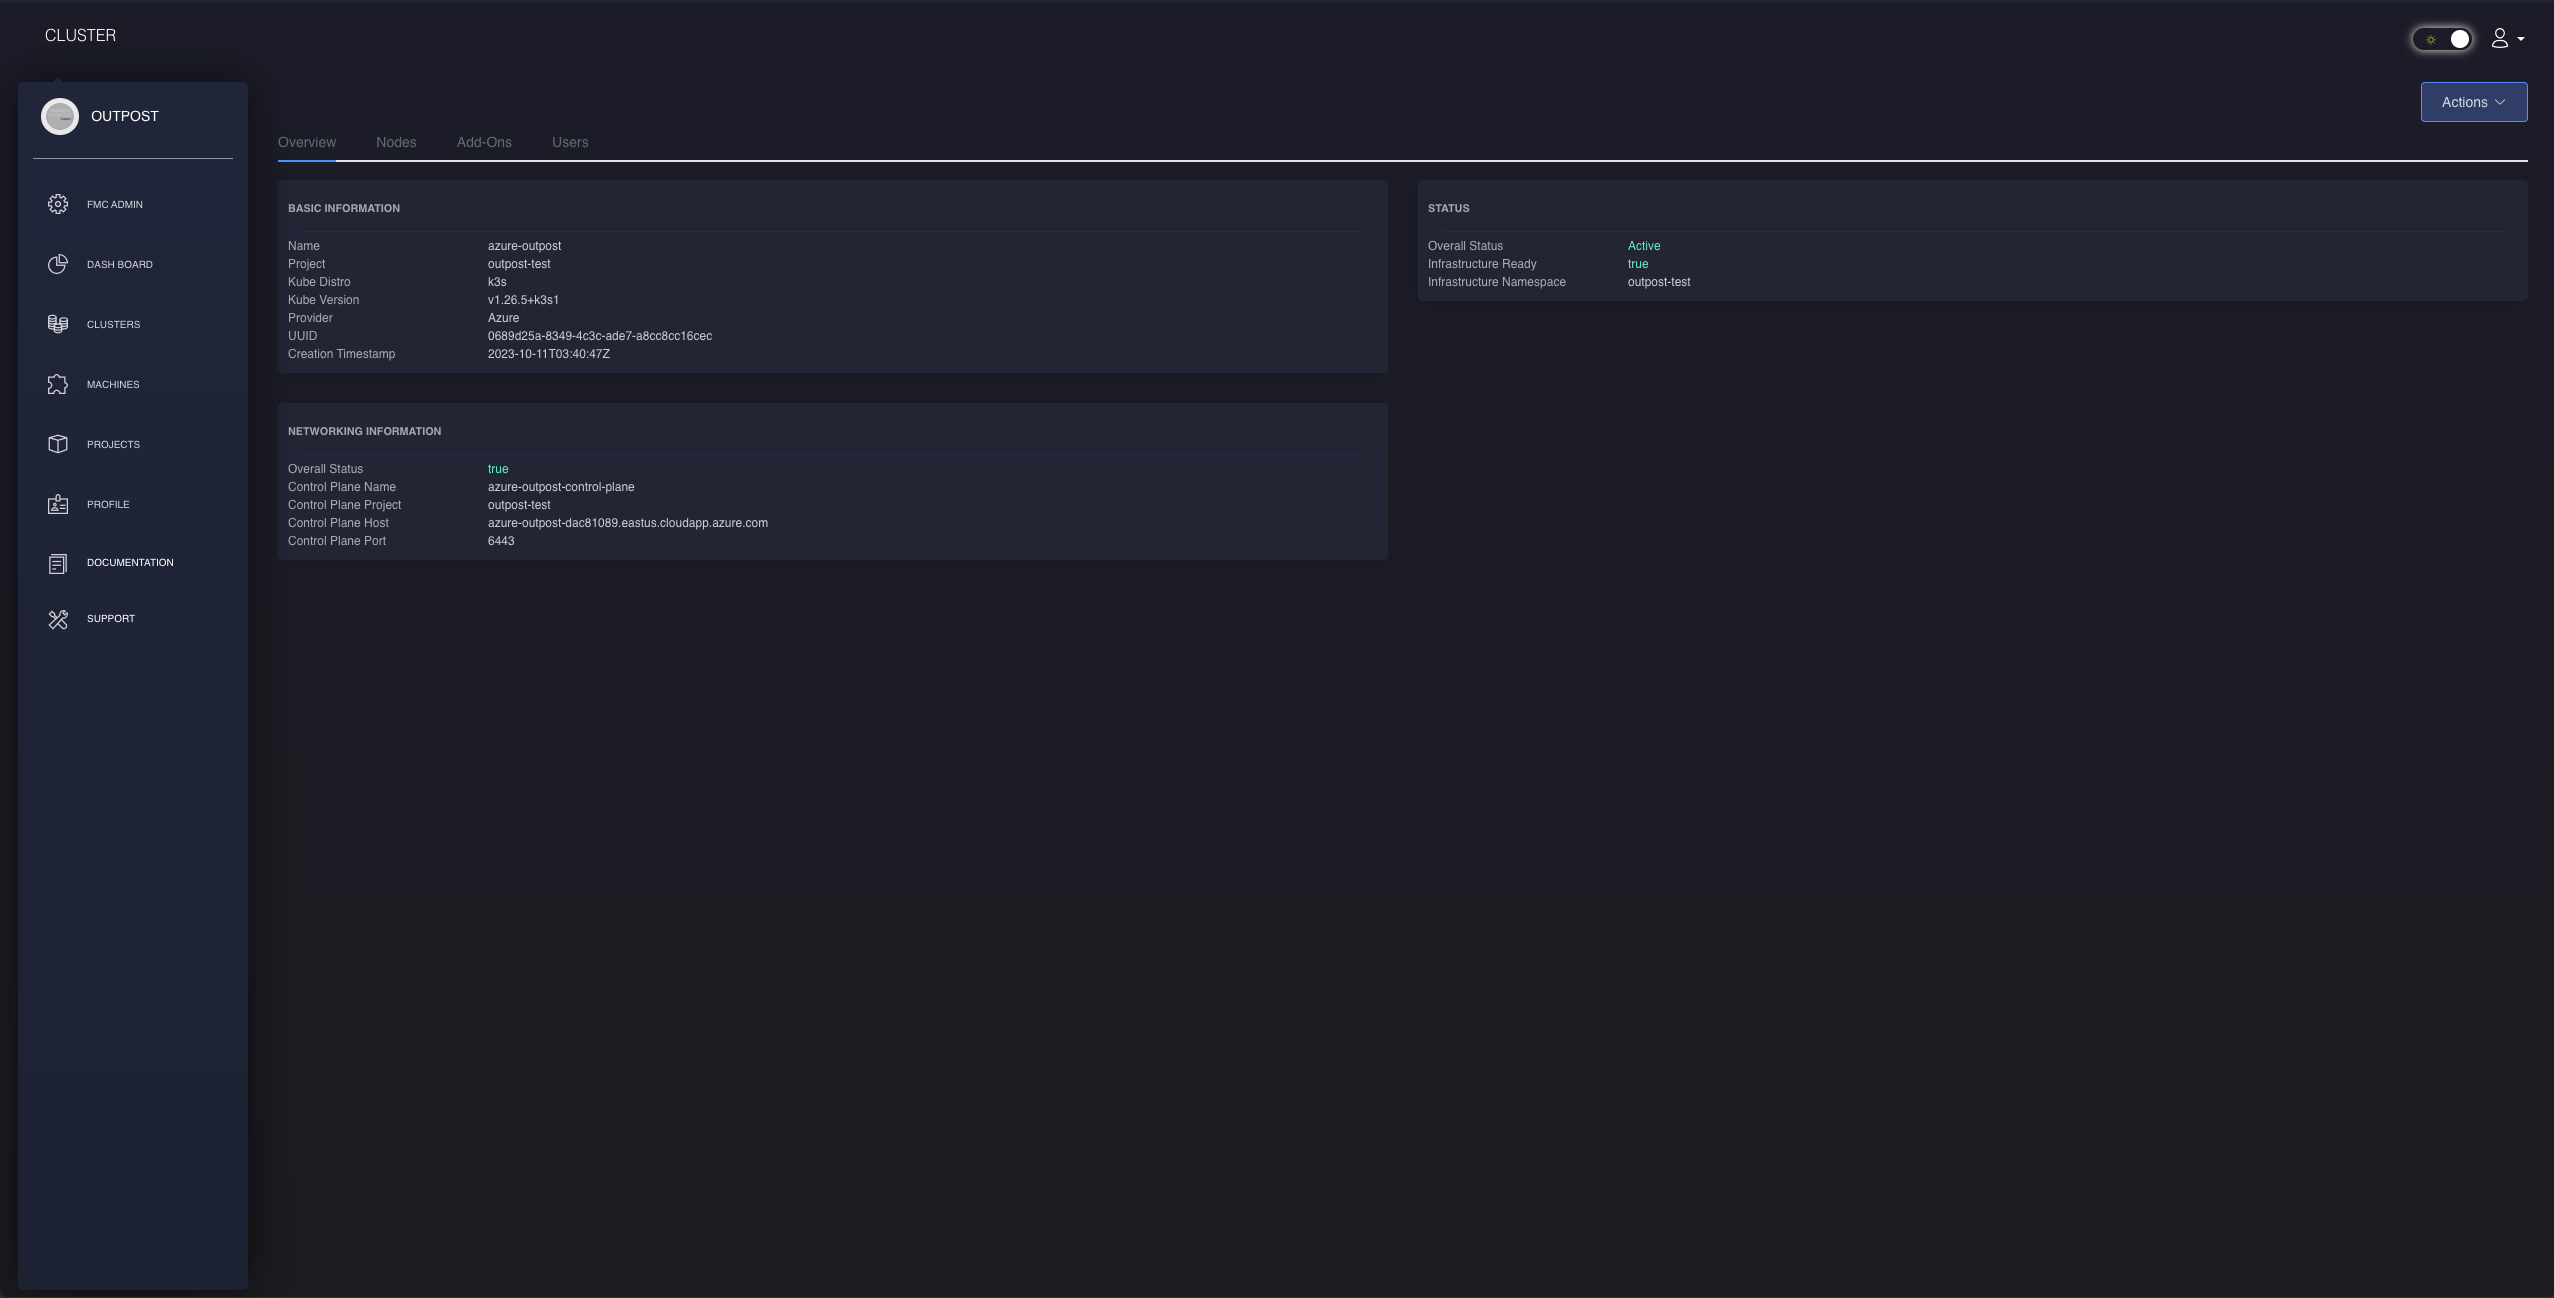
From the cluster list, FKP users are able to navigate to the cluster details menu based off of which cluster was selected from the table in the previous section. They will possess capabilities to retrieve details of basic, networking, and status information with the addition of viewing nodes and users that are assigned to that workload cluster.
View Nodes of the Cluster
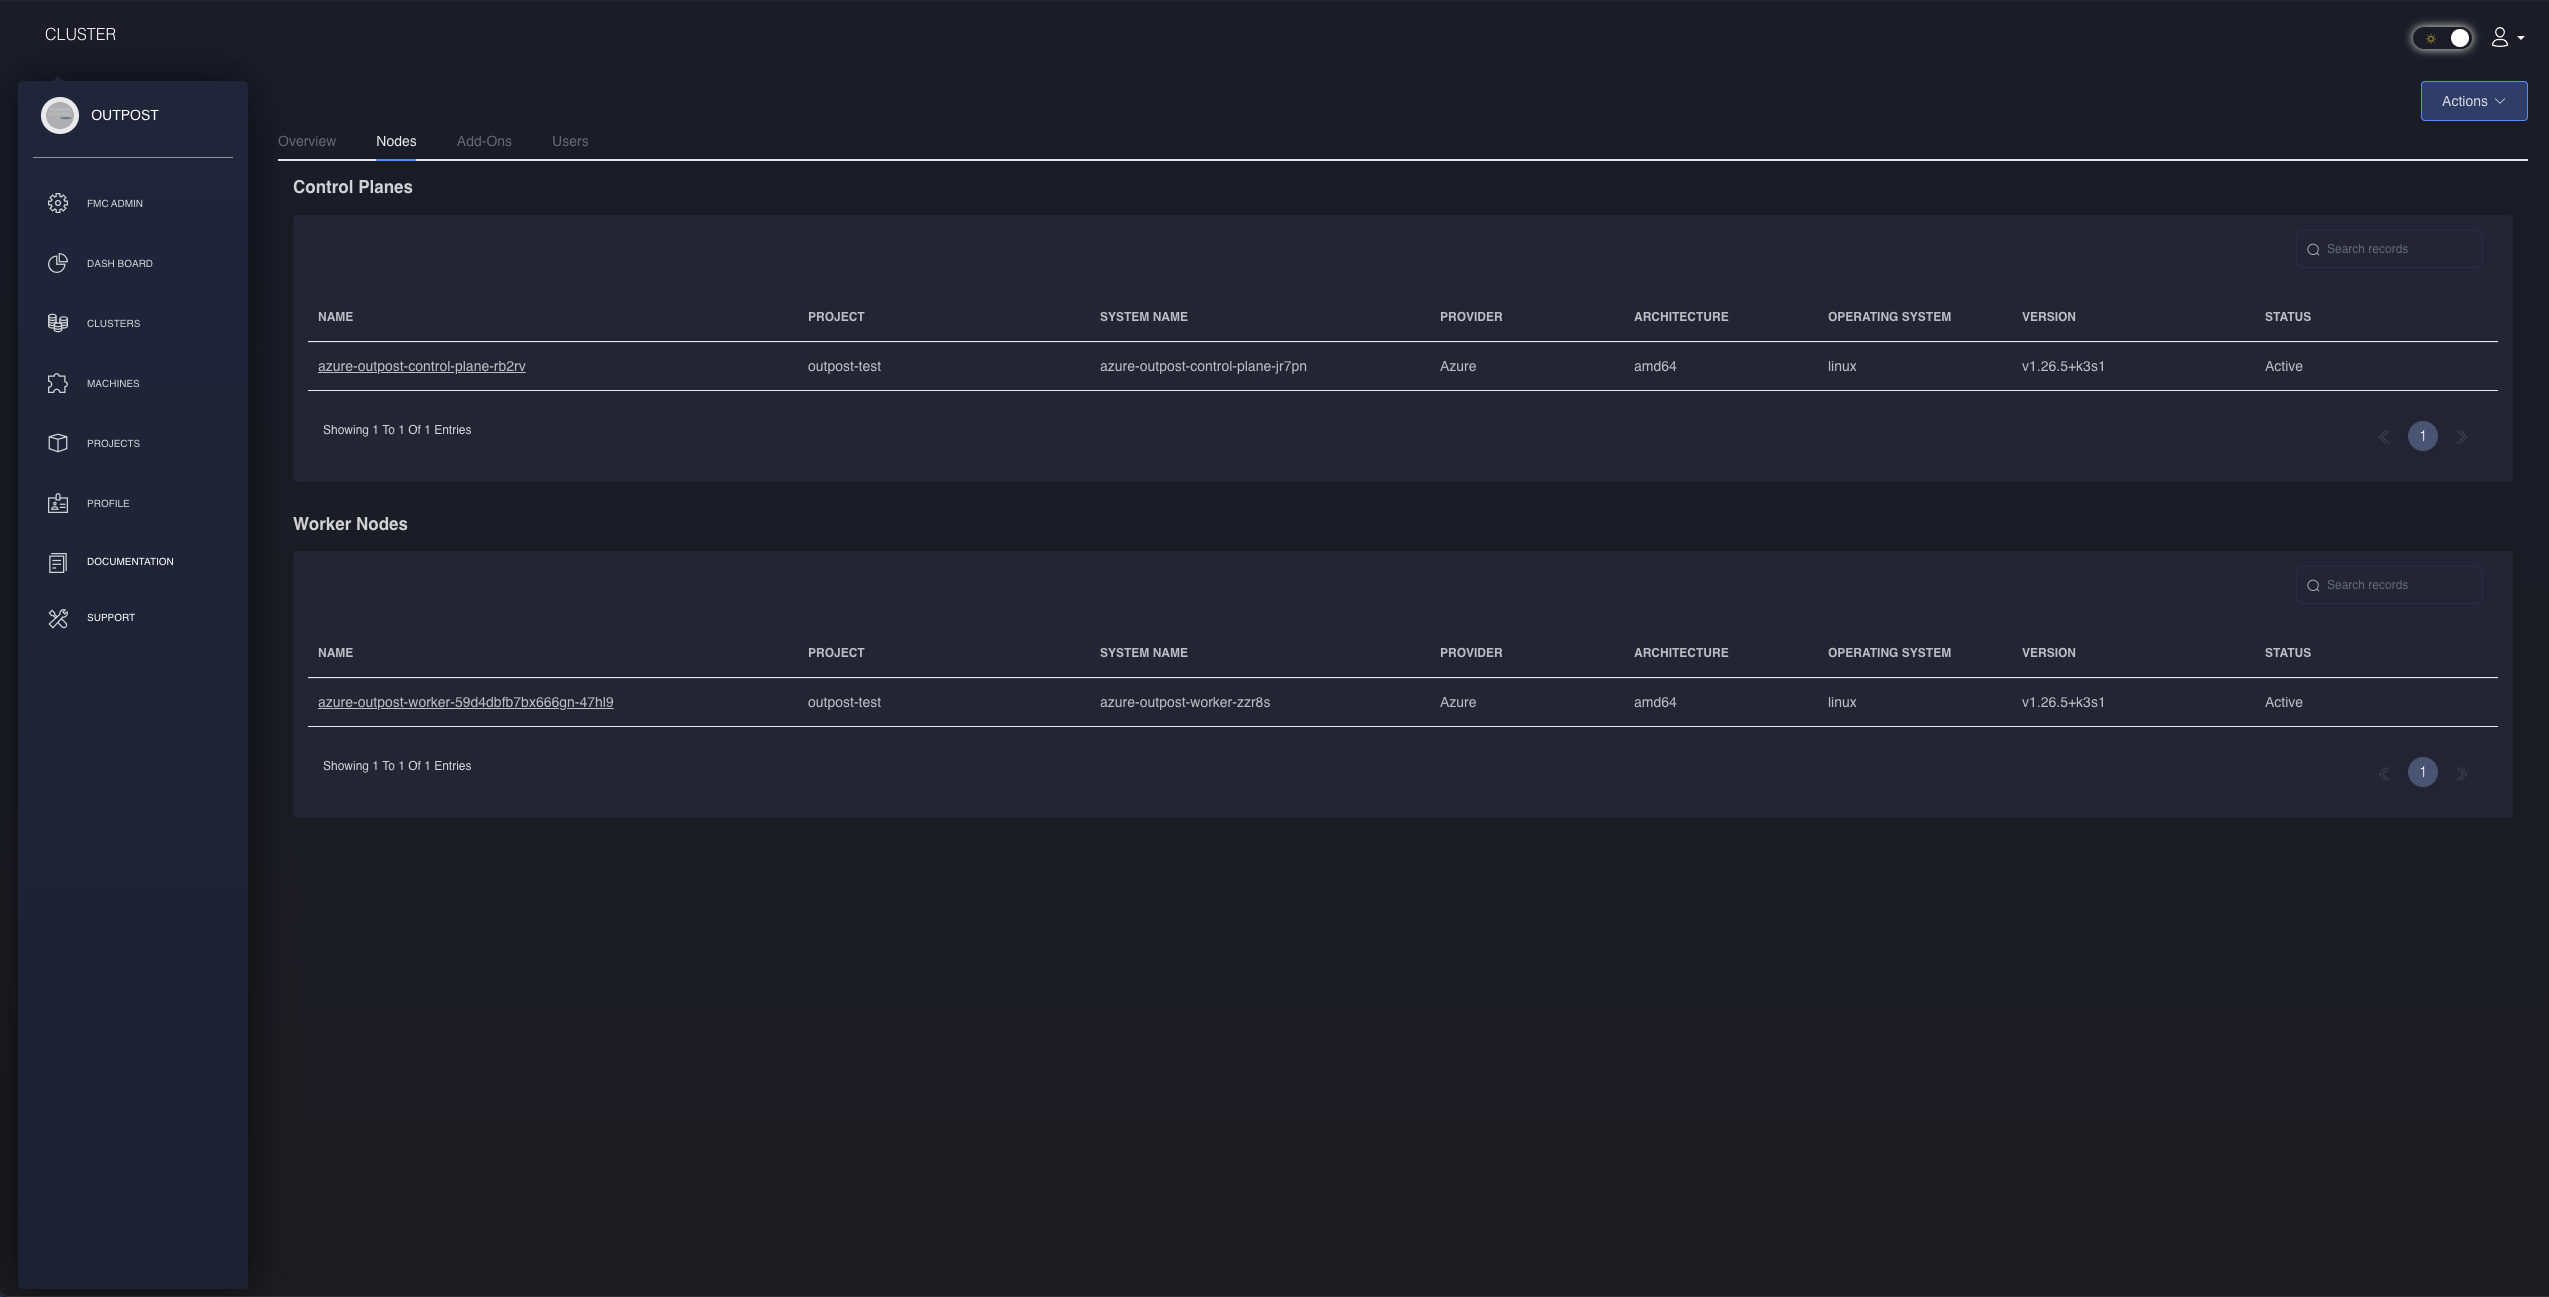
Within each cluster, you can use the top-bar navigation feature to access the nodes list of that particular cluster. Here you will have two seperate tables which sort the control plane and worker nodes that belong to that workload cluster. You will be able to navigate and view each of those specific machines by clicking on their respective names.
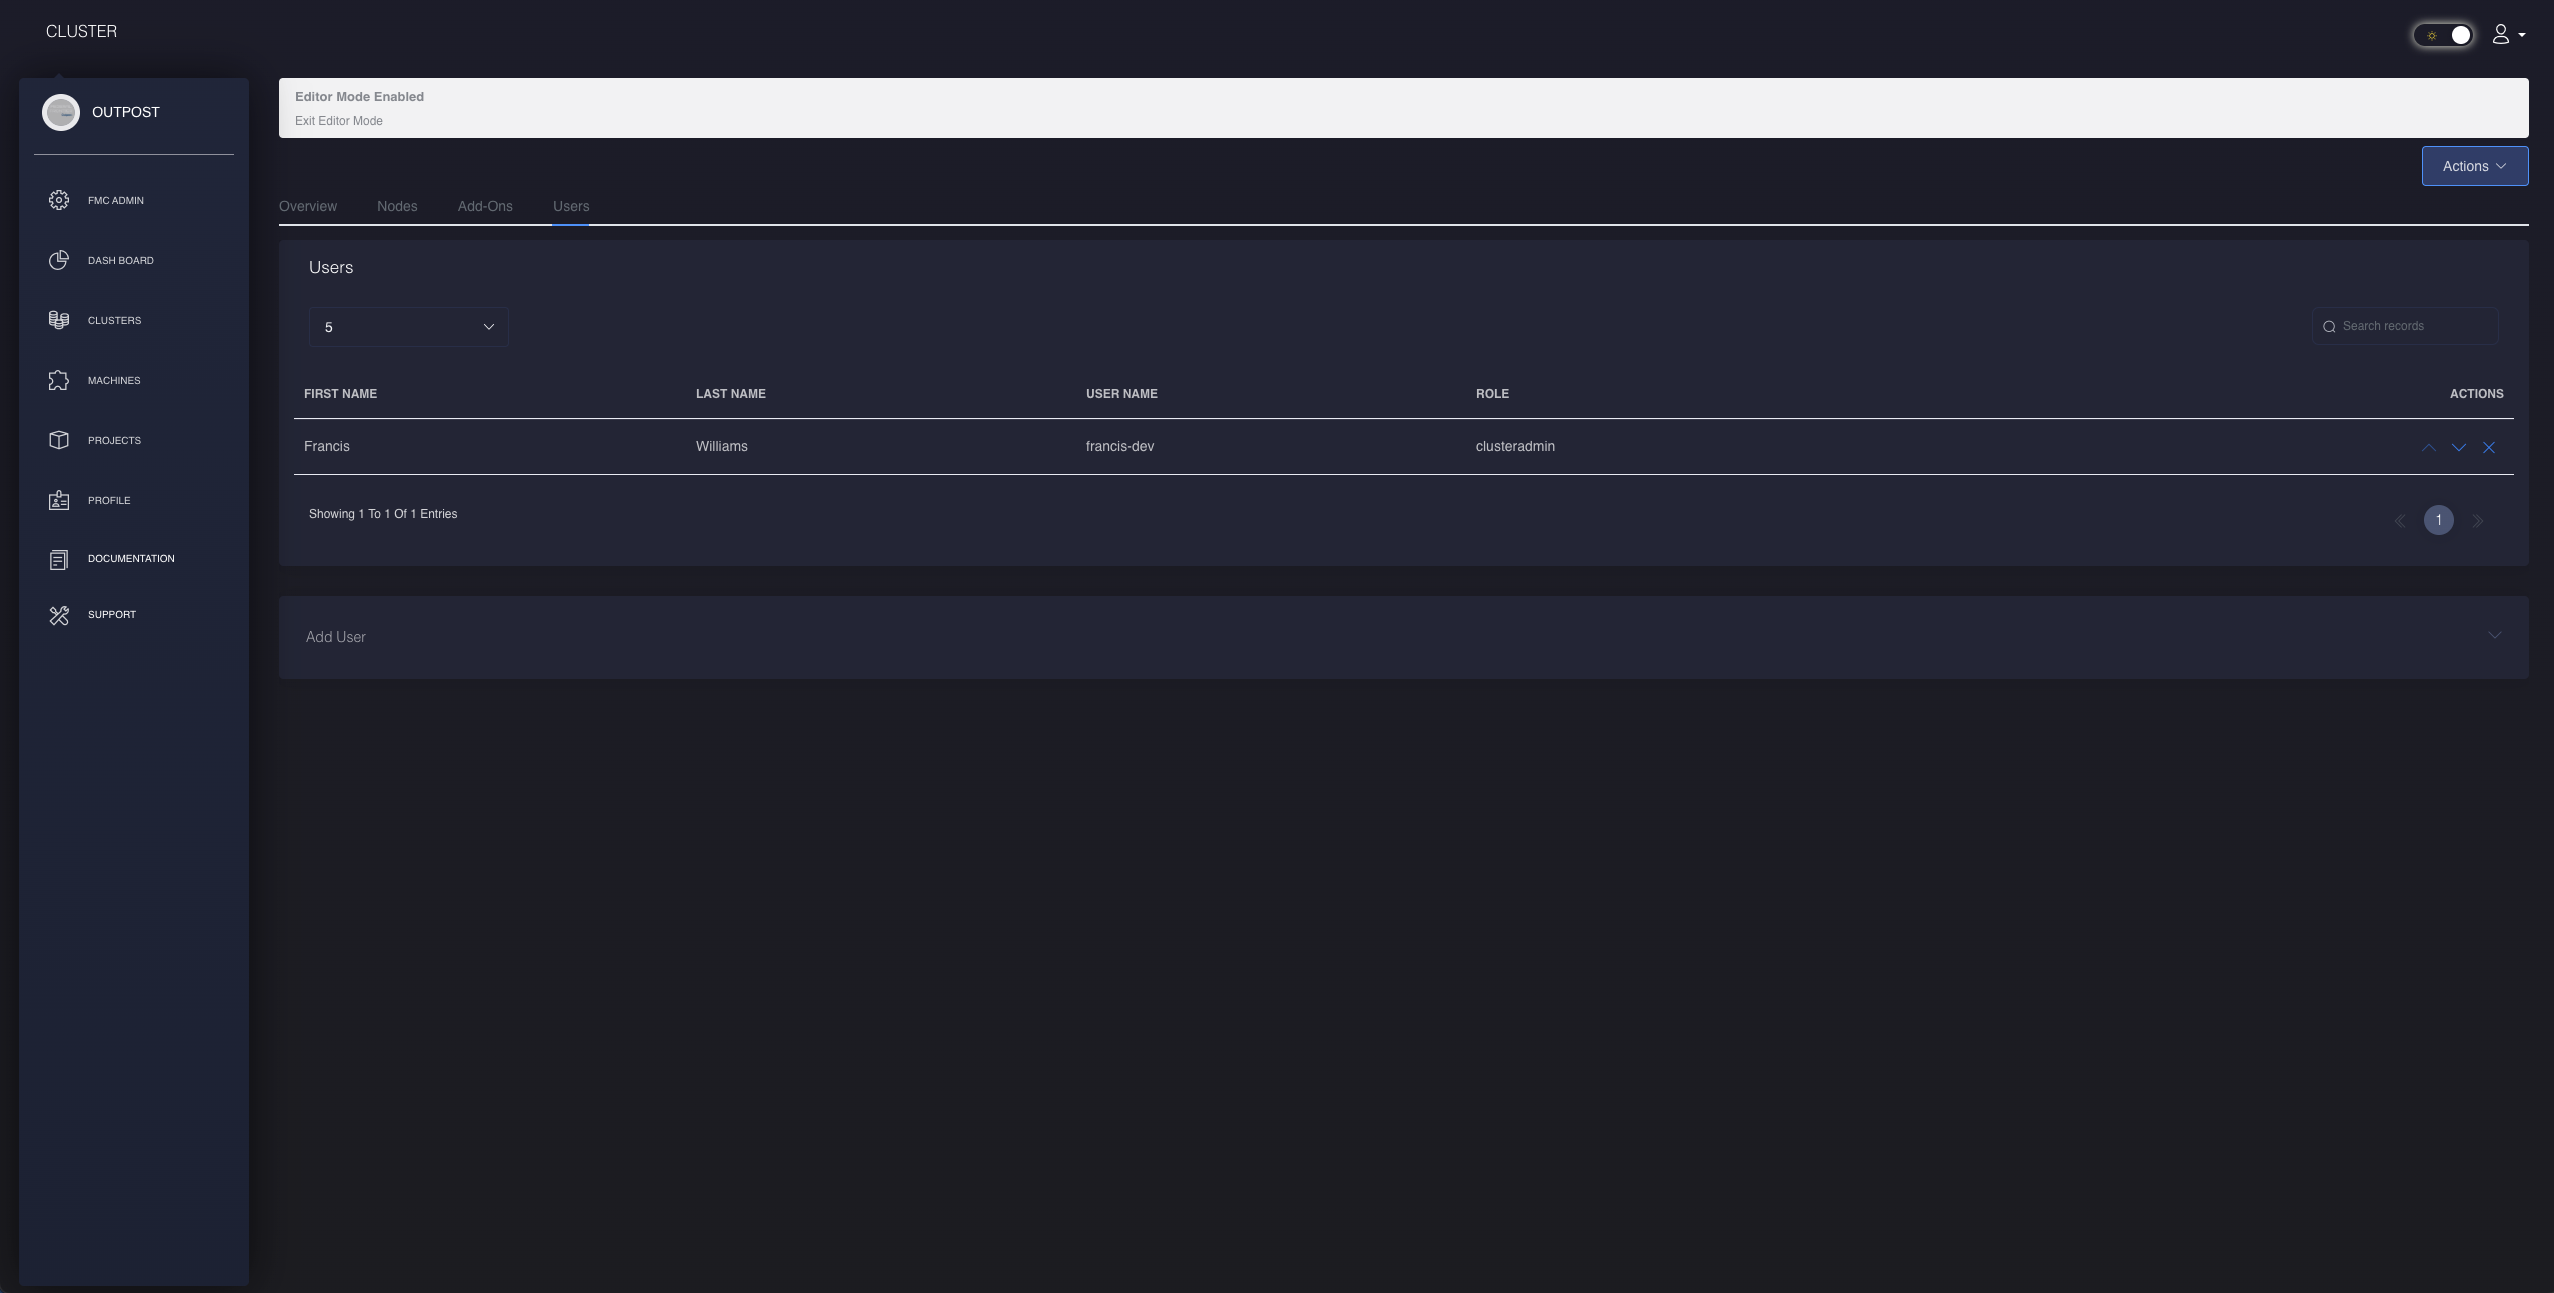
View Users of that Cluster
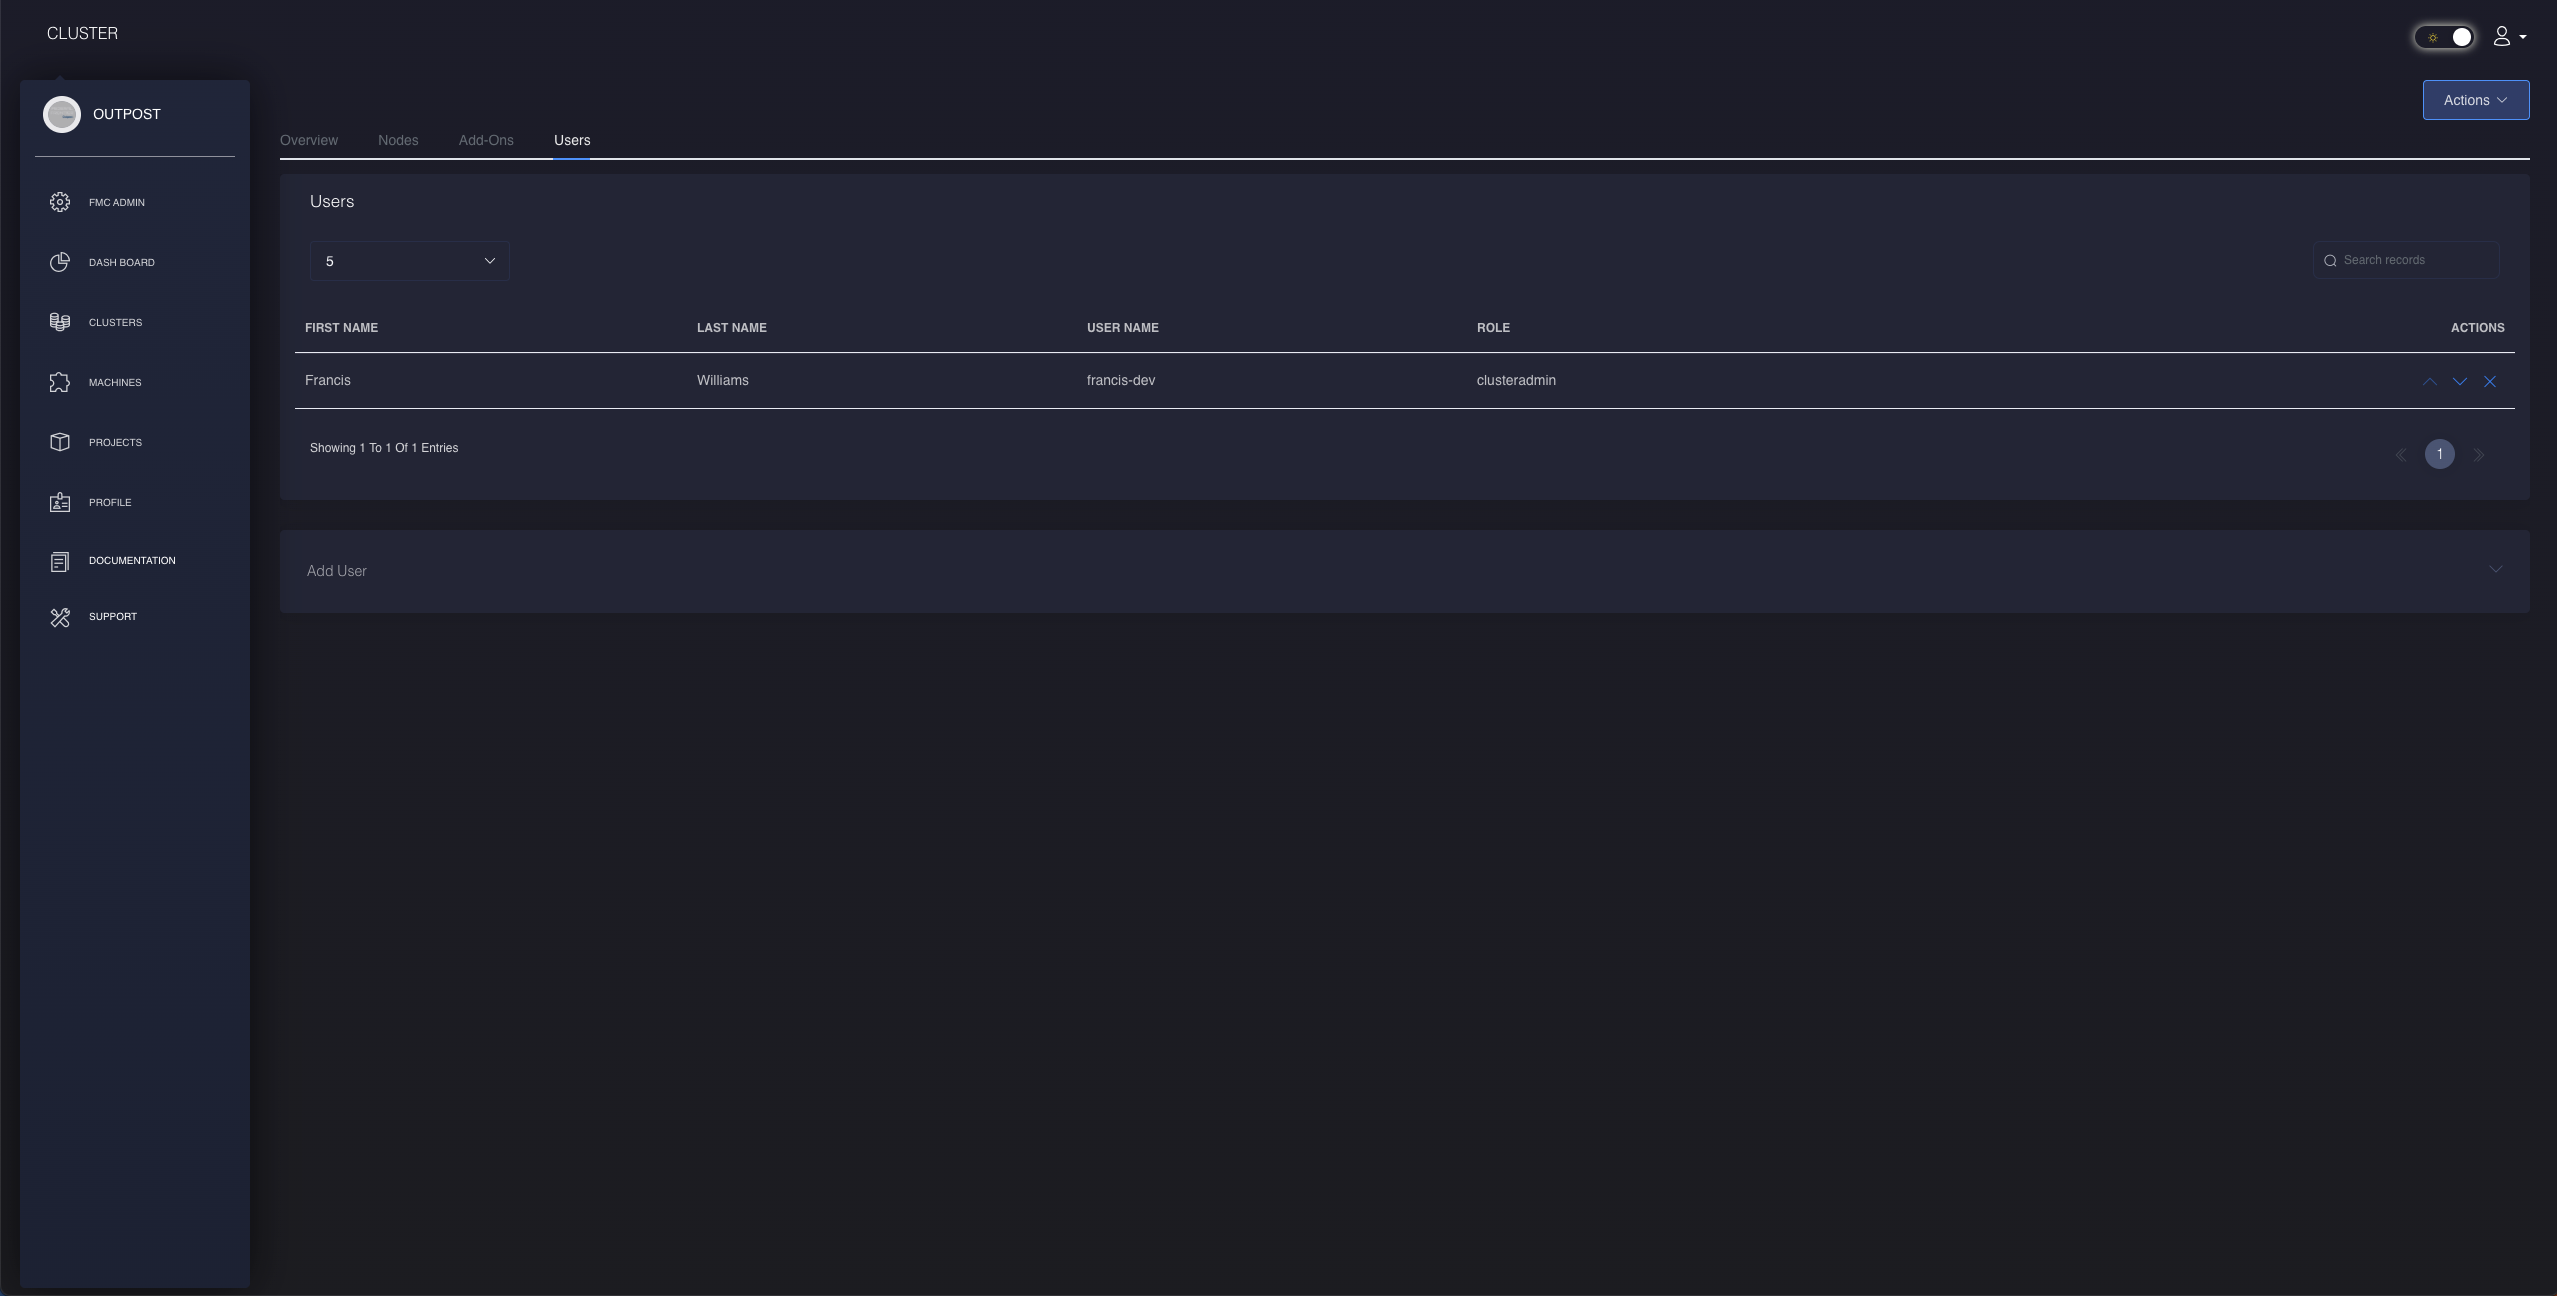
Within each cluster, you can use the top-bar navigation feature to access the users list of that particular cluster. Here you will be able to view all users who are assigned to that workload cluster.
Creating Clusters
When authorized FKP personnel want to create a new cluster, they will be prompt with a form containing a series of configuration settings to be desired for their cluster. There are five steps total. We will break down each of the five steps in the upcoming sections.
Step 1: Basic Information
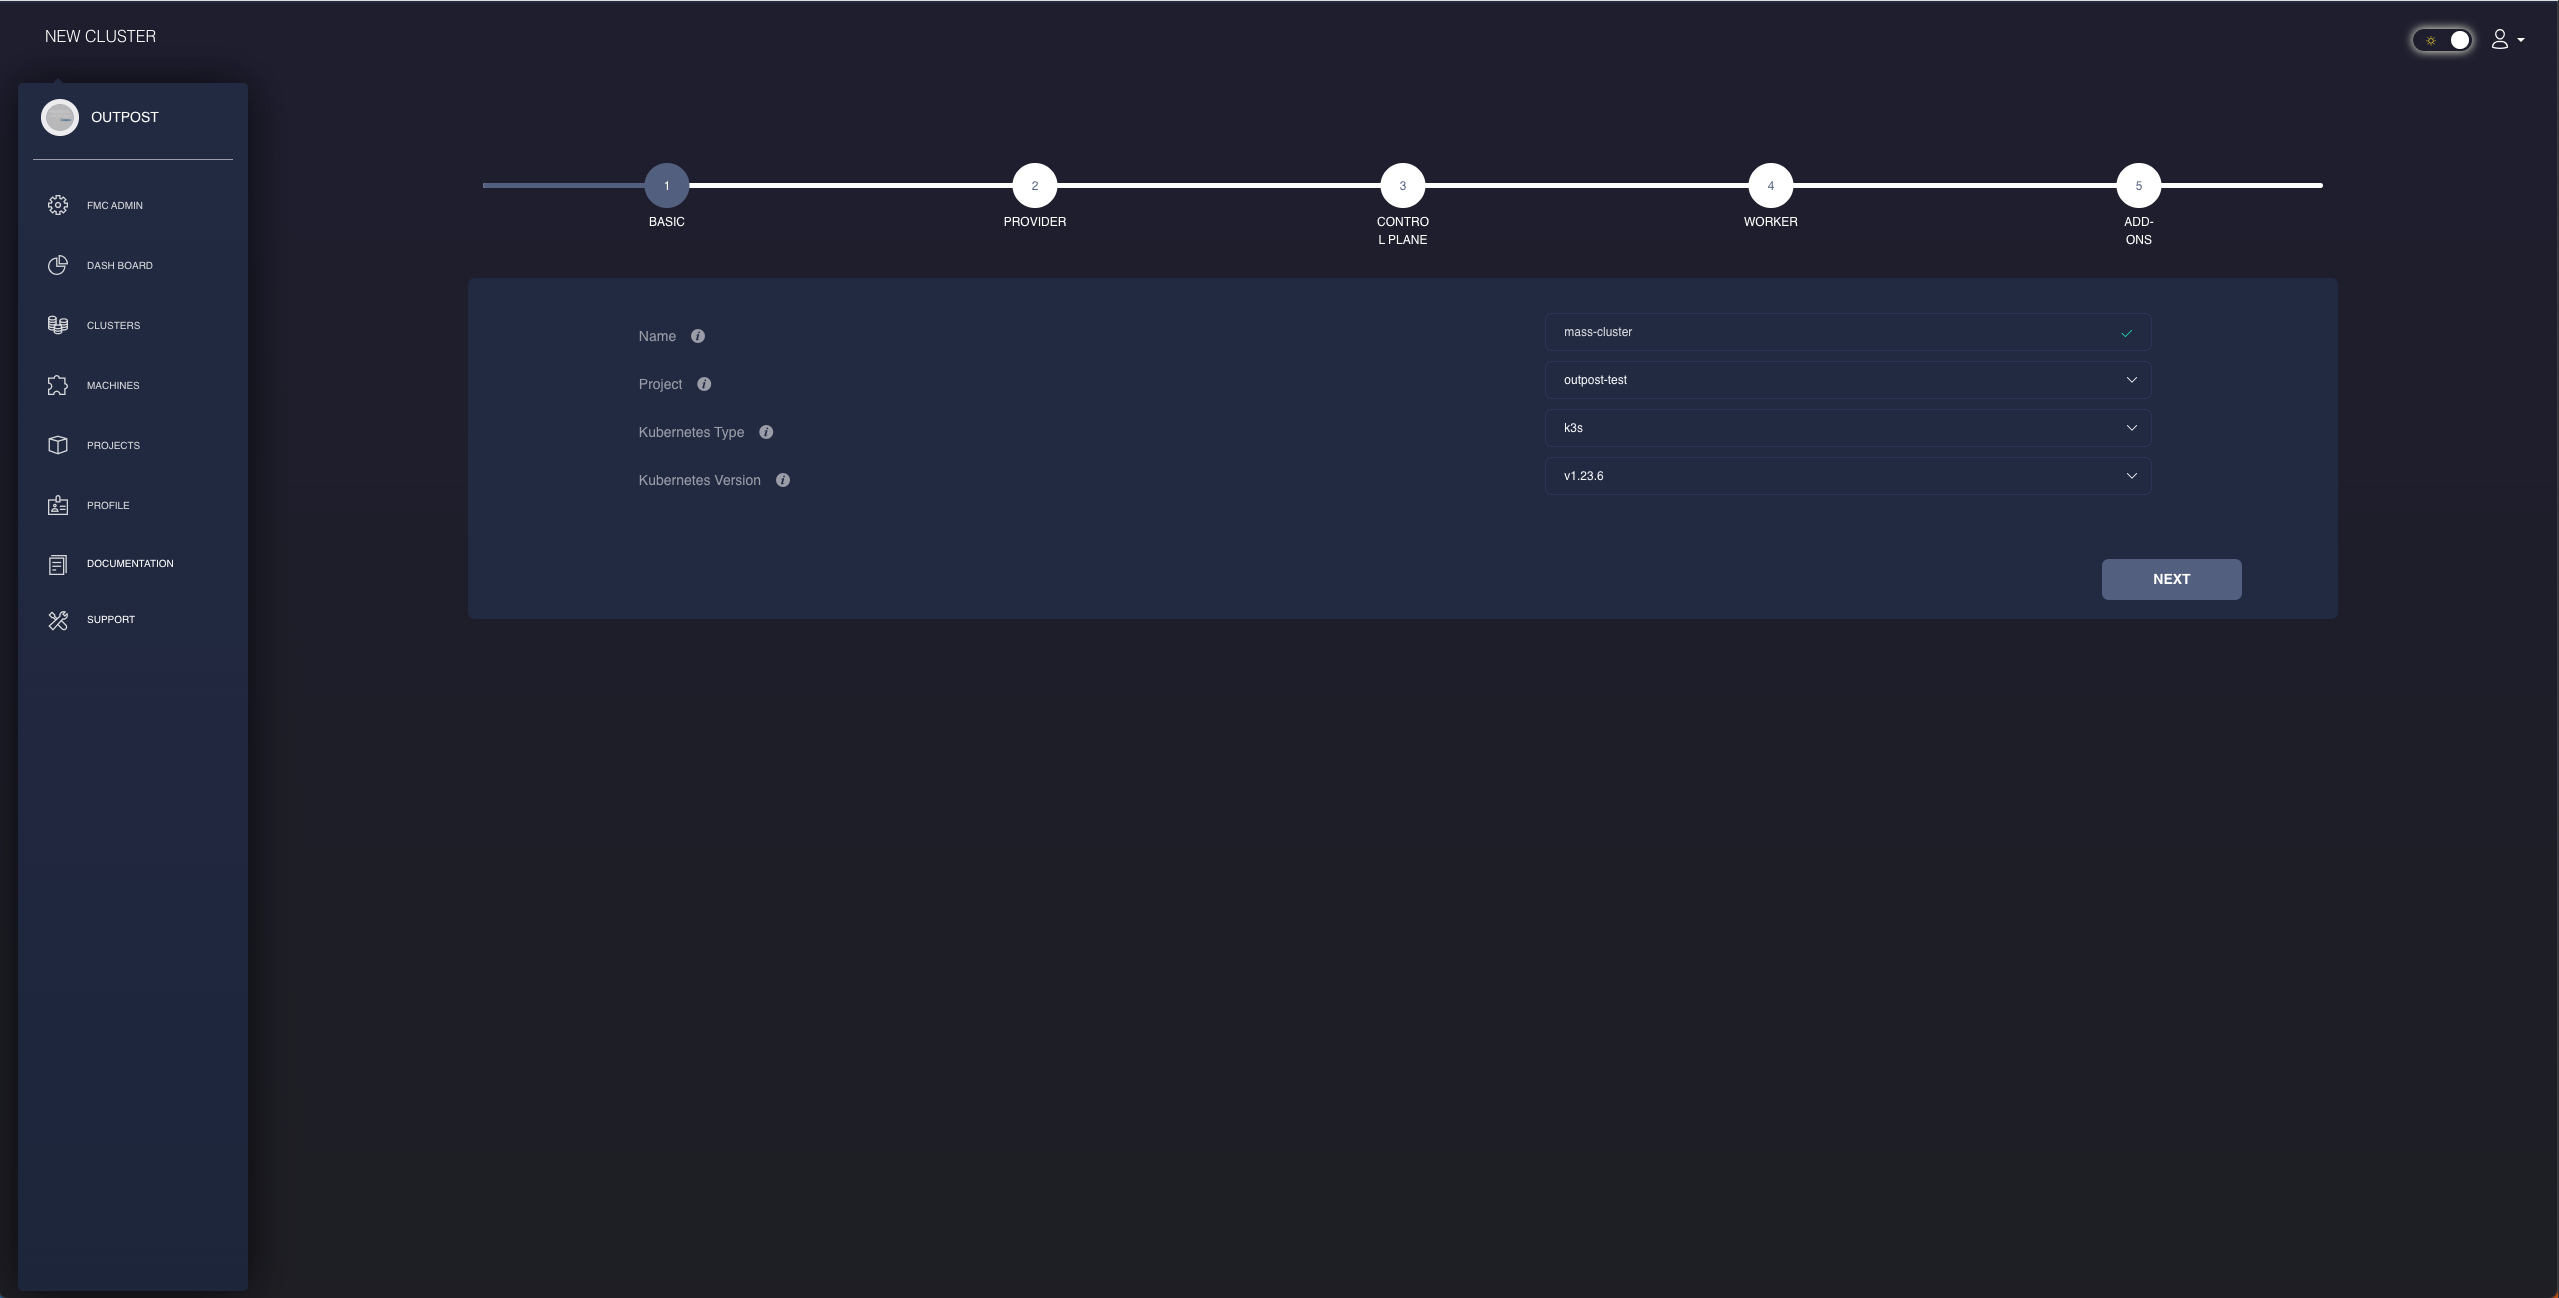
The first part of the form contains basic information the authorized FKP user wants for their new cluster. This basic infromation will contain the name of the cluster as well as their preferred assigned project and their Kubernetes type/version. The cluster name must be unique within each project and cannot have be a duplicate. However, the same cluster name can be utilized across other projects. The Kubernetes version will depend on the type chosen, whether that be K3s or the upcoming production of Micro-K8s. The Frontier Outpost will list a variety of options that was supported and recommended by FKP, but authorized users are capable of inserting their versions outside of those recommendations. With that being said, be aware that other versions may cause cluster deployment error and failures.
Step 2: Provider Information

The second part of the cluster creation form involves infrastructure providers. At this time, FKP currently supports three infrastructure providers. They are Metal-as-a-Service (MAAS), Amazon Web Services (AWS), and Microsoft Azure. The rest of the form will change pending on the choice you choose for your provider. If you choose any of the Cloud Service Providers (CSP) to run your FKP workload cluster, you will have to select the region you would like your cluster to reside in. This will not be the case with MAAS.
Step 3: Control Plane Node
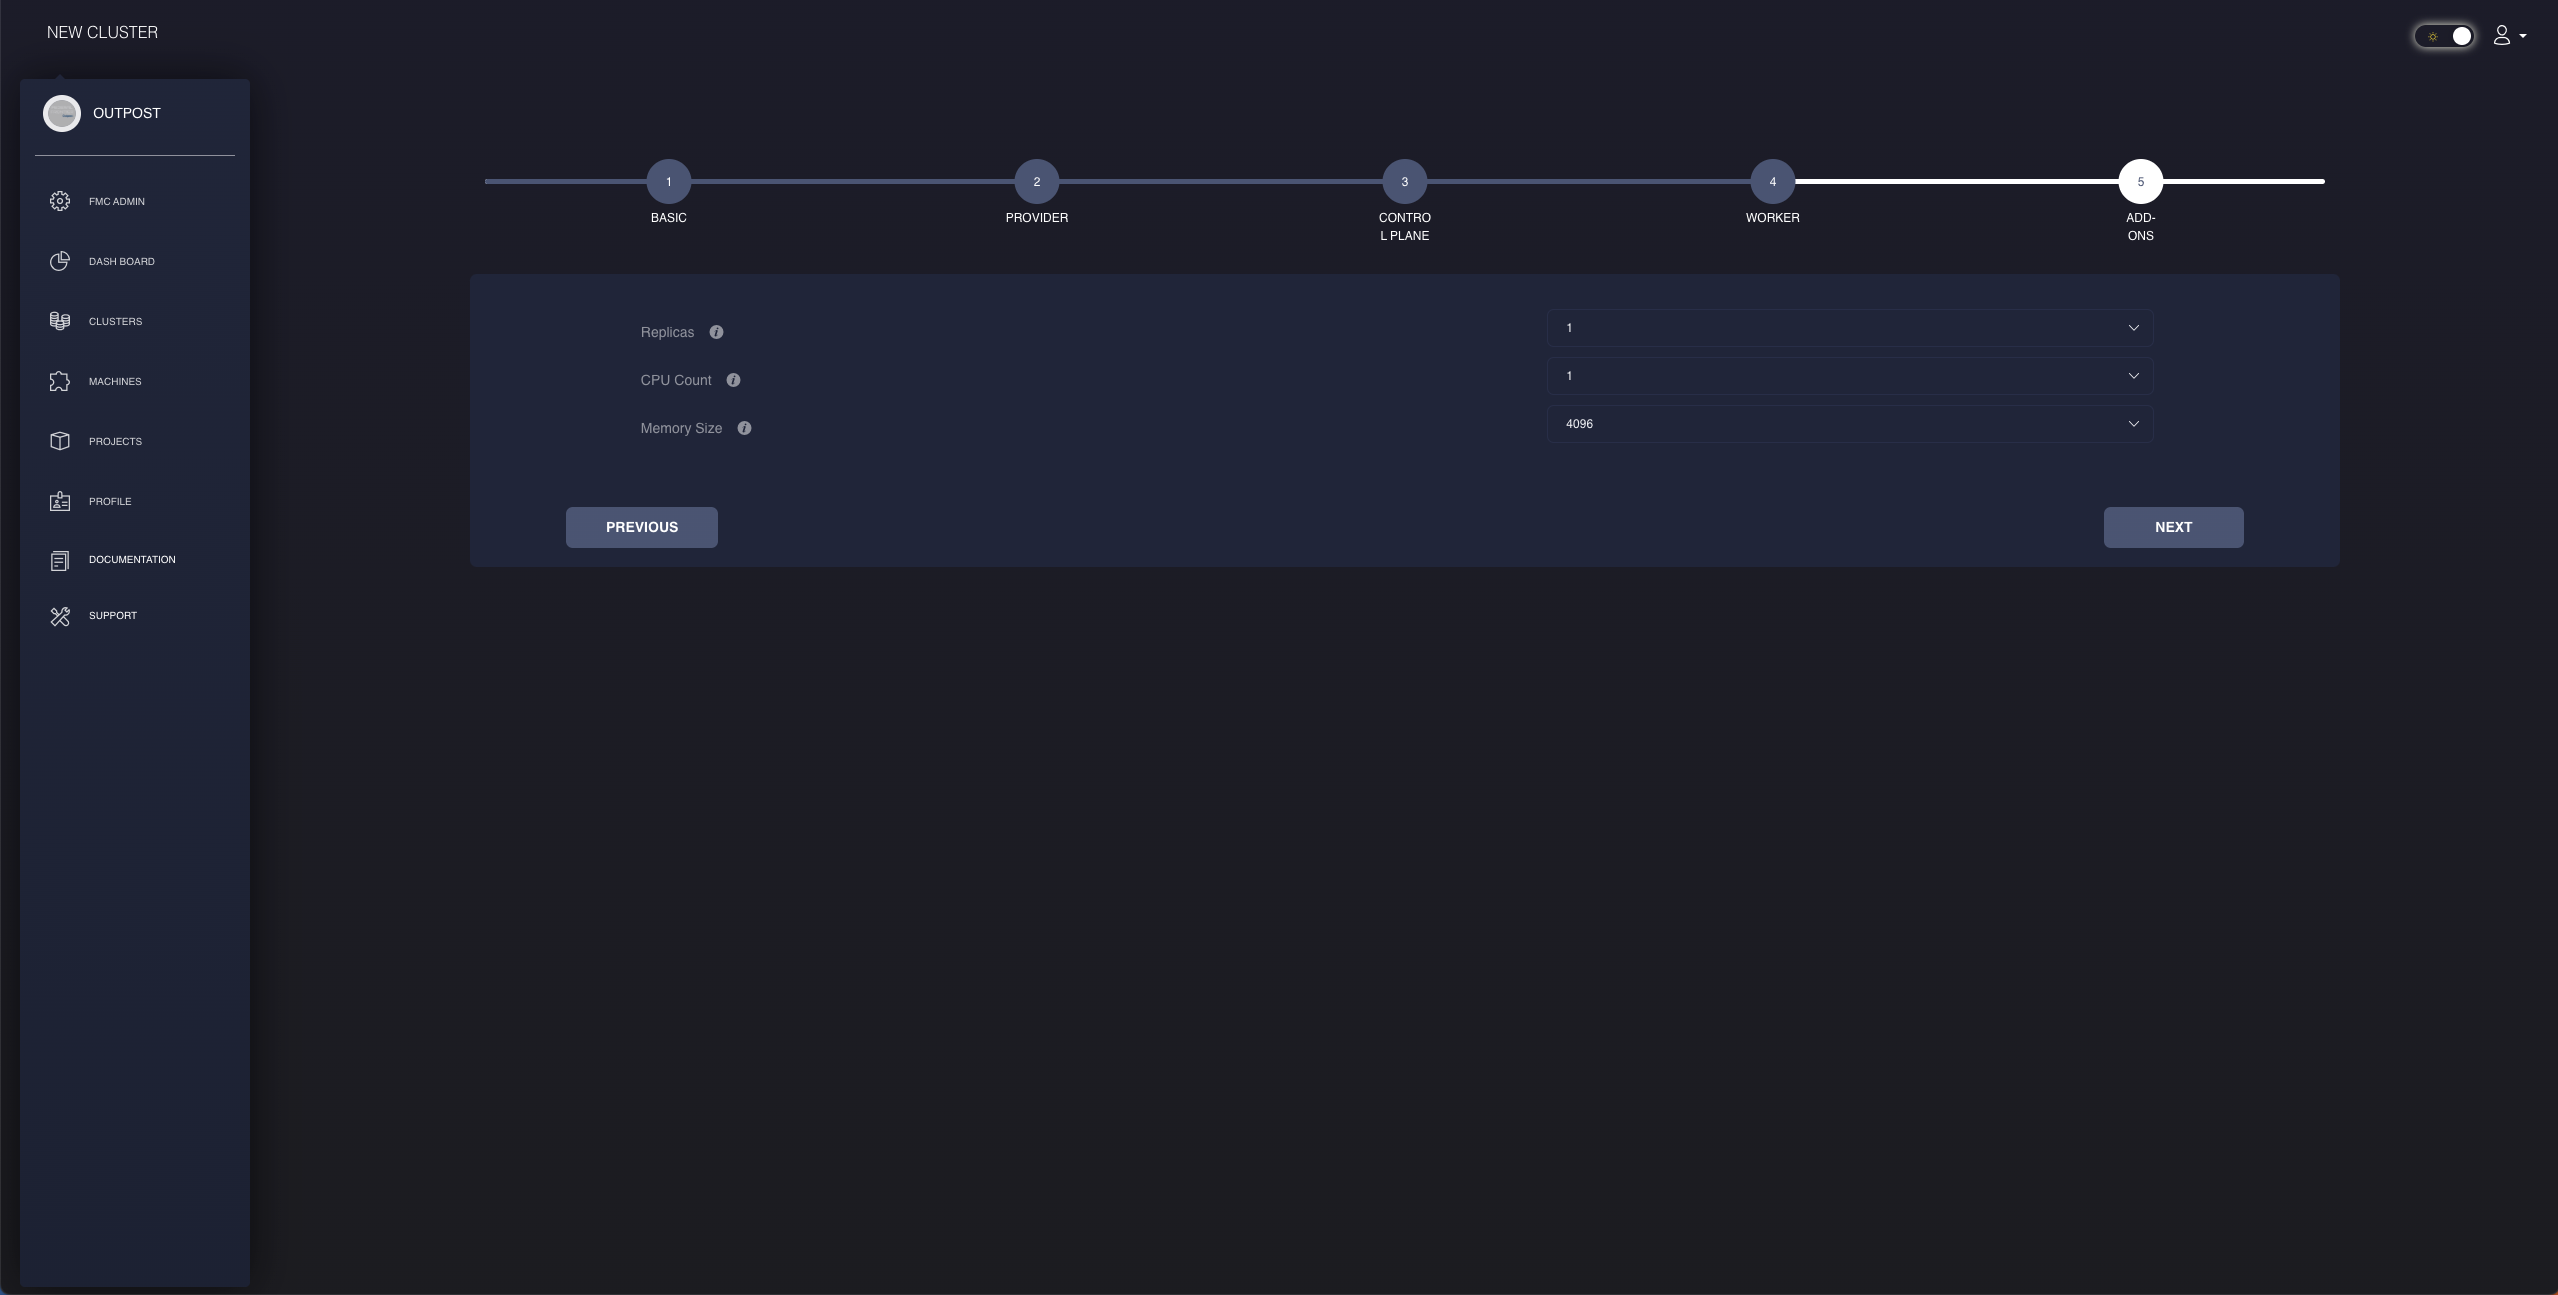
As previously mentioned, the rest of the form will depend on the provider you choose in Step 2. When it comes to specifications of your FKP workload cluster’s control plane, you will be confronted with a different set of options to choose from. We will go into detail of these options among each of the infrastructure providers. However across all providers, every form will contain choices for the number of replicas and their desired operating system.

For the MAAS control plane, we are able to set the CPU count and memory size. Each user will be able to select the number of CPU cores they would like to have for their control plane node. The machine selected through MAAS among the the options may vary pending on the minimum number of CPUs from an available machine. For instance, if a user were to select 2 CPU cores and there are no machines available matching with 2 CPUs, it will find the nearest number above the selected option. For RAM, users will be able to select the size of memory by megabytes (MBs). The same case of next minimum matching relates to the memory size as it does with the CPU core count. Regardless of which choices the FKP user selects for their MAAS control plane node, a machine will be found and utilized for their new workload cluster.
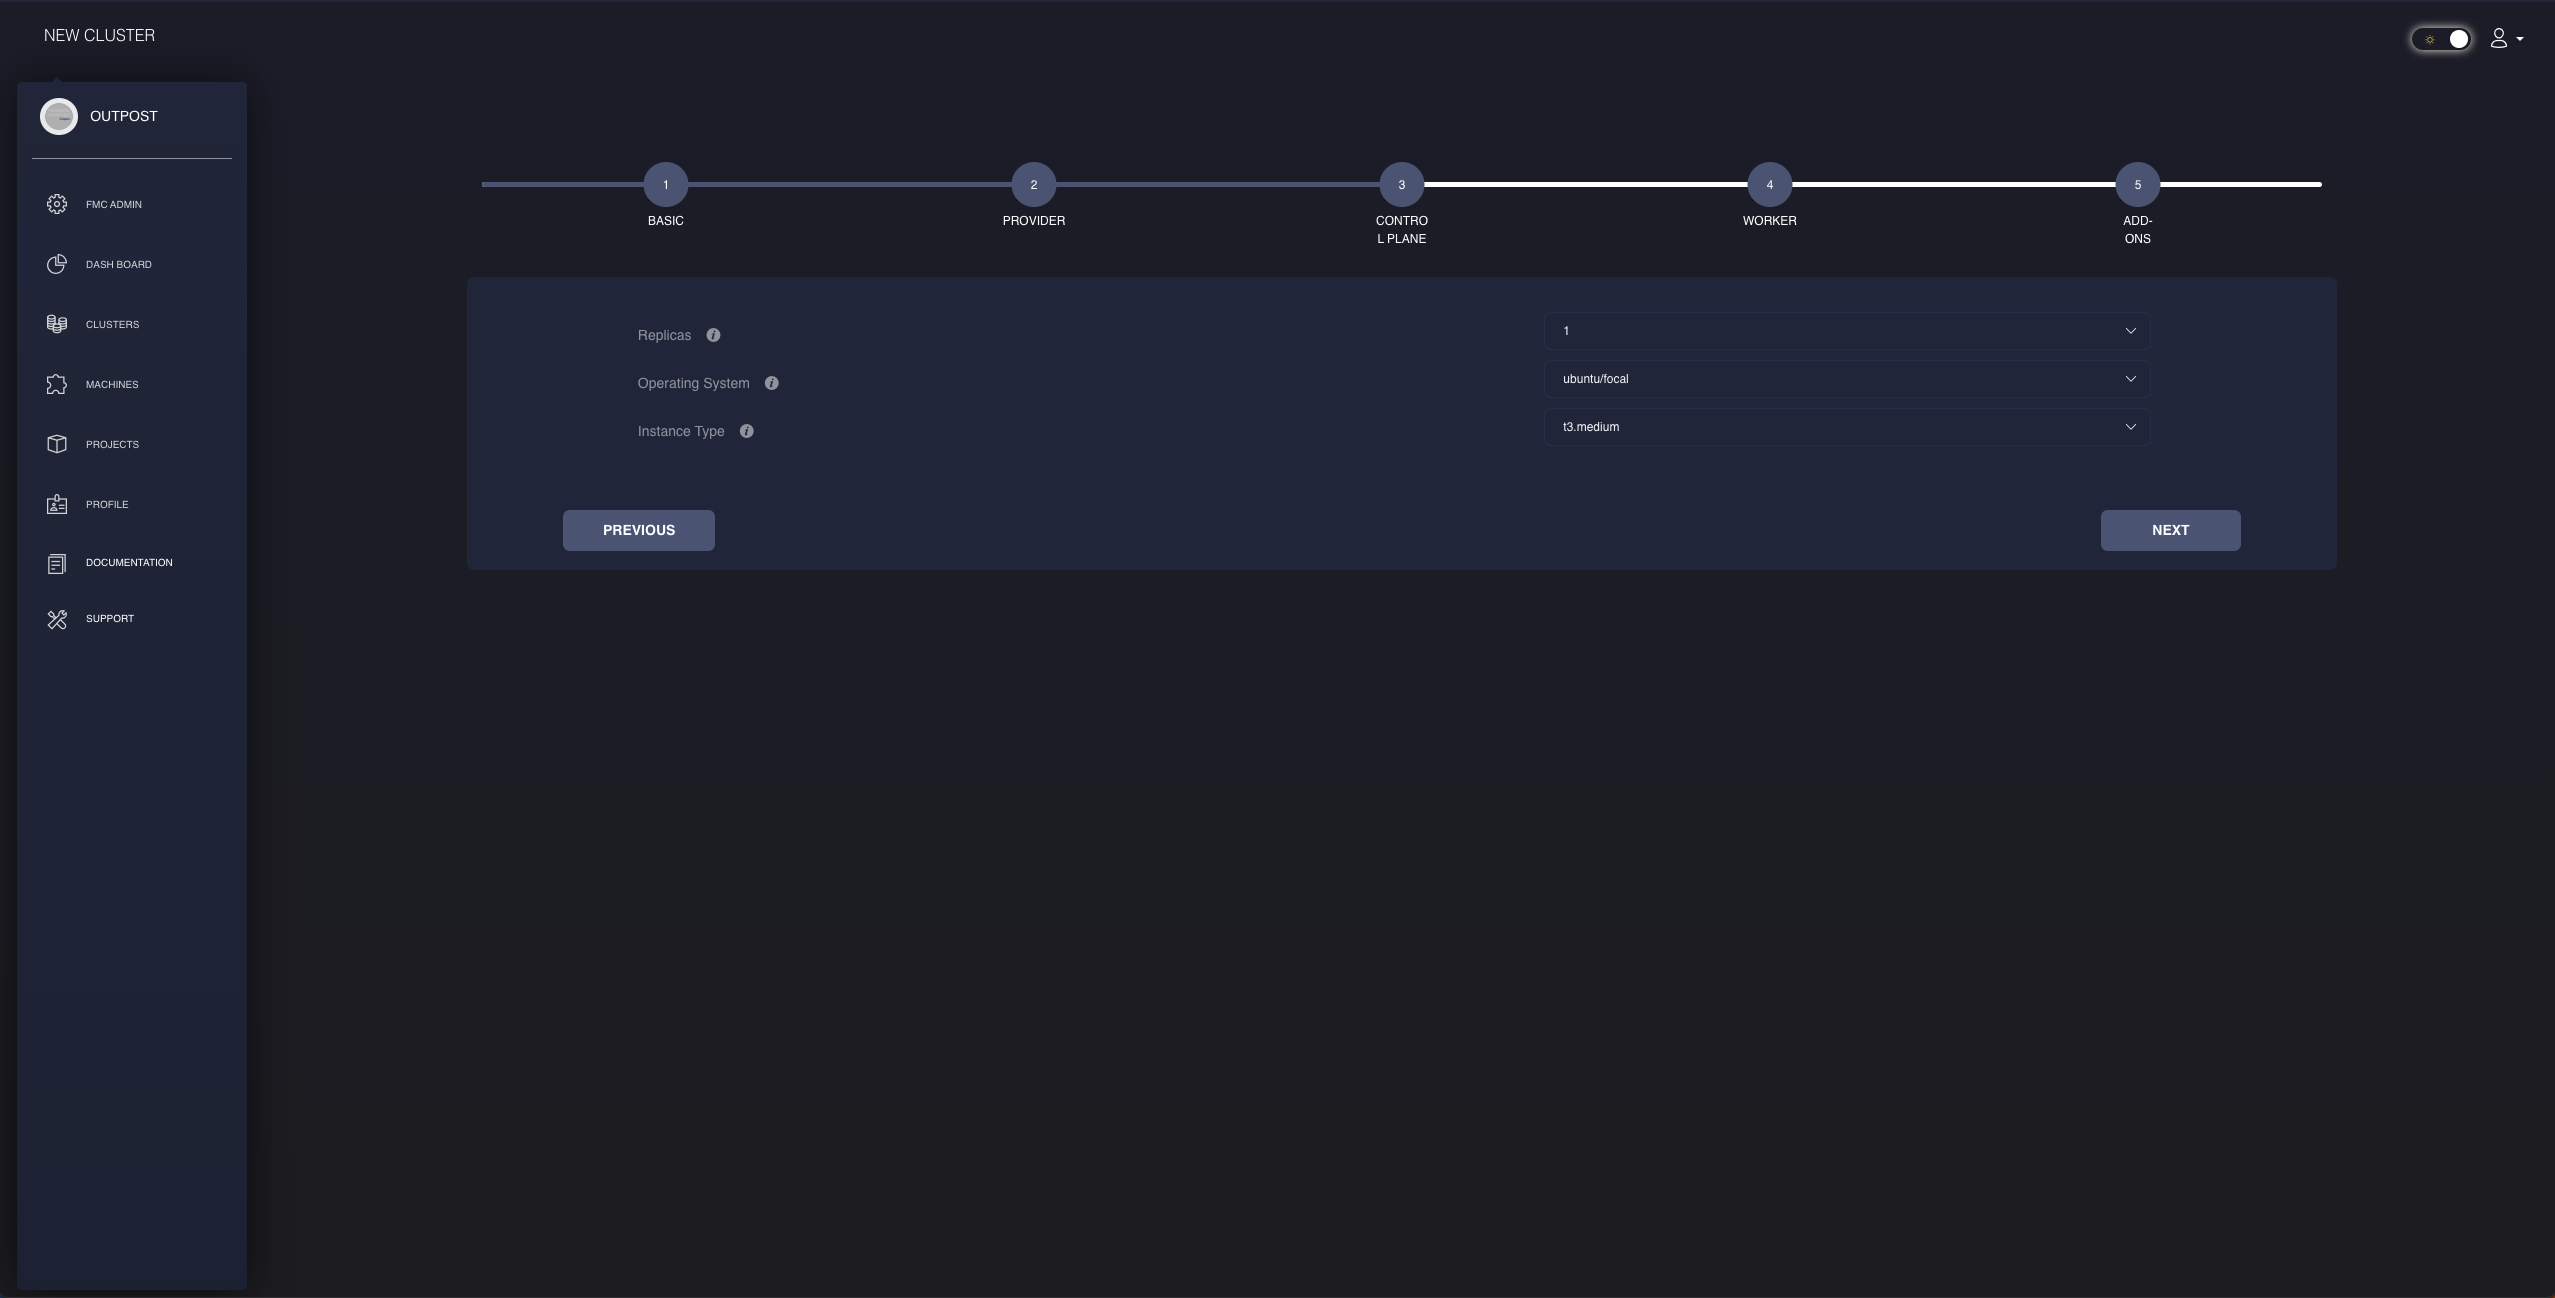
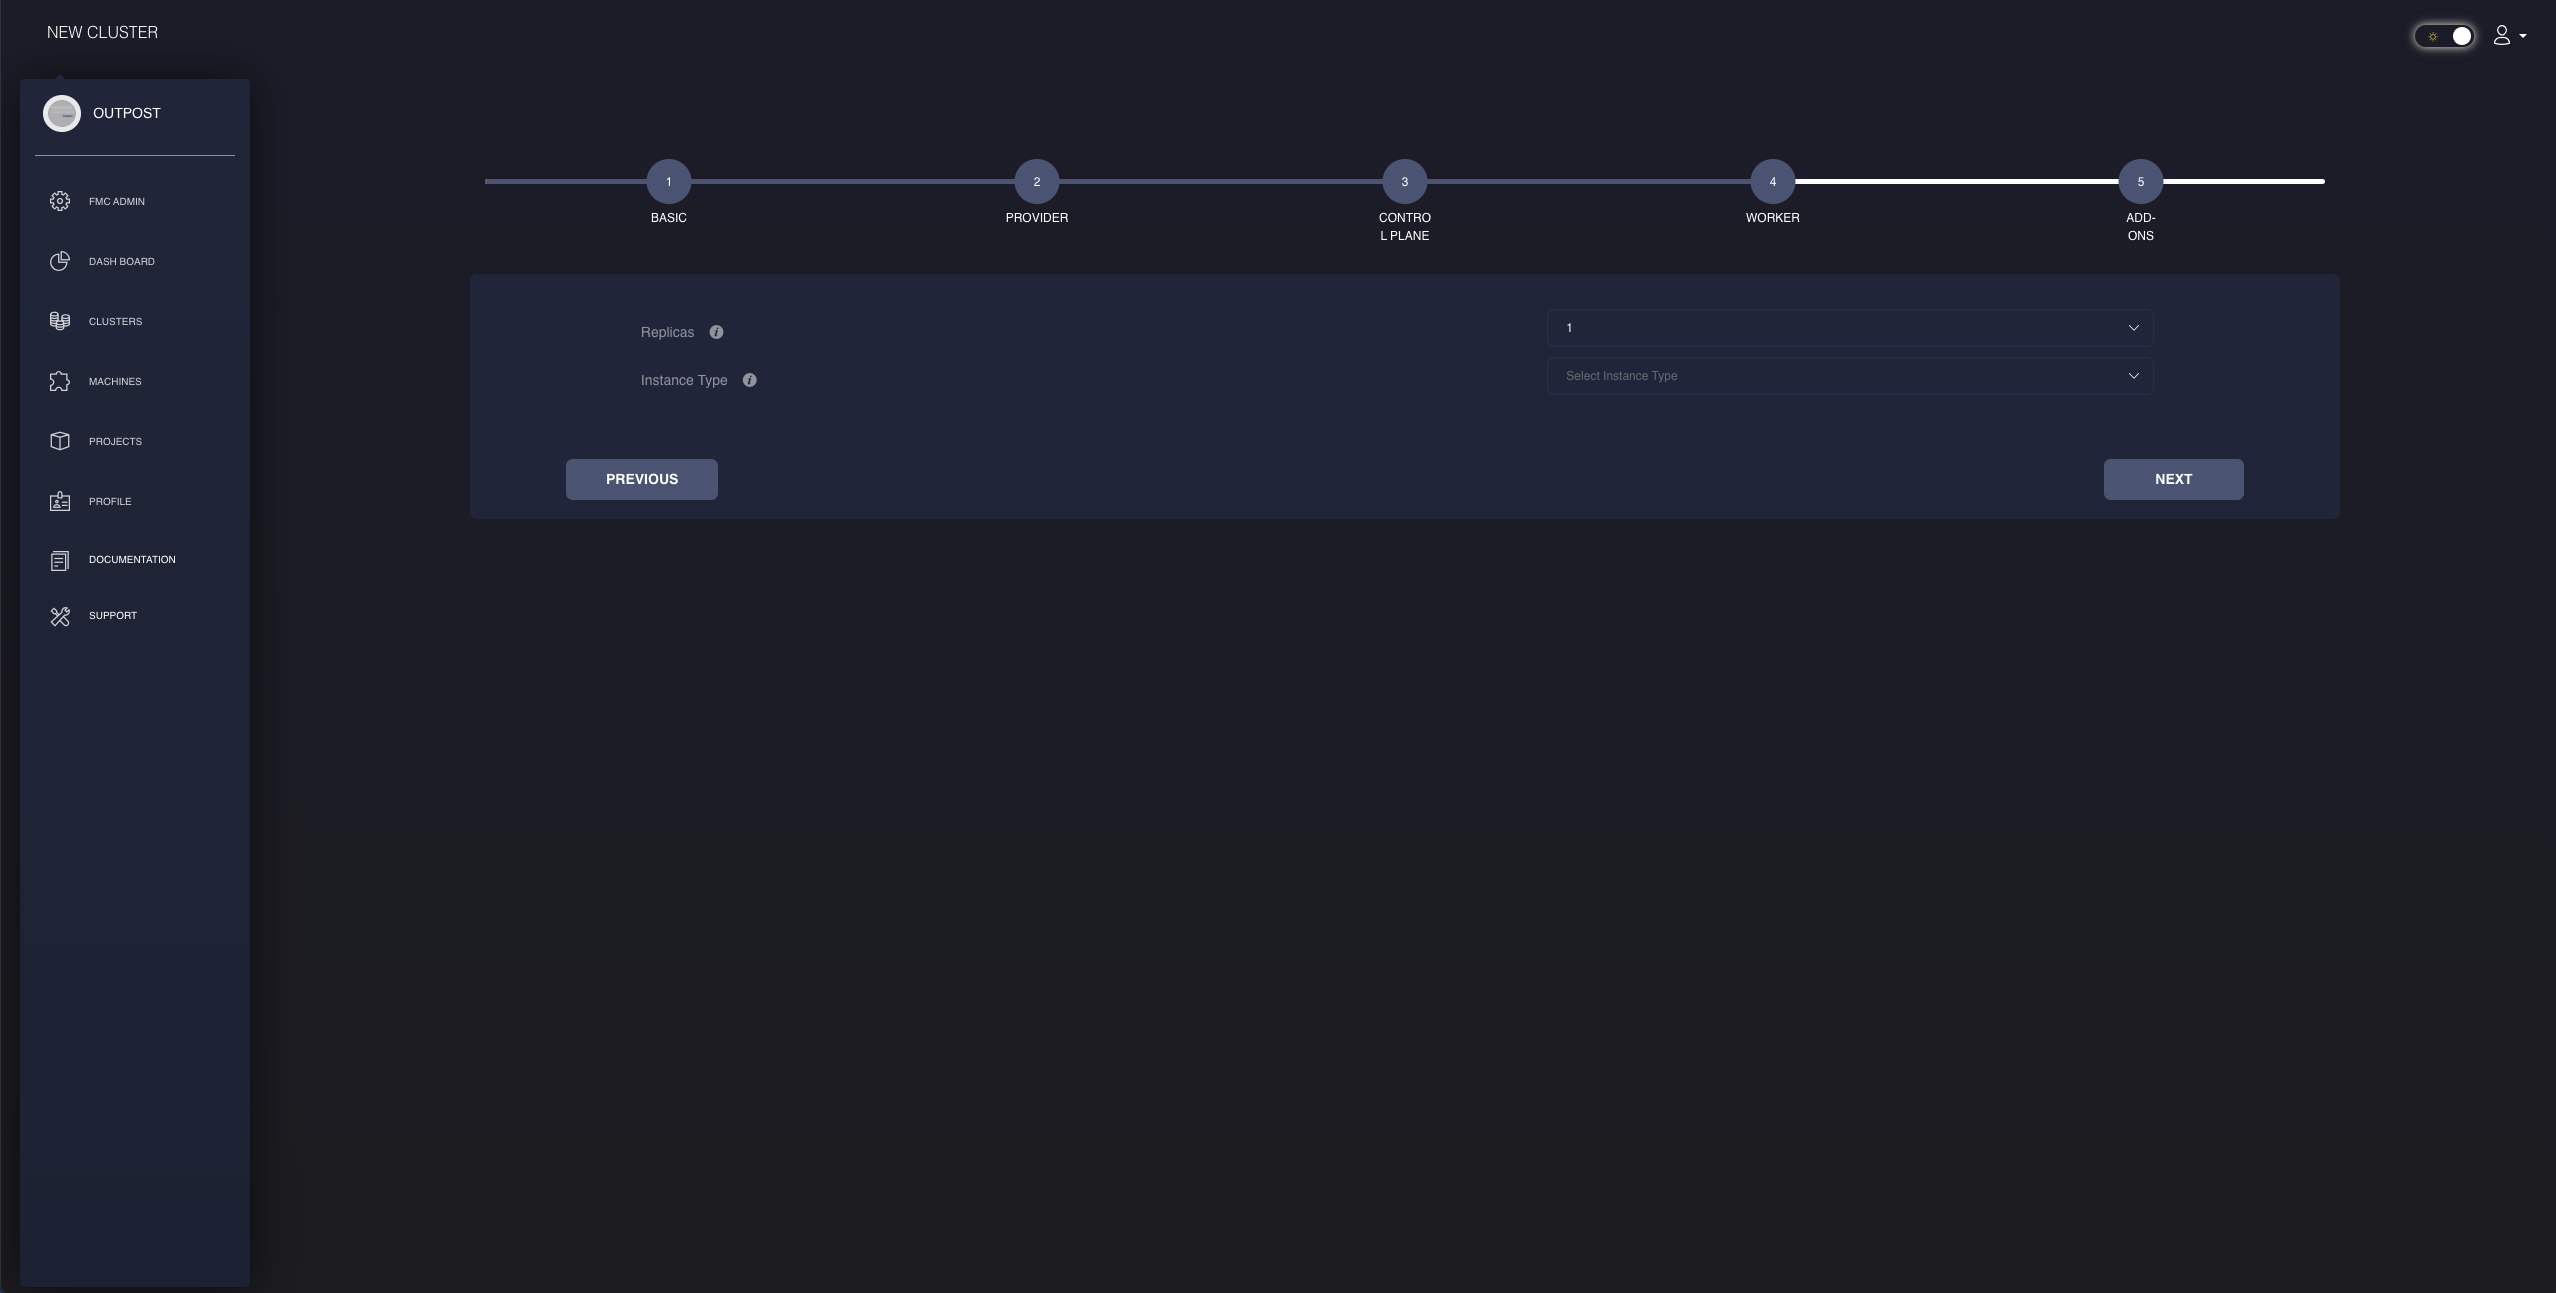
For the AWS control plane, we set the specifications of the instance by choosing its type. If you go to your AWS console, you will have a large variety of different options to choose from when it comes to types of instances you would like for your control plane nodes. FKP has a list of recommendations. The Frontier Outpost default option is set to t3.medium which has 2 vCPU cores with a size of 4096 MB for the memory, but there are many other supported options to choose from.
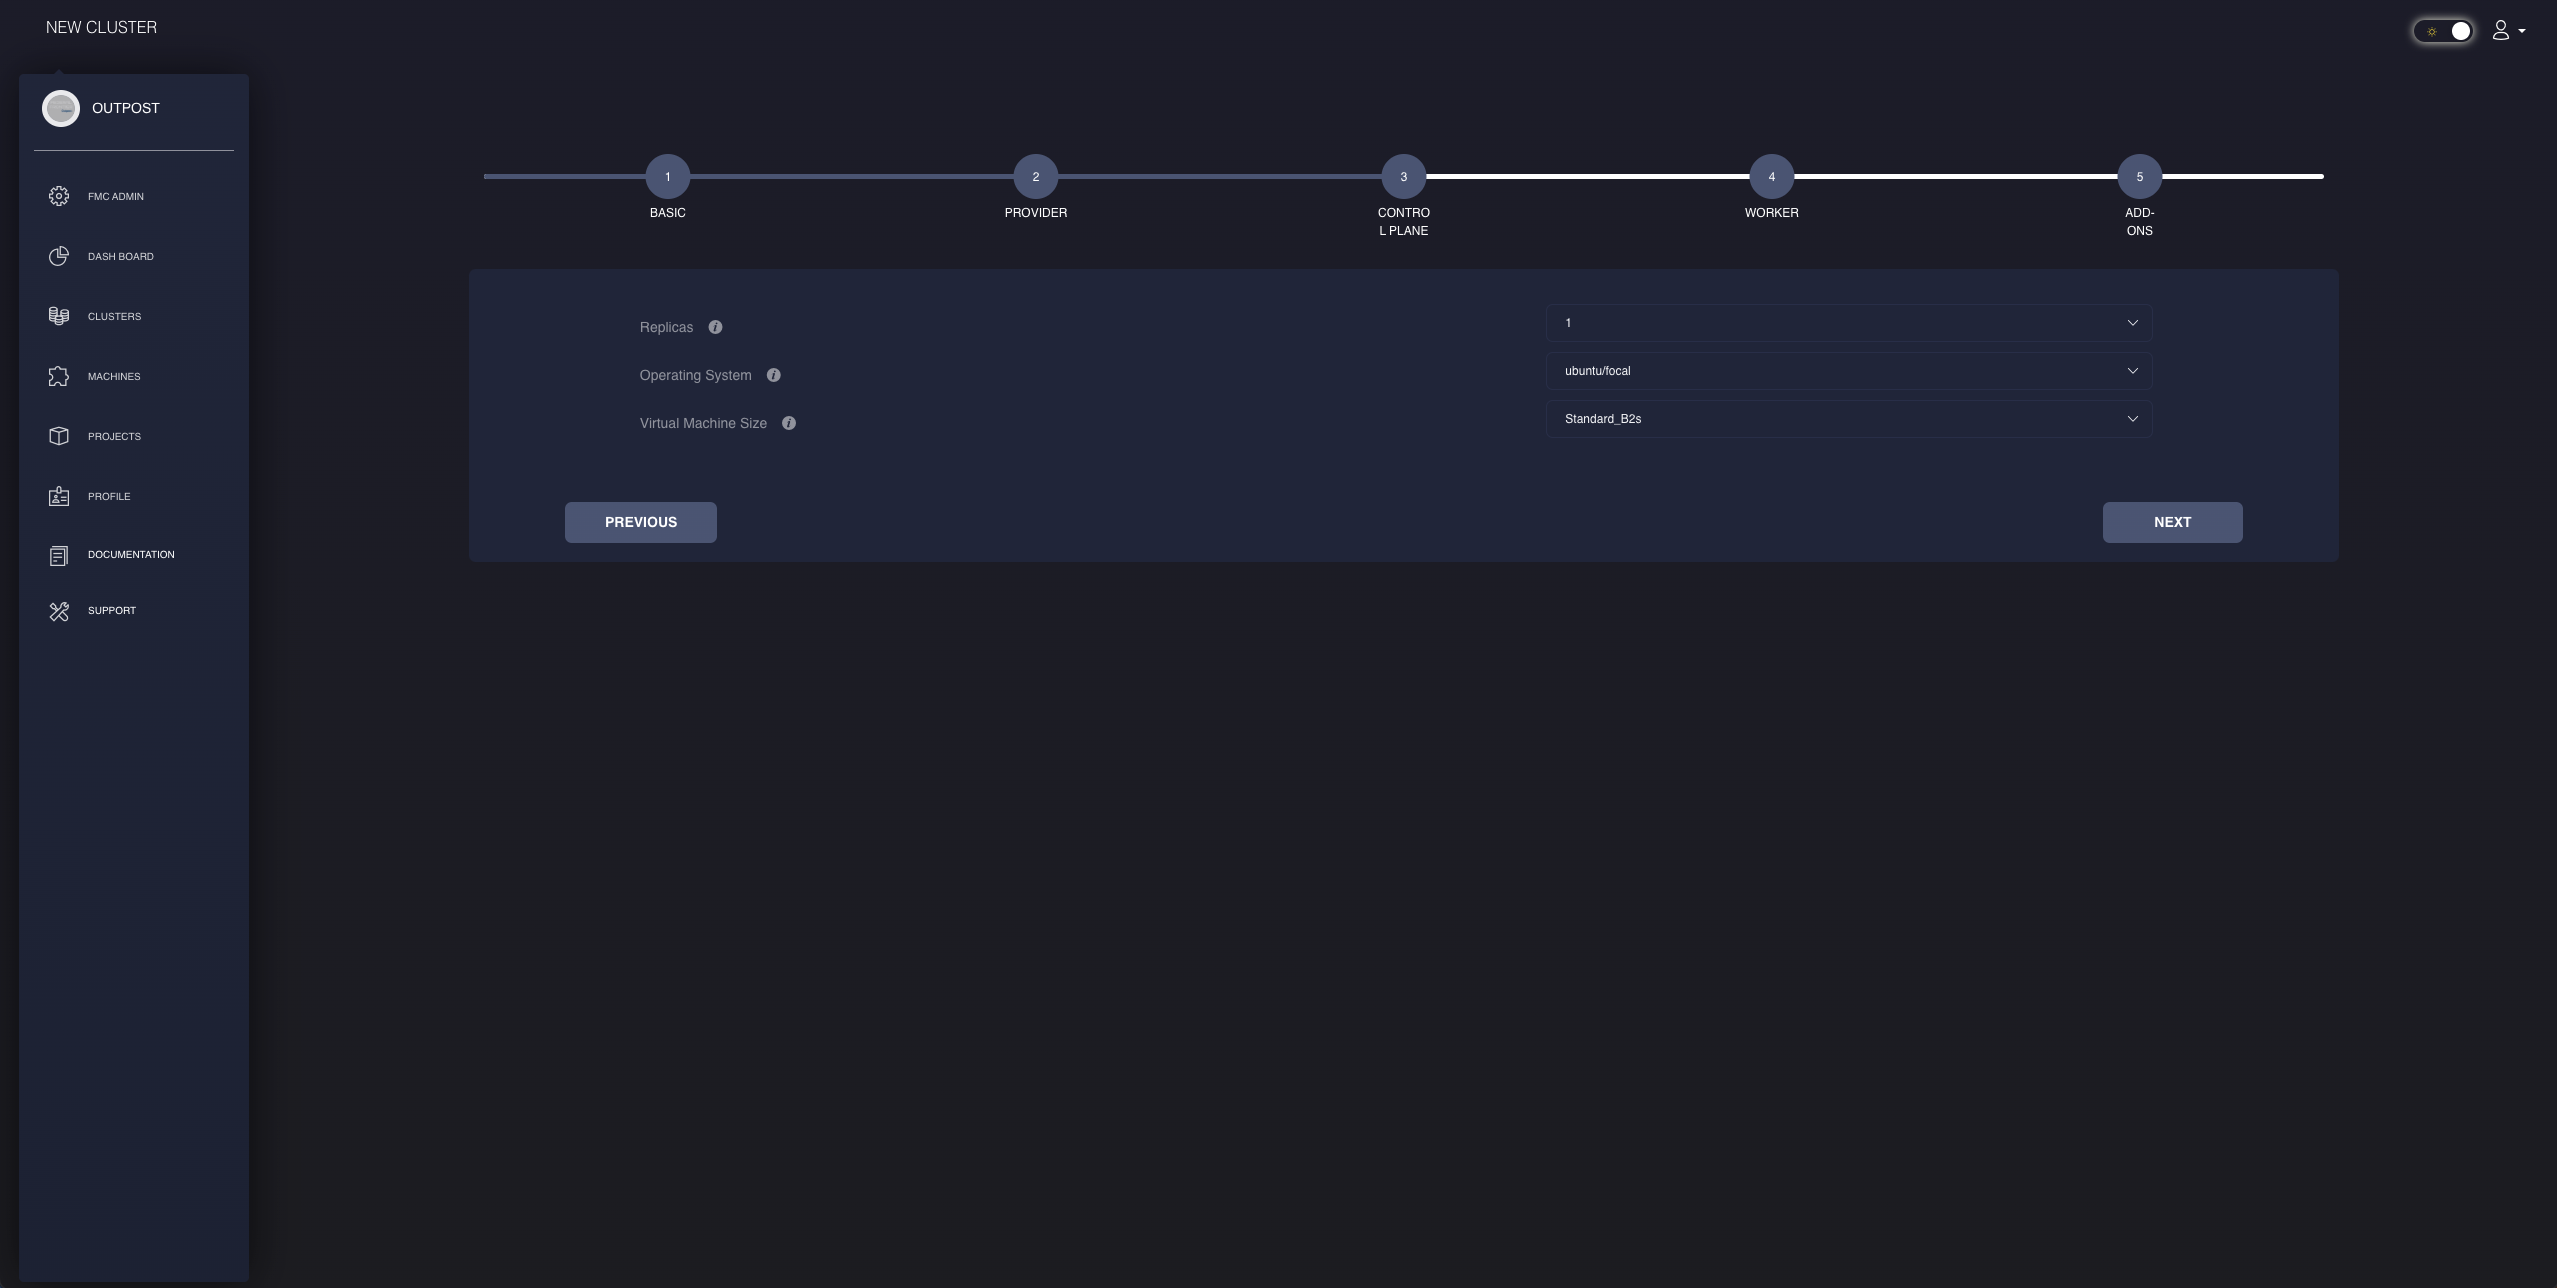
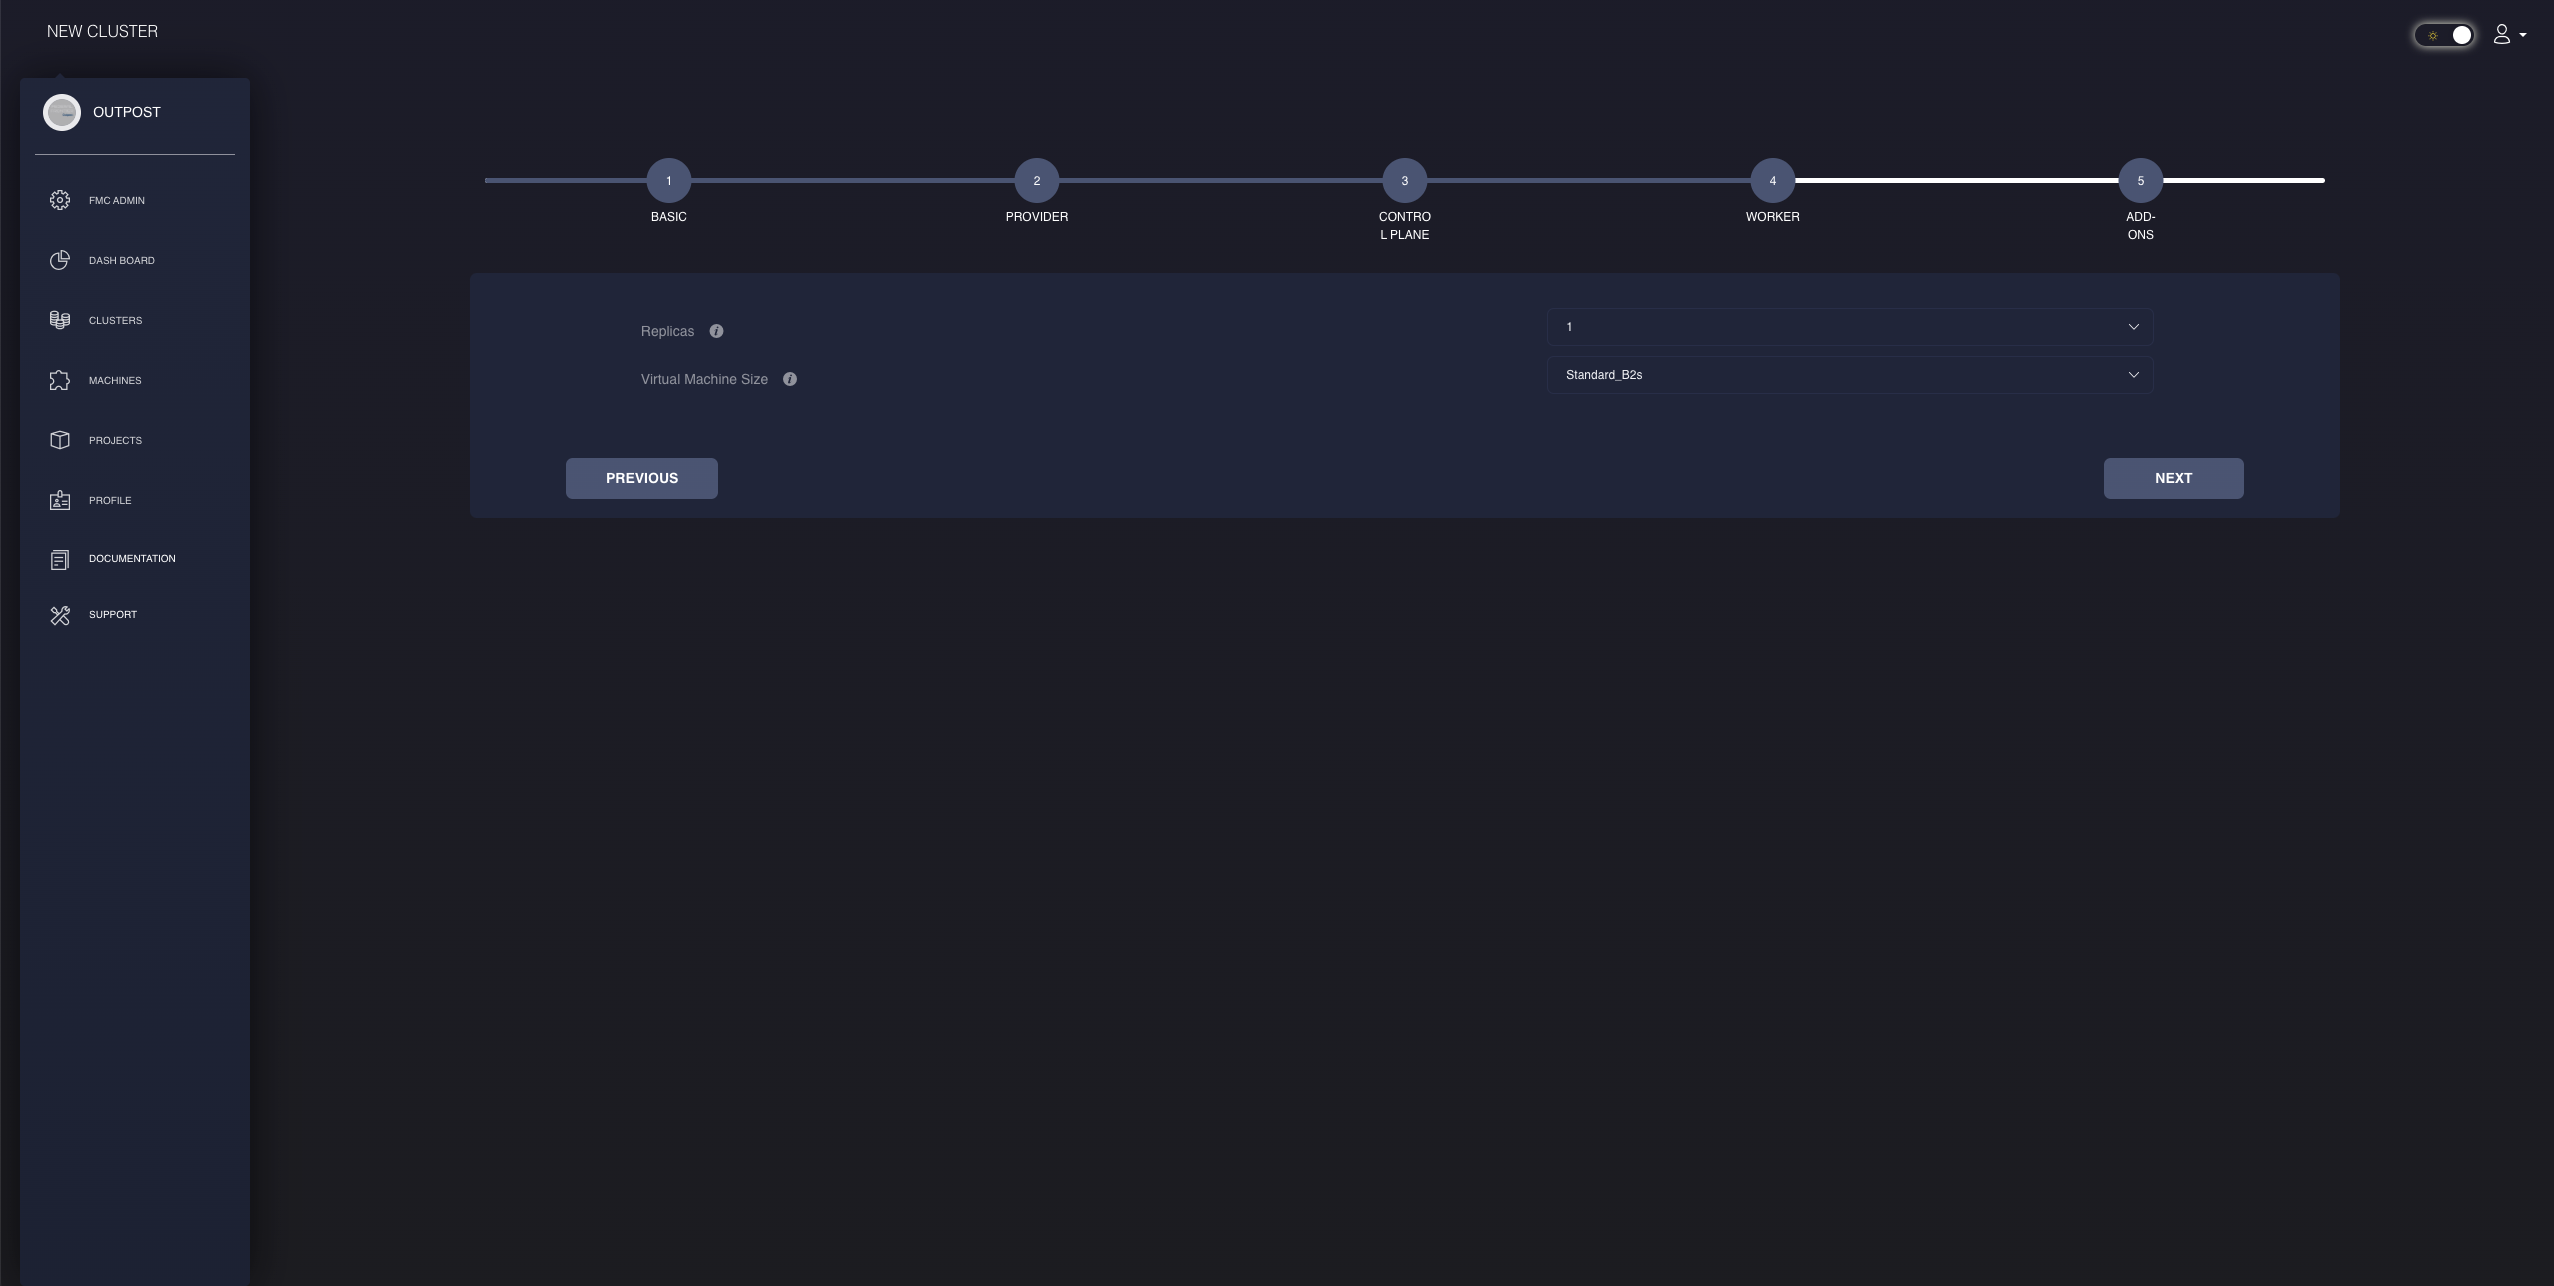
For the Azure control plane, we set the specifications of the virtual machine by choosing its size. If you go to your Azure CLI and type in the command:
az vm list-sizes --location "<region>"
You will be given a response with a large variety of different options to choose from when it comes to virtual machine sizes Azure has to offer. FKP has a list of recommendations based off the operating system chosen. The Frontier Outpost default option is set to Standard_B2s which has 2 vCPU cores with a size of 4096 MB for the memory, but there are many other supported options to choose from.
Step 4: Worker Node
The fourth step where FKP personnel can configure their worker nodes is very similar to the control plane form from Step 3. The only difference is that the operating system is matching the control plane nodes. Therefore, FKP personnel will not be given the option of setting an operating system image specific to the worker nodes. With that being said, the option for the number of worker node replicas is still available to the user.
Similar to the MAAS control plane form, users will be given configurations for the CPU count and memory size. The next minimum available machine based off the desired specifications will also apply to the worker nodes as well.
This worker node form is also similar to the CSP control plane providers. FKP personnel will be able to choose the specification of their worker nodes through the different types of AWS instances and sizes of Azure virtual machines. They can be either more powerful or weaker in performance in comparison to their control plane nodes.
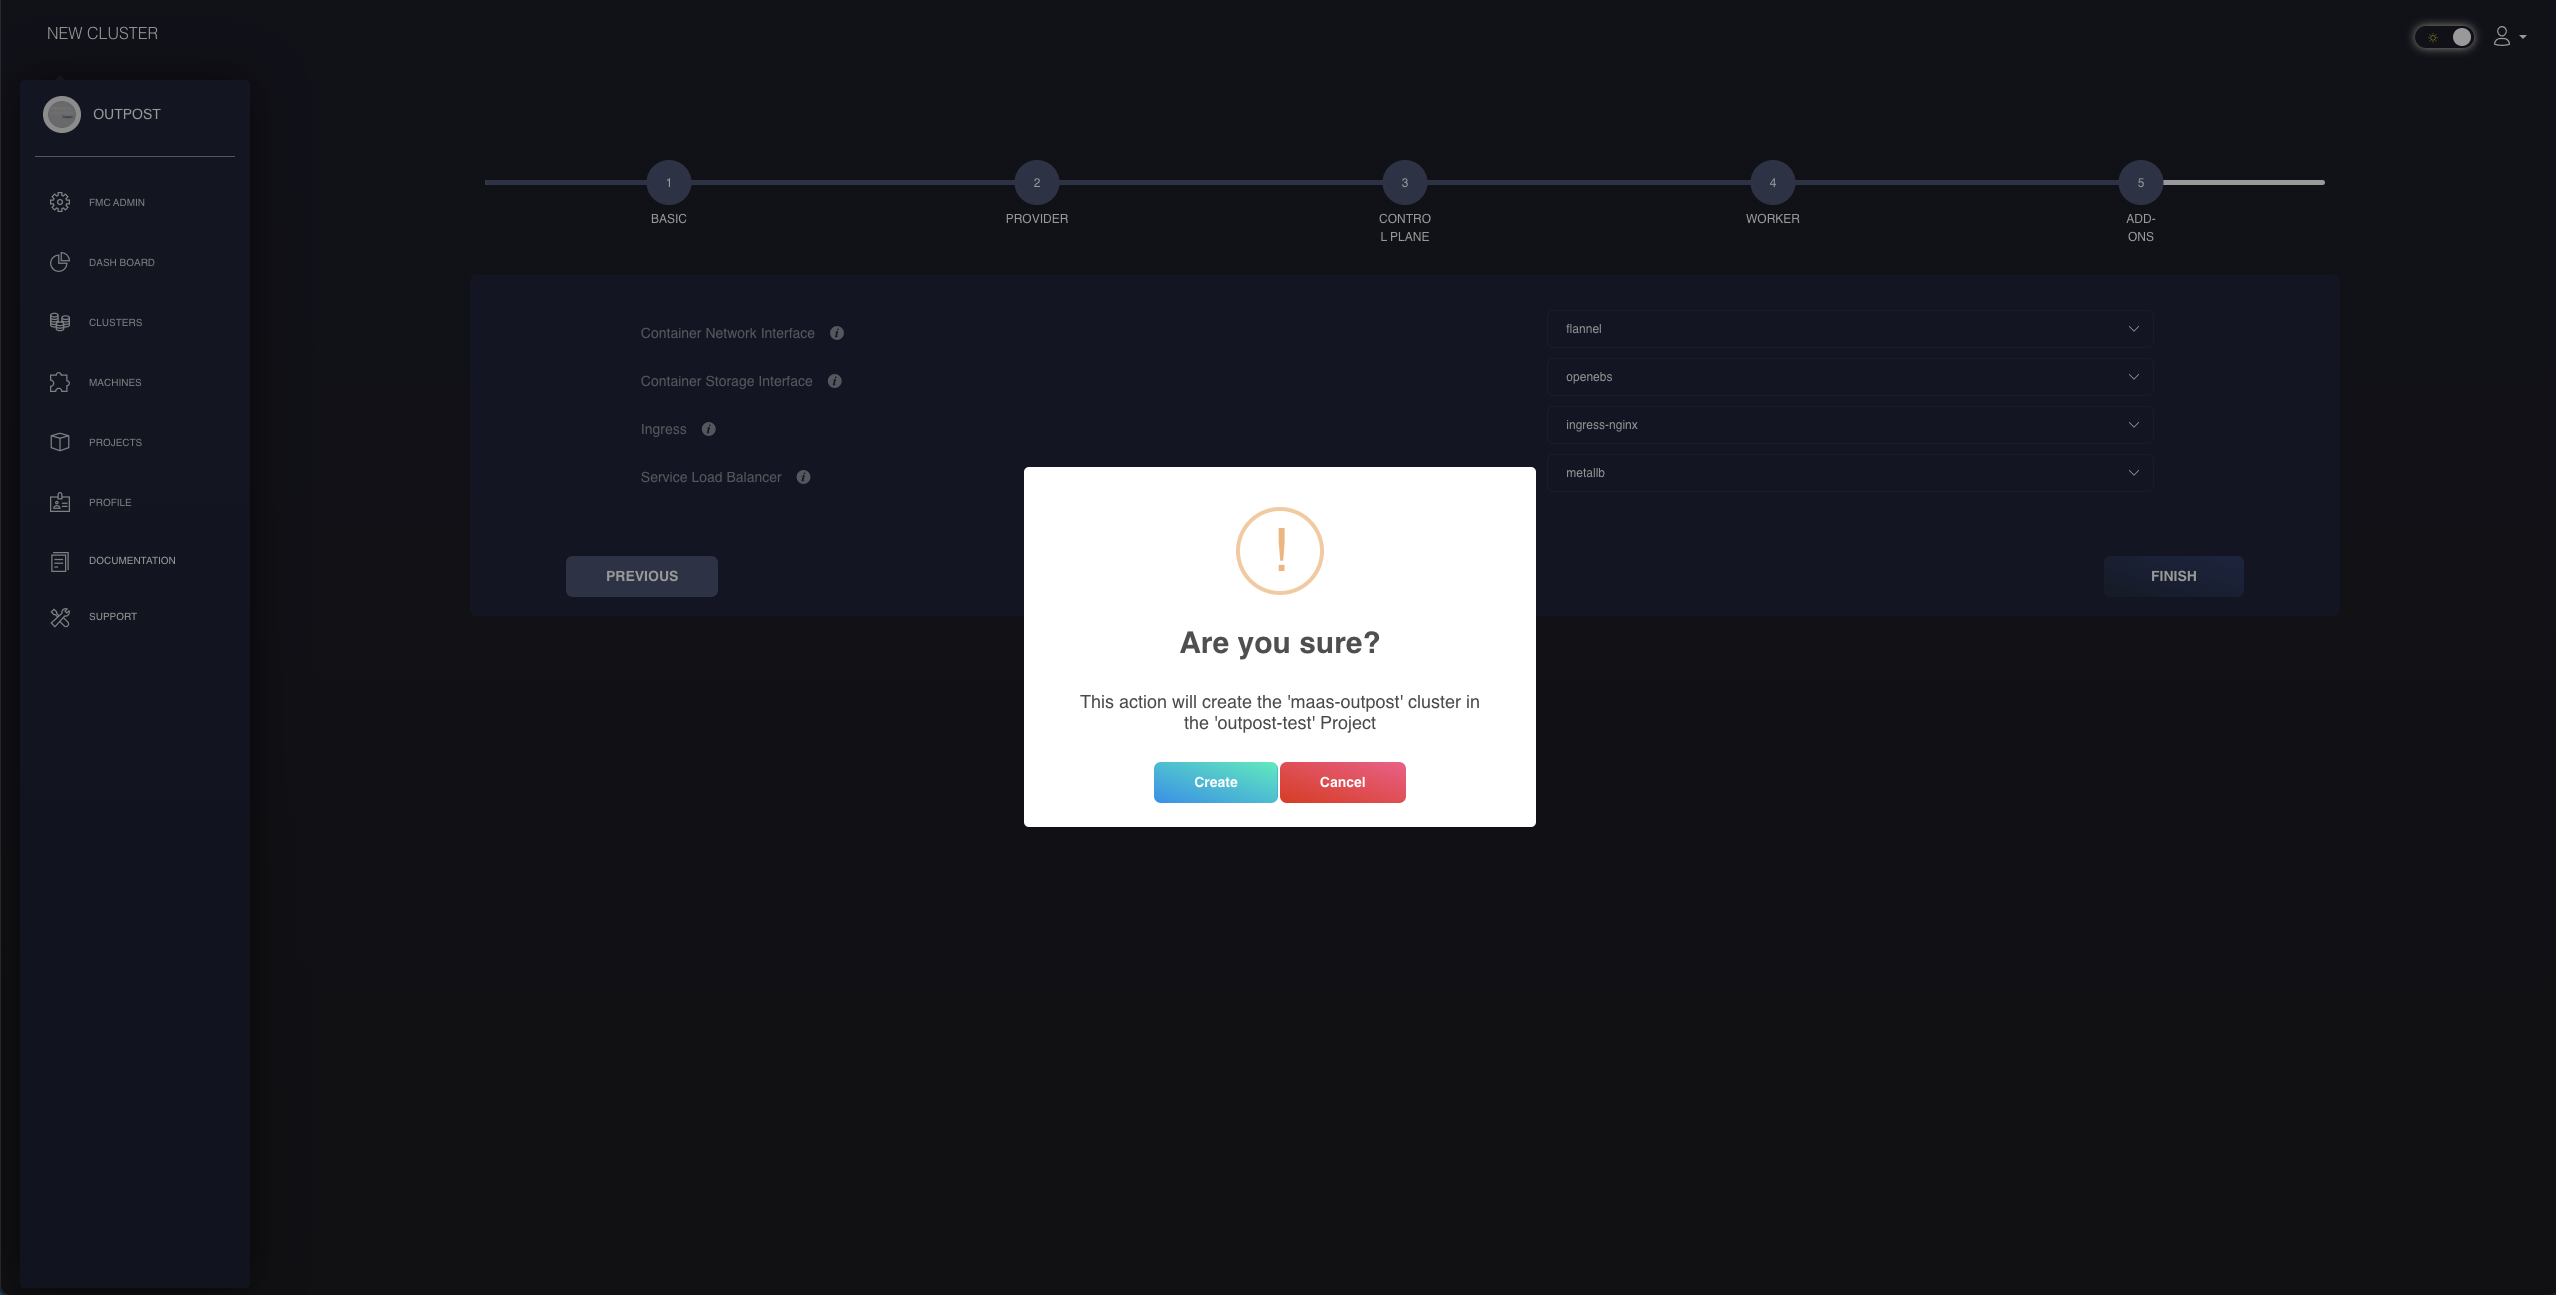
Step 5: Add-Ons
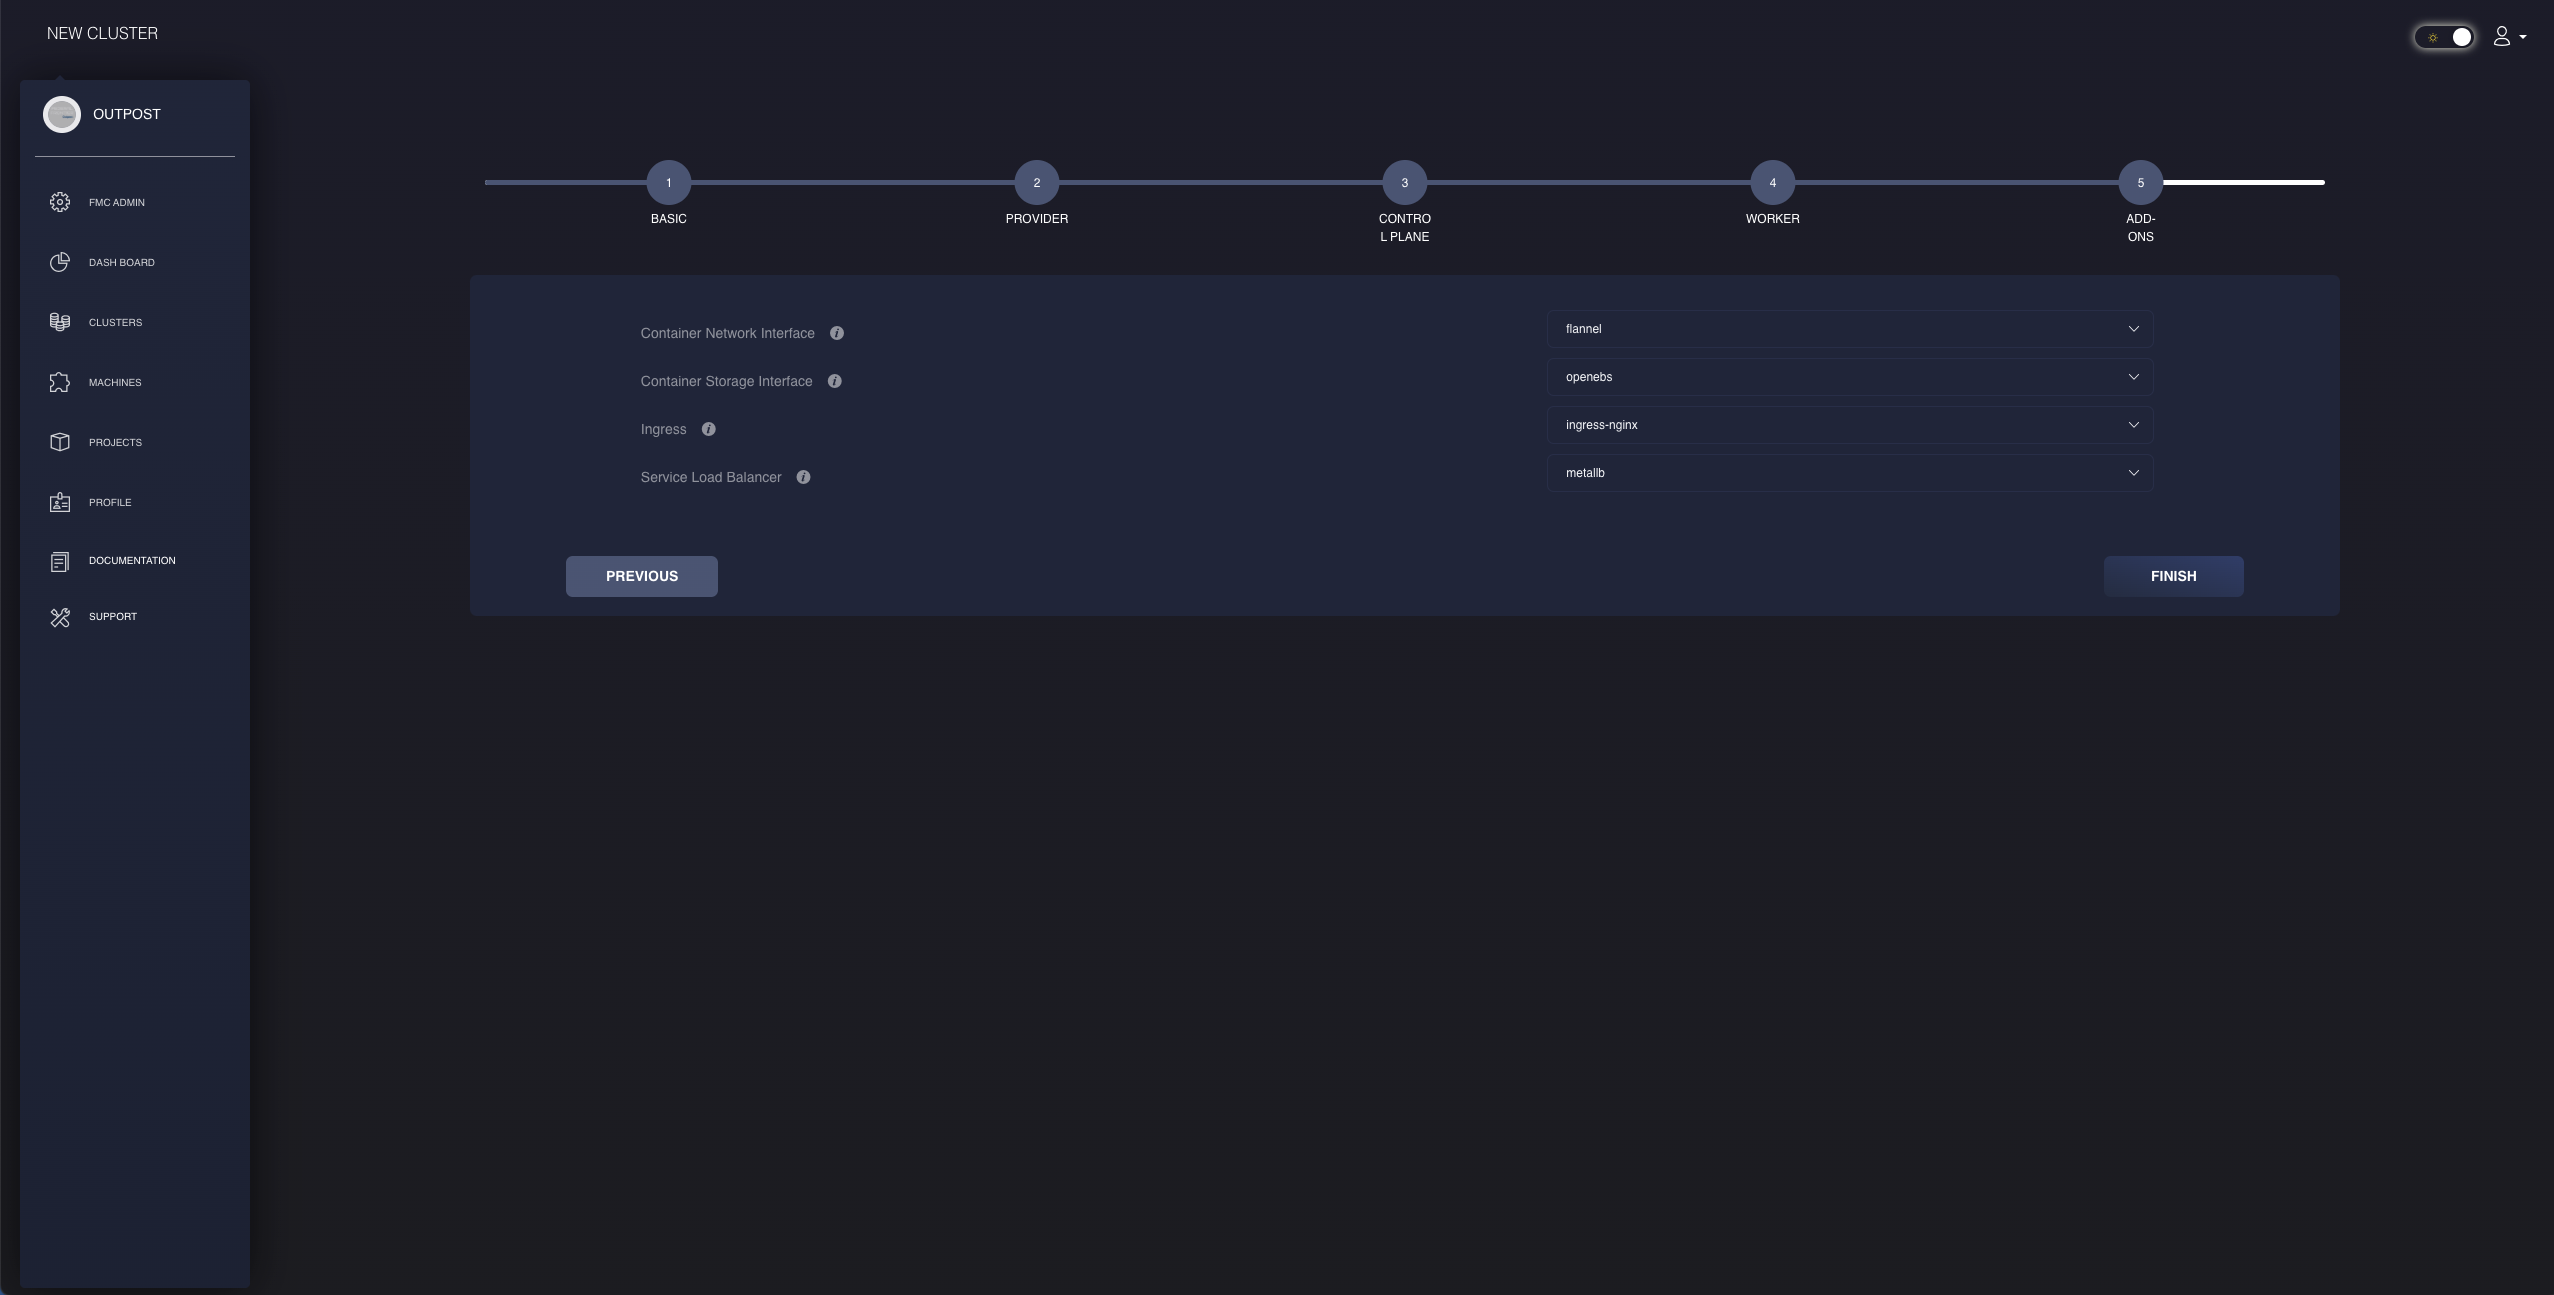
The final step of the form contains add-ons desired to be implemented to your new FKP workload cluster. FKP offers recommendations for each of these options. In the image above, we are able to view the form provided by MAAS. All providers will be given the same list of all these options to choose from, with the exception of the service load balancer. MAAS will have two options between using MetalLB and no service load balancer at all similar to the CSPs since they have their own. As for all other add-ons, FKP users are given the opportunity to change these configurations pending on their preferences. This may differ from other Kubernetes platforms such as MicroK8s, where there are limitations on what can be added and must do so from within their respective control plane machine nodes.
Once satisifed with the configurations of your new cluster, click on the Finish button to complete your creation steps. You will be given a confirmation prompt such as that from the image below.
Congrats! You have officially created your new workload cluster using Frontier Outpost!
Edit And Modify Cluster
Using the action menu, authorized FKP personnel can enter the Editor Mode which enables them to make changes to their workload cluster. Changes that can be made within each workload cluster can involve changes to roles of the assigned users. Other changes also include the Frontier Add-Ons selected for that workload cluster.
Modify Frontier Add-Ons
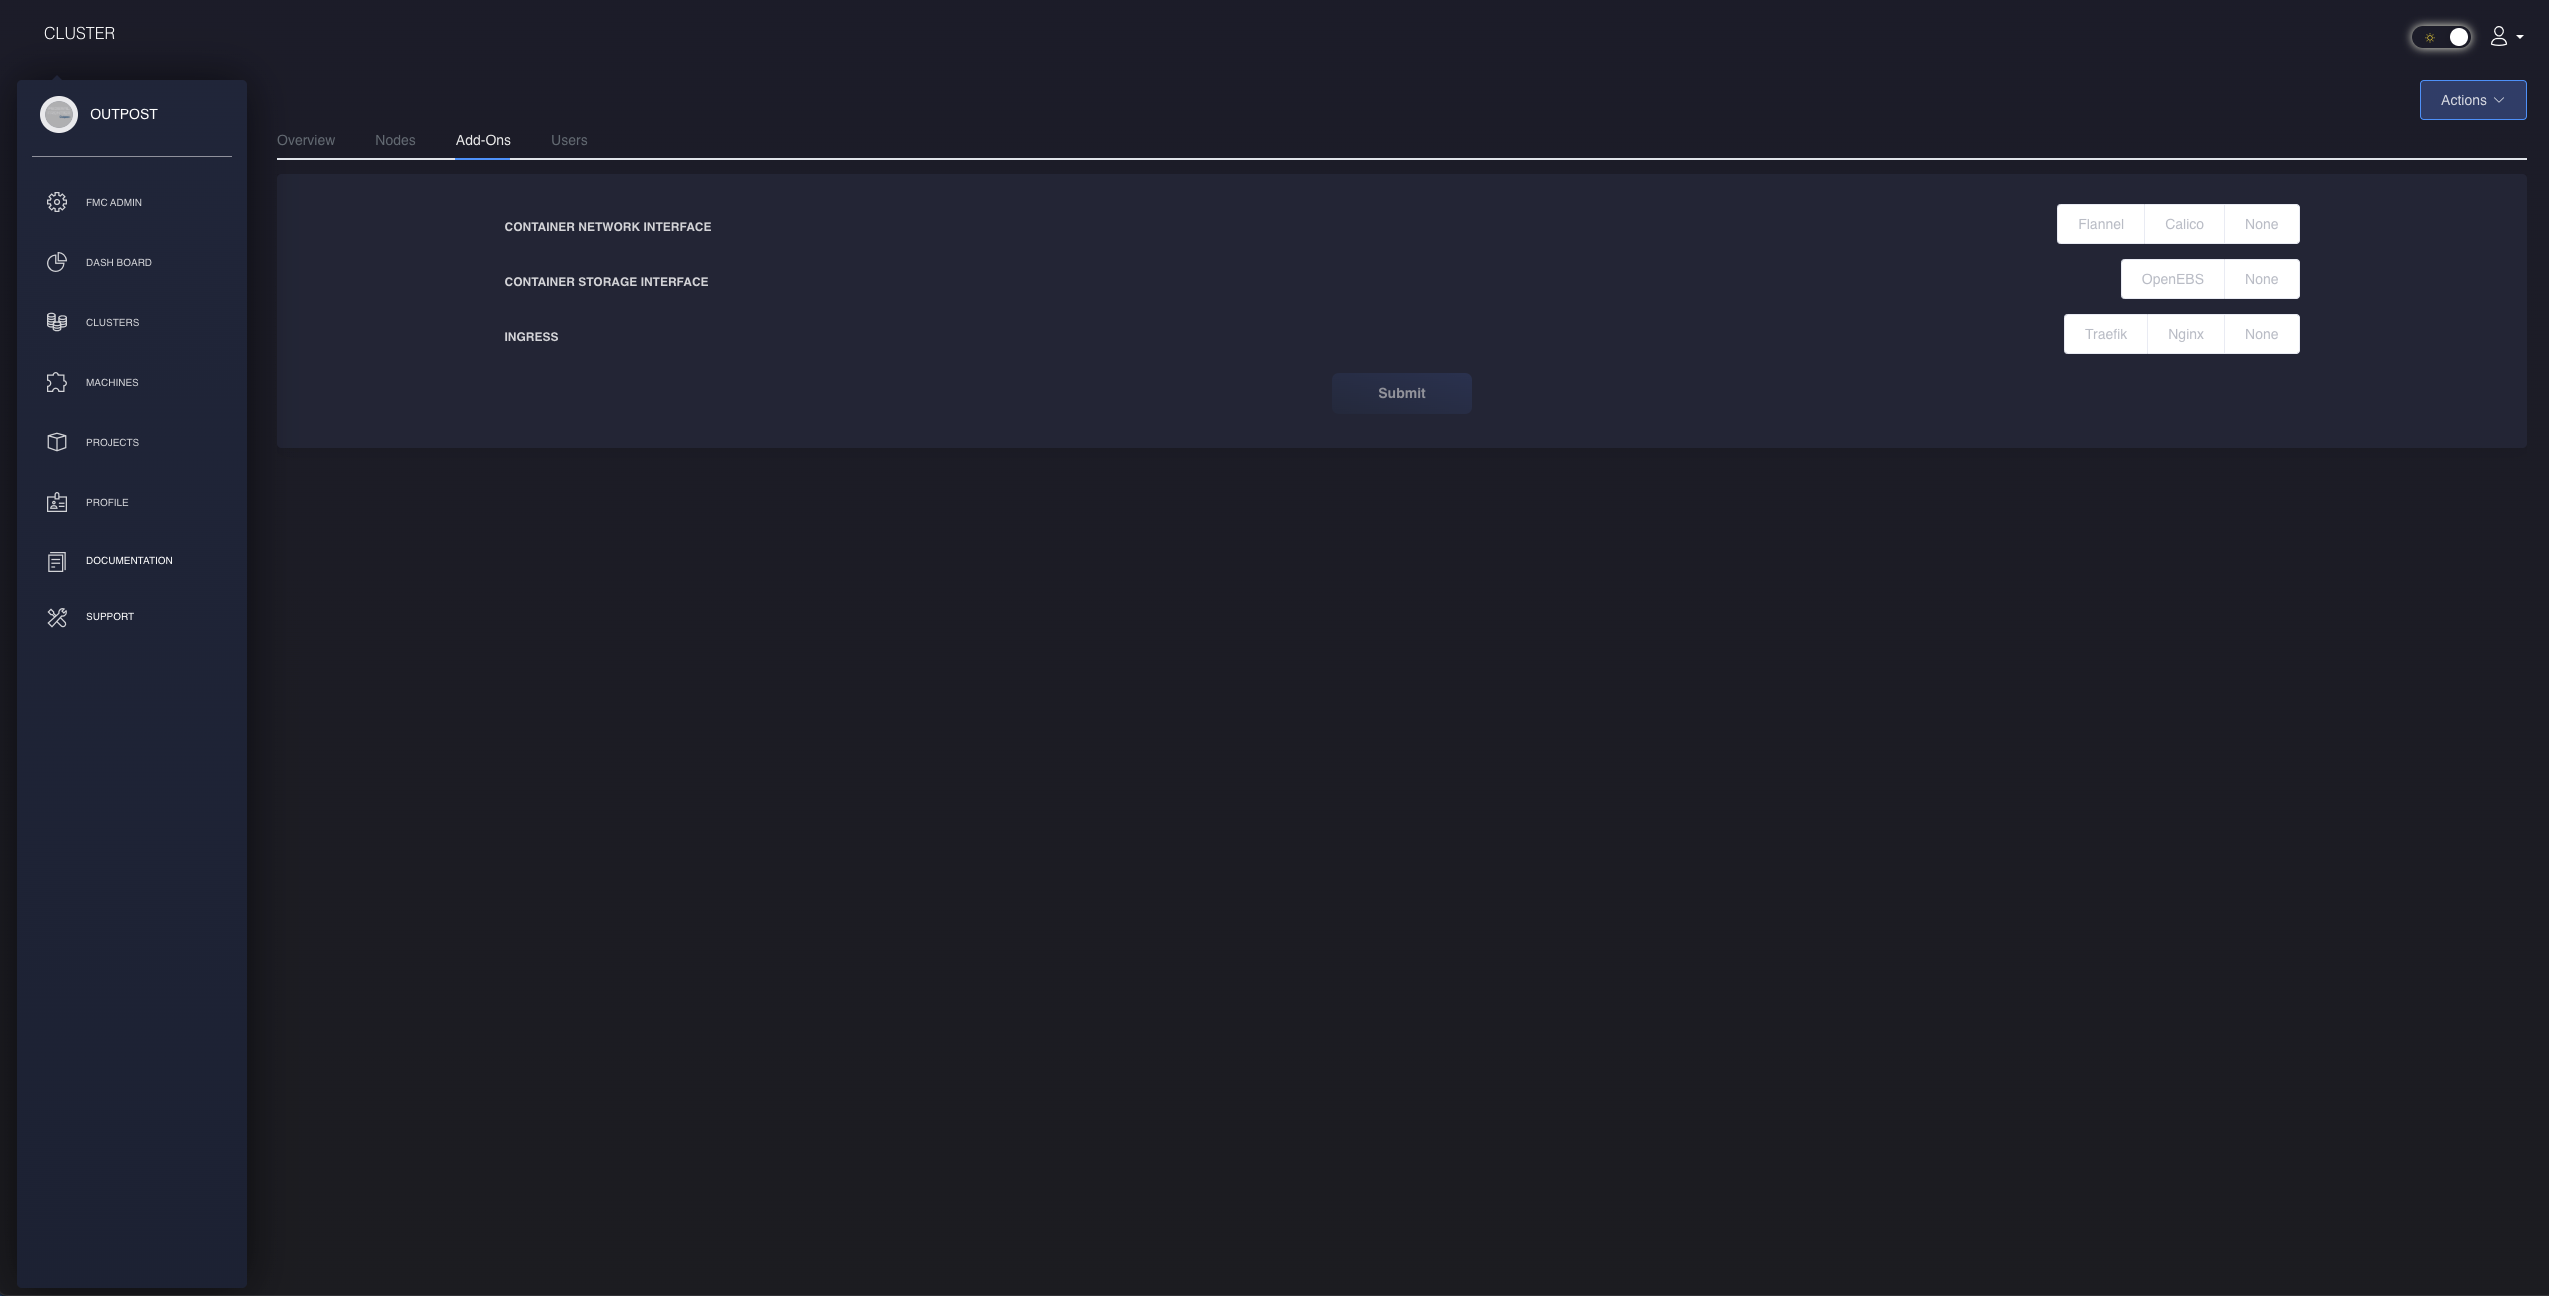
Authorized FKP personnel will have the capability to make changes to their Frontier Add-Ons on an existing cluster. They will be able to make changes such as their CSI, ingress controllers, or service load balancers. An example would be switching their ingress controller from Traefik to Ingress-NGINX. Frontier Services makes it easy for users to change out their add-ons in case administrators change their mind.
Retrieve Cluster’s Kubeconfig
Using the action menu, authorized FKP personnel can either view or download the Kubeconfig file for the workload cluster. Supported options for downloading the file can be in either .yaml or .txt, with .html being the supported option for viewing the cluster’s kubeconfig.
Delete Clusters
Lastly, authorized FKP personnel can delete their workload cluster using the action menu. The cluster administrator deleting this workload cluster will be prompted with a confirmation screen, as this action cannot be undone.