Keycloak Setup
How to setup Keycloak Authentication for your Frontier Management Cluster (FMC)
OIDC and OAuth 2.0 Security
OAuth 2.0 is an authorization framework that enables applications such as Frontier API Services (FAS) to obtain limited access to user accounts on an HTTP service. The OAuth 2.0 protocol provides API security through scoped access tokens. OAuth 2.0 enables you to delegate authorization, while OIDC enables you to retrieve and store authentication information about your end users. OIDC extends OAuth 2.0 by providing user authentication and single sign-on (SSO) functionality.
Roles used for Federal Frontier API Services
OAuth 2.0 enables you to delegate authorization, while OIDC enables you to retrieve and store authentication information about your end users. OIDC extends OAuth 2.0 by providing user authentication and single sign-on (SSO) functionality. This will allow the FMC to restrict access of certain actions based on the permissions authorized by the employee user’s roles. There are currently 4 roles that will be utilized for Frontier services. They are:
- Frontier Administrator
- Project Administrator
- Cluster Administrator
- Frontier User
Deploy Keycloak Into Your FMC
To begin this guide, you must first complete the Stackgres guide from Storage Setup tutorial. This will satisfy all prerequistes to initiate installation for Keycloak services within your FMC. Start off by creating the keycloak namespace within your FMC cluster:
kubectl create namespace keycloak
Following up with the Stackgres Cluster (SGCluster) created from the Storage Setup guide, we will require finding the external-ip of the frontier PostgreSQL database. To find the address, enter the following comand below:
kubectl get svc -n frontier
This will output a list of services currently running the frontier namespace. The one we are looking for in particular, is the primary database service.
NAME                   TYPE           CLUSTER-IP      EXTERNAL-IP                              PORT(S)             AGE
frontier-db-primary    ExternalName   <none>          frontier-db.frontier.svc.cluster.local   <none>              14d
In this case, our external-ip address is frontier-db.frontier.svc.cluster.local. We will need this for the Keycloak deployment manifest.
Keycloak Database Setup
We will need to create and enable all required prequisites before connecting Keycloak services to our SGCluster PostgreSQL database. Taking a look at all our existing database pods using the command:
sudo k3s kubectl exec -ti "$(kubectl get pod --selector app=StackGresCluster,cluster=true -o name | head -n 1)" -c patroni -- patronictl list
We will take the writable [Leader] database and exec into that specific pod.
kubectl exec -it frontier-db-0 -n frontier -- bash
A base shell will appear. Type in the following command to enter your PostgreSQL database configuration:
psql
We will need to write query statements to prepare for the Kubernetes Keycloak deployment. We will begin by creating the database:
CREATE DATABASE KEYCLOAK;
Next we will need to create the Keycloak user account for the database. Be sure to take note of your username and password. We recommend setting your username to keycloak for simplicity. Input any value in for <password>. These values will be used for your Keycloak deployment credentials configuration in the manifest.
CREATE USER keycloak WITH PASSWORD '<password>';
Once you’ve created the new user, we will now grant all privileges of the Keycloak database to the Keycloak database user.
GRANT ALL PRIVILEGES ON DATABASE KEYCLOAK to keycloak;
After completing this step, we can then exit out of the PostgreSQL database and pod to begin the Keycloak deployment.
The Keycloak Manifest
To get started, we are going to use the following manifest below. You can save this YAML file as keycloak-stackgres.yaml for simplicity.
kind: Service
apiVersion: v1
metadata:
  name: keycloak
  labels:
    service: keycloak
spec:
  ports:
    - port: 8443
      name: https
    - port: 8080
      name: http
  selector:
    service: keycloak
    layer: security
---
apiVersion: apps/v1
kind: Deployment
metadata:
  name: keycloak
  labels:
    service: keycloak
    layer: security
spec:
  selector:
    matchLabels:
      service: keycloak
      layer: security
  strategy:
    type: Recreate
  template:
    metadata:
      labels:
        service: keycloak
        layer: security
    spec:
      containers:
        - image: quay.io/keycloak/keycloak:20.0.3
          imagePullPolicy: IfNotPresent
          args: ["-Djgroups.dns.query=keycloak-jgroups-ping.keycloak.svc.cluster.local", "start", "--auto-build", "--cache-stack=kubernetes", "--db=postgres", "--db-url=jdbc:postgresql://<postgres-external-ip>/keycloak", "--db-username=keycloak", "--db-password=<password>", "--hostname sso-dev.eupraxialabs.com", "--proxy edge", "--spi-sticky-session-encoder-infinispan-should-attach-route=false", "--hostname-strict-https=false"]
          name: keycloak
          resources:
            limits:
              cpu: 2
              memory: 1024Mi
            requests:
              cpu: 500m
              memory: 1024Mi
          ports:
            - containerPort: 8443
            - containerPort: 8080
            - containerPort: 4444
            - containerPort: 8888
          env:
            - name: KEYCLOAK_ADMIN
              value: admin
            - name: KEYCLOAK_ADMIN_PASSWORD
              value: admin

---
apiVersion: networking.k8s.io/v1
kind: Ingress
metadata:
  name: keycloak
  labels:
    service: keycloak
    layer: security
  annotations:
    kubernetes.io/ingress.class: "nginx"
    nginx.ingress.kubernetes.io/backend-protocol: "HTTP"
    nginx.ingress.kubernetes.io/affinity: "cookie"
    nginx.ingress.kubernetes.io/session-cookie-name: "KC_SC"
    nginx.ingress.kubernetes.io/session-cookie-secure: "true"
    nginx.ingress.kubernetes.io/session-cookie-change-on-failure: "false"
    nginx.ingress.kubernetes.io/affinity-mode: "balanced"
spec:
  rules:
    - host: sso-dev.eupraxialabs.com
      http:
        paths:
          - path: /
            pathType: Prefix
            backend:
              service:
                name: keycloak
                port:
                  number: 8080
---
apiVersion: v1
kind: Service
metadata:
  labels:
    service: keycloak
  name: keycloak-jgroups-ping
spec:
  clusterIP: None
  ports:
    - port: 4444
      name: ping
      protocol: TCP
      targetPort: 4444
  selector:
    service: keycloak
  sessionAffinity: None
  type: ClusterIP
Within spec.template.spec.containers of the deployment manifest, you will notice core configurations for our Keycloak container. Inside of args, we will modify the value <postgres-external-ip> from the db-url flag using the external-ip address acquired earlier. Additionally, we will also input the value <password> for the db-password flag as well configured in the previous section. Apply this manifest to your Kubernetes cluster under the keycloak namespace by running the command:
kubectl apply -f keycloak-stackgres.yaml
The container may take a while to create. You can check the status by viewing the Keycloak container in getting all pods from the keycloak namespace.
kubectl get pods -n keycloak
Output Example:
NAME                        READY   STATUS    RESTARTS        AGE
keycloak-6d4fdb5f8d-brdjt   1/1     Running   0               52d
Test to See if Keycloak Is Running
Once you are able to see that the Keycloak container is in the Running state, you can port-forward the pod to your local machine:
kubectl port-forward <pod-name> -n keycloak 8080
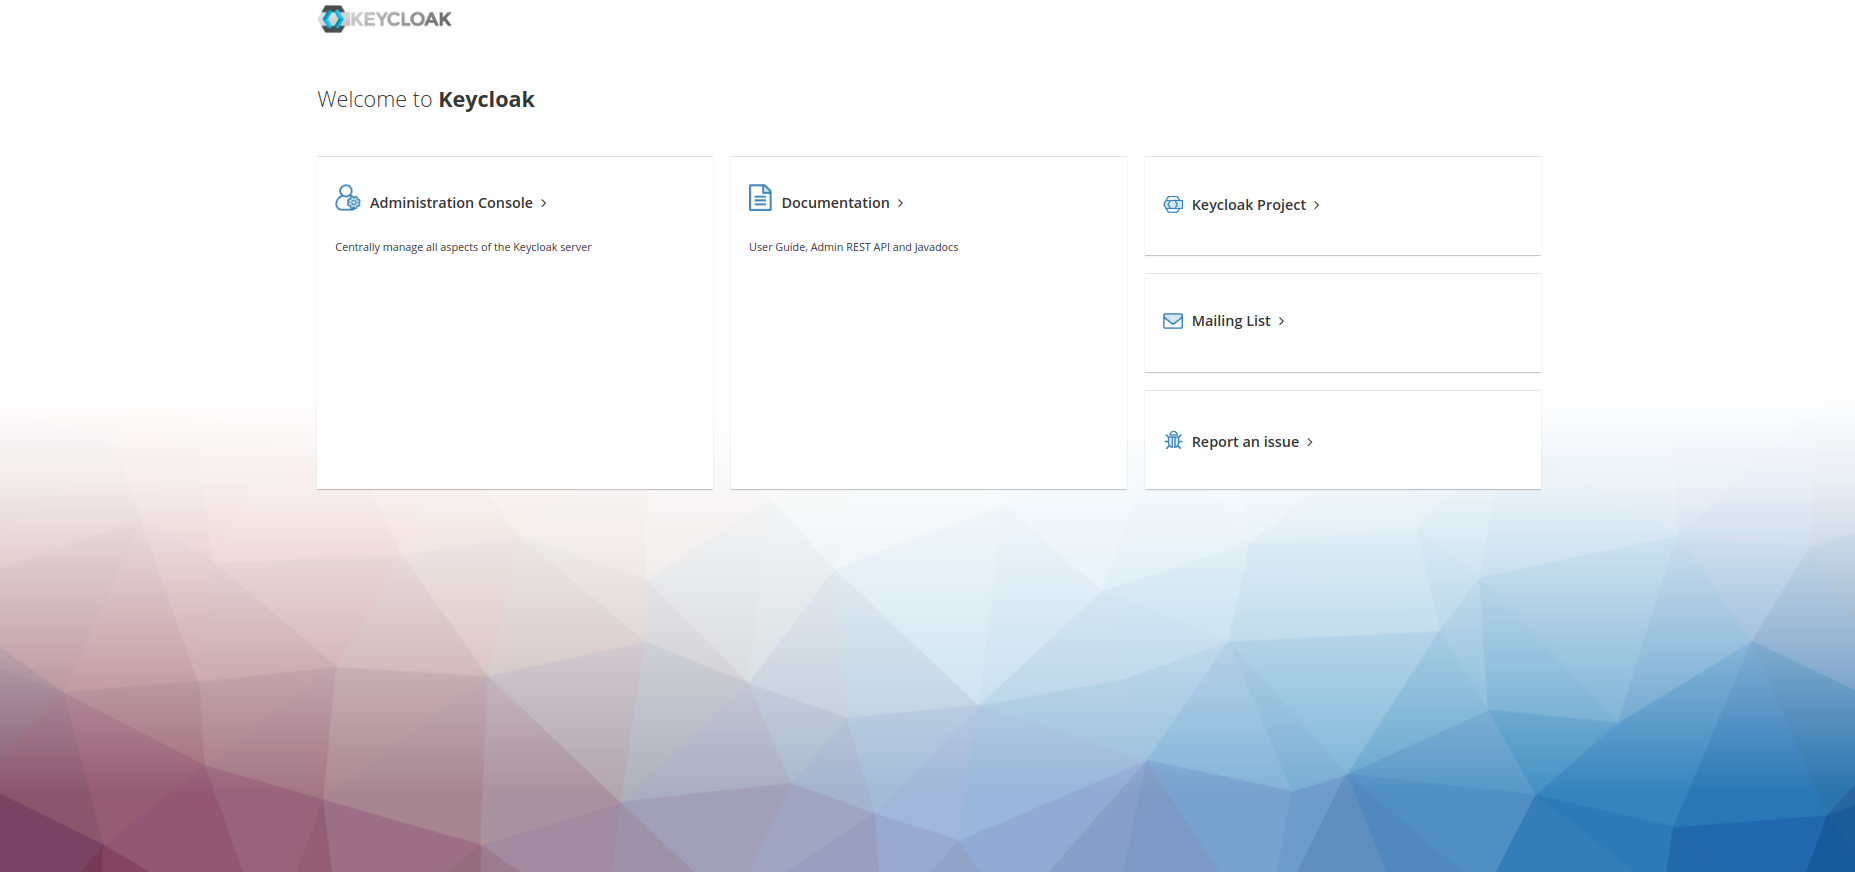
By going into your browser on http://localhost:8080/, you should see a graphical user interface such as the image below.
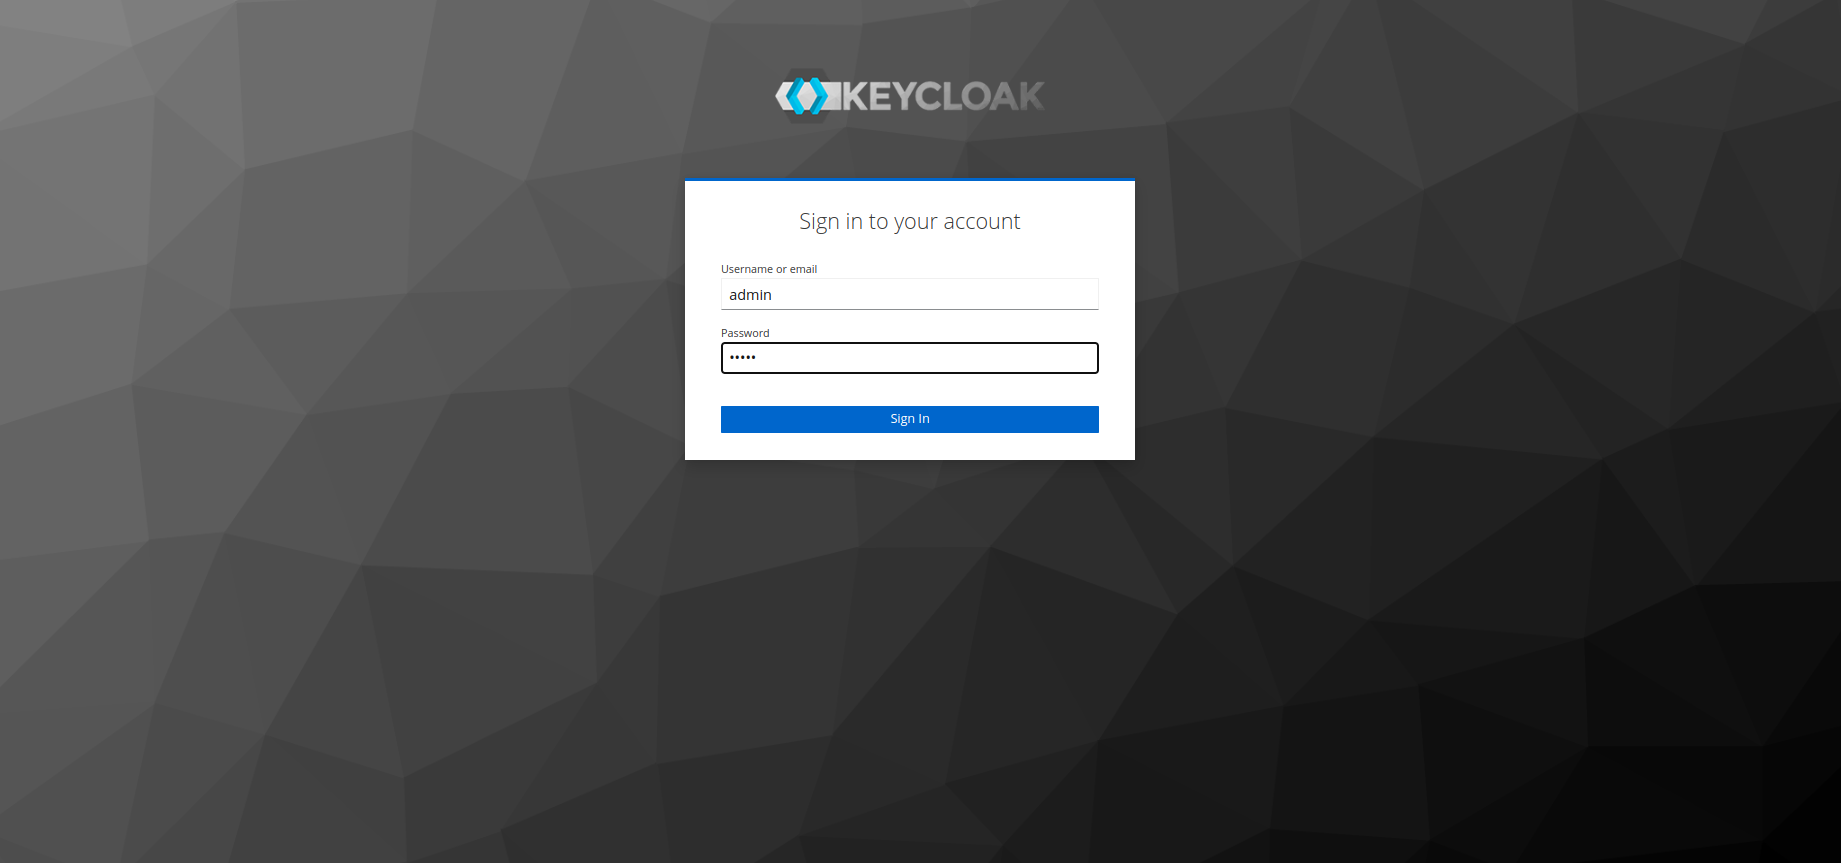
Click on Administration Console. You can log into the Keycloak administration account by entering the following:
- Username: admin
- Password: admin
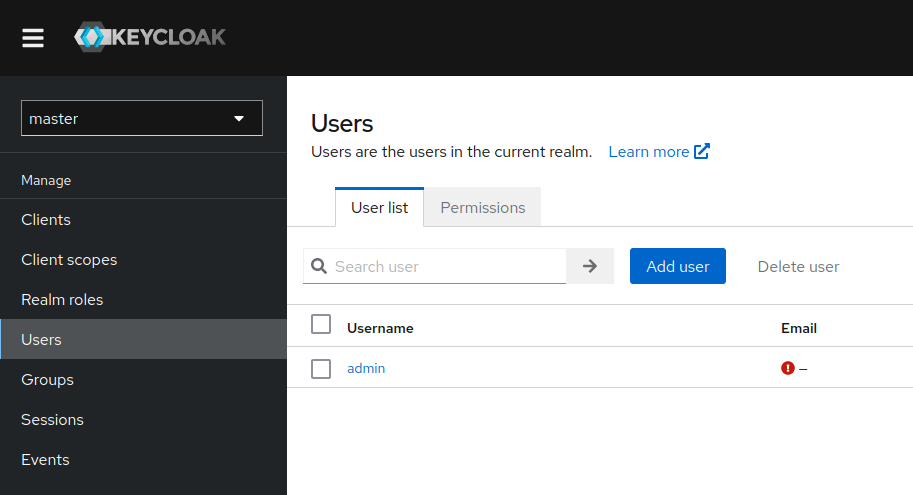
If you are able to authenticate, then congratulations! We can now begin changing out the password of the Keycloak administration account. We will navigate to the Users tab from the side navigation bar.
Once you are on the user menu for the master realm, navigate into the admin user. Enter the credentials tab located on the top navigation bar of the admin user profile.
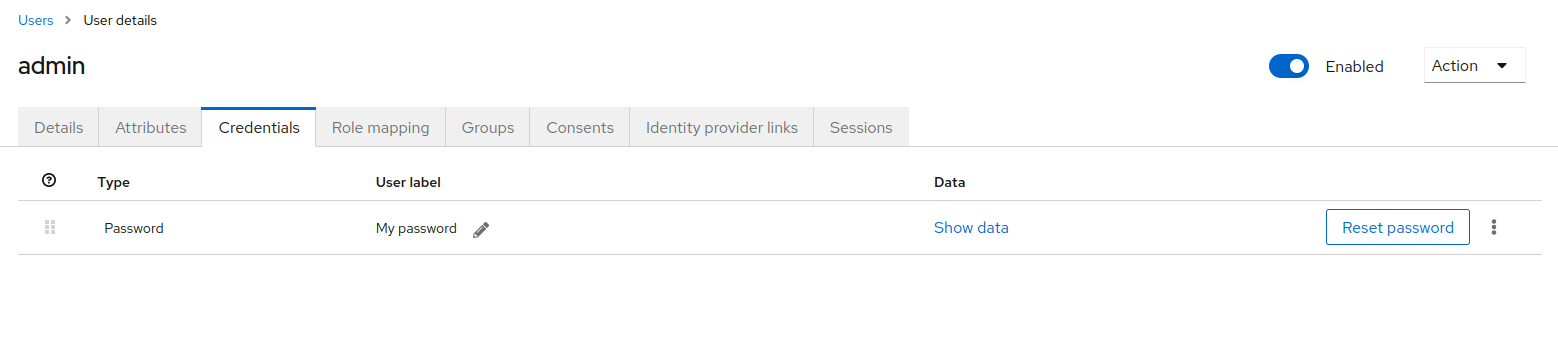
Click on Reset Password button located on the right to change your password. This will severly decrease the security risk of the keycloak administration account. With this now completed, we can now modify our Keycloak services for FKP.
Keycloak Realm Setup
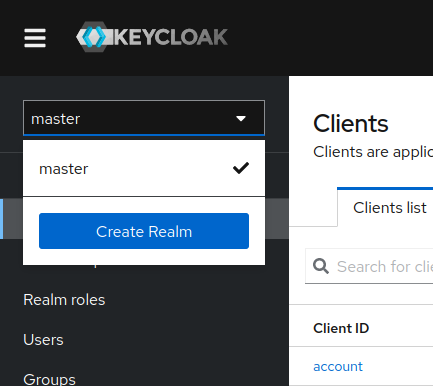
Inside of your admin console, create a new realm. You can find this option using the sidebar navigation such as the image below.
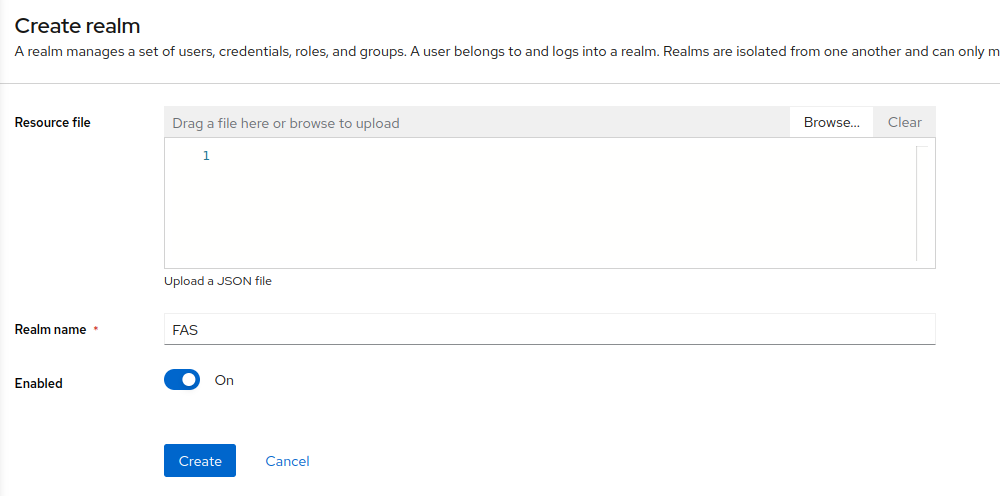
You can input details for your newly created realm. I will just insert “FAS” as the name of the Realm for this example. Once you’re done, click Create on the bottom.
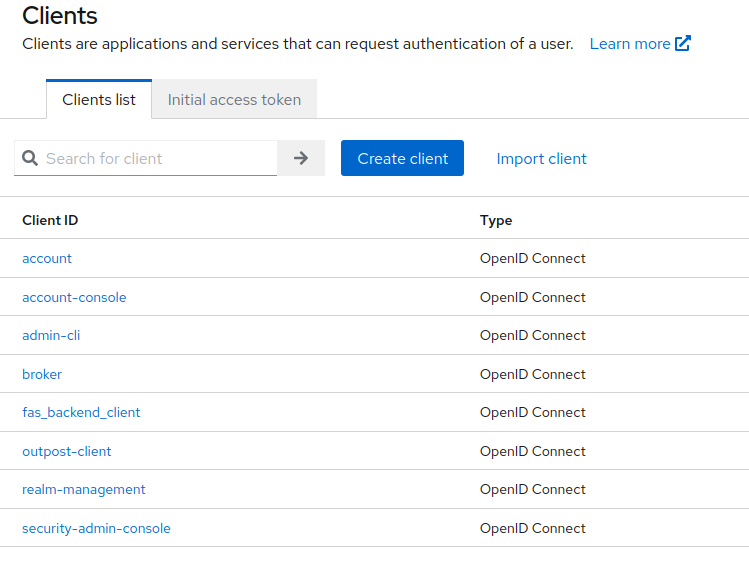
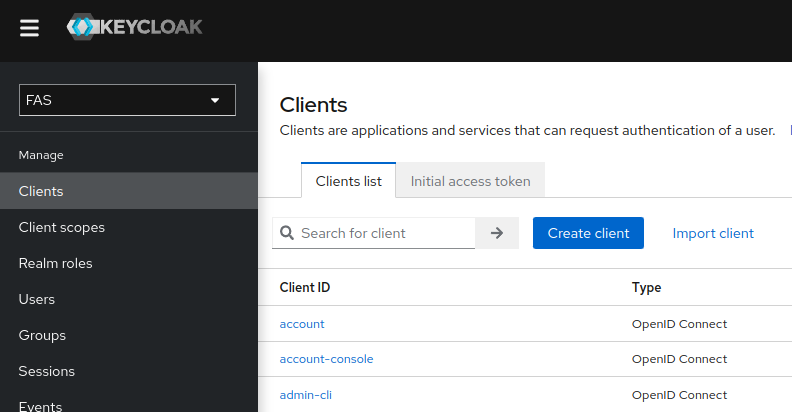
Keycloak Frontier API Service (FAS) Client Setup
Navigate to Clients off the sidebar navigation on your new realm. You will already see default preset clients utilized for the functionality of the realm. We will create a new client within your realm that will be further utilized for your services. Click on the Create client button.
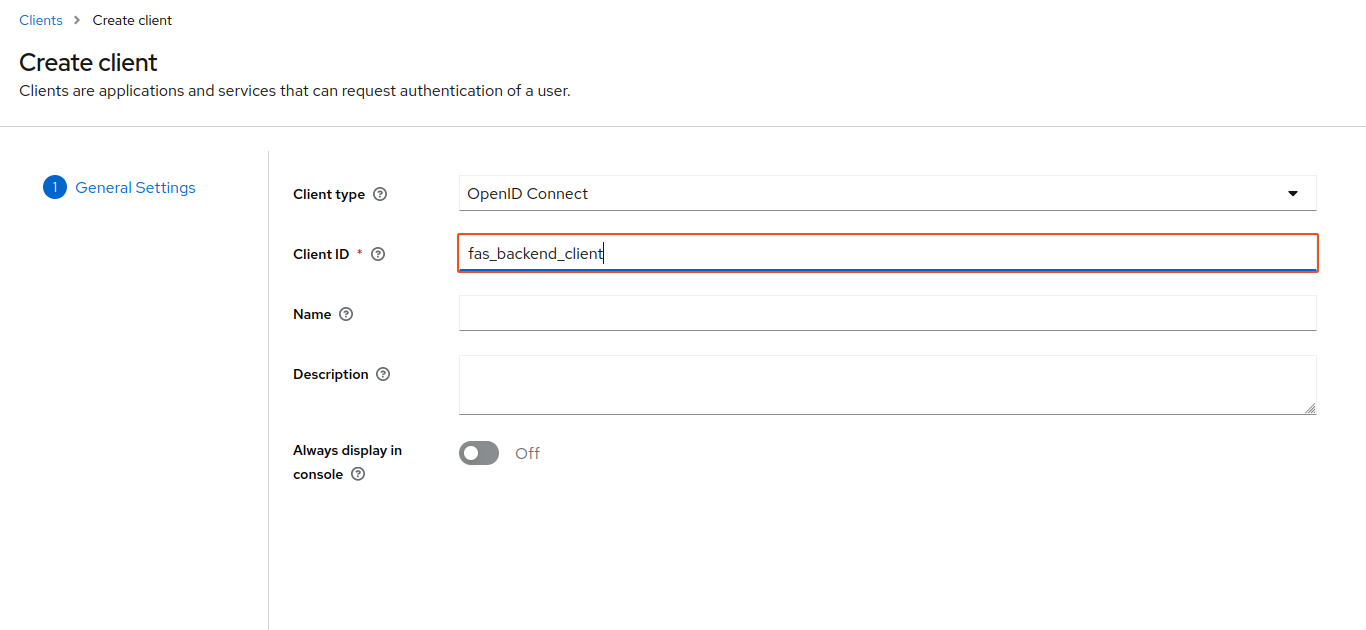
Frontier is going to require two different realm clients for your FKP FMC cluster. For this part of the guide, we will create the back-end service client first for FAS. You can input details for your newly created client inside of your realm. We will insert “fas_backend_client” as the name for this client. Once you’re done, click Next on the bottom.
We will change some of the configuration settings within this newly created client inside of your realm. We will start by inserting a redirect and logout url after the client has authenticated for both FAS server and Outpost application for the organization using the FMC. For this example, we will use multiple URLs utilized for FAS and Outpost running in our local environment. Therefore, the links mentioned throughout this section may vary for yourself as you may serve these applications on different addresses inside of your organization’s external and internal networks.

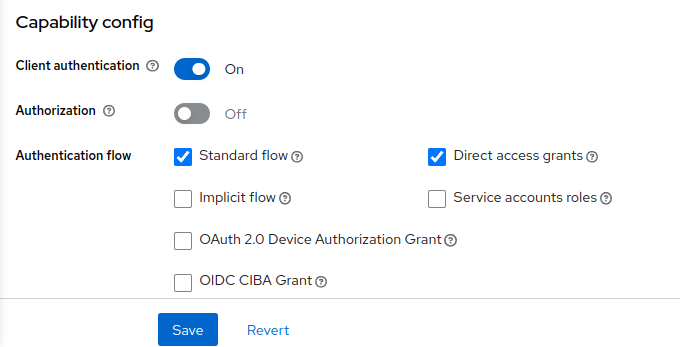
Another setting we will change is the Client Authentication. In the case of our back-end client, we will be required to activate this setting to protect services of our FMC cluster from external sources and staff.
With this change, we can now navigate to Credentials using the client’s exclusive top navigation bar. Here you will find the secrets utilized for the client. You will need these later in the FAS Setup Admin Guide.

Keycloak Client Roles Setup
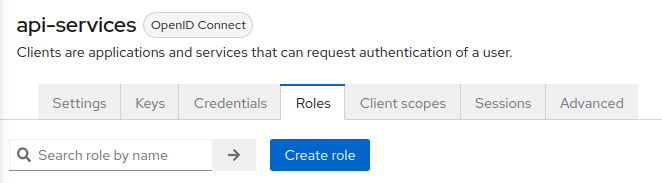
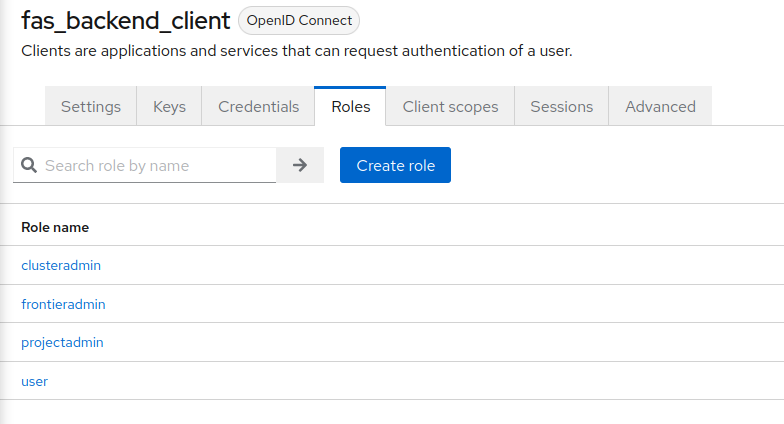
Once we have finished setting up our credentials for the client, we can create roles for users within the services. Navigate to Roles using the client’s exclusive topbar navigation. Here you will be able to create new roles that will be further utilized within the client’s services. Click on the Create role button.
While creating a role, you want to ensure the name fits the roles mentioned in Roles used for FAS and FMC Security - Roles and Authorization. For the example in the image, I will use user role out of all 4 roles offered within FKP services. Once you list the Role Name as user, click the Save button on the bottom of the form.

Be sure to complete this process for all other roles described in from the Federal Frontier API Services Roles. That should be superadmin, projectadmin, clusteradmin, and user. The end result of your role list for your client should mirror the ones from the image below.
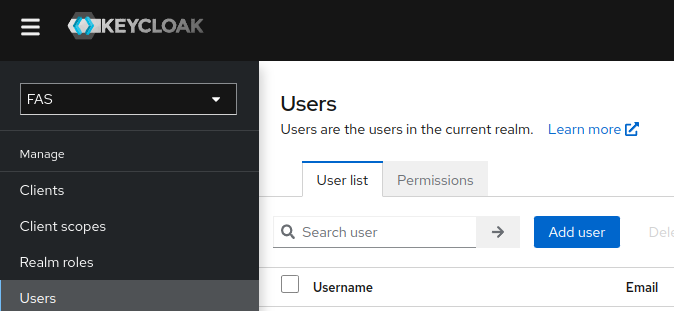
Keycloak Client Users Setup
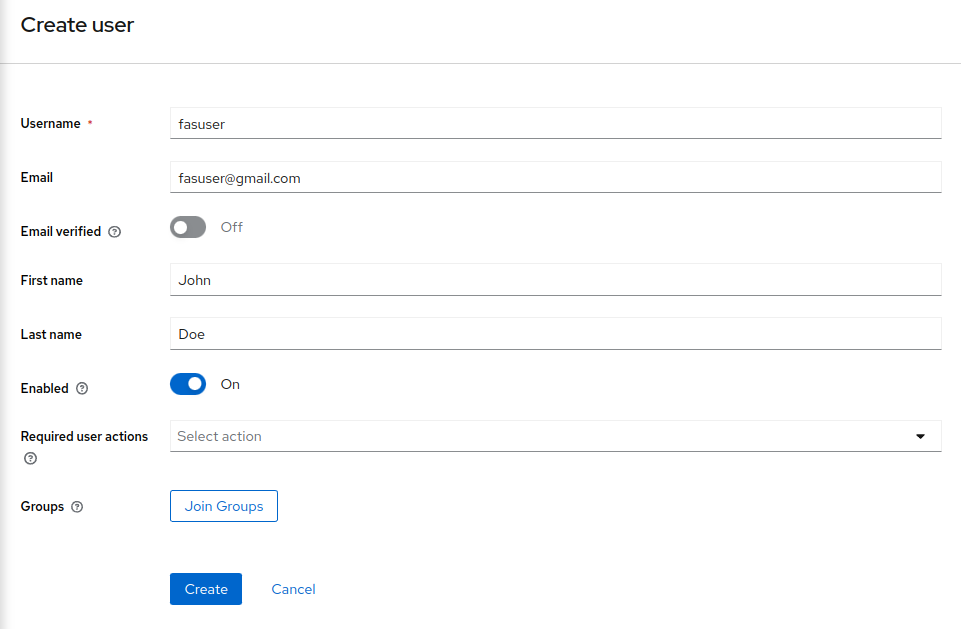
After you created all the roles, navigate to Users tab on your sidebar navigation on Keycloak. You will be directed to a user management page. Click on the Add user button similarily seen in the image below.
Once you click on the Add user button, you will be directed to user creation page. You can fill the user details here. Save the inputted information by clicking on the Create button.
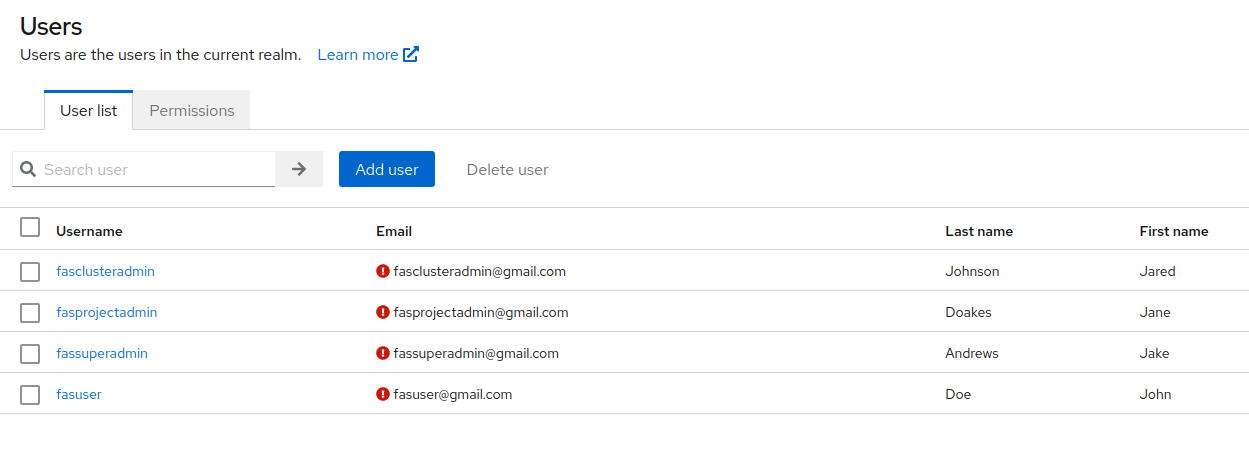
You will need to assign these users roles that were created from the api-services client. You can achieve this by navigating to Role mapping on the top navigation bar for the user’s settings. Click on Assign Role and transfer the roles you desire to the new user from fas_backend_client by filtering roles by client in the assignment menu options.

Do the same steps for all other users within your organization that need to be created.
Keycloak Frontier Outpost Client Setup
For the upcoming Frontier Outpost GUI, we will need to set up a client service for that front-end application as well. This will be required in order to authenticate to your Keycloak server from the Outpost application without exposing the client’s secret.
Frontier CLI and Outpost Keycloak Authentication Flowchart Diagram
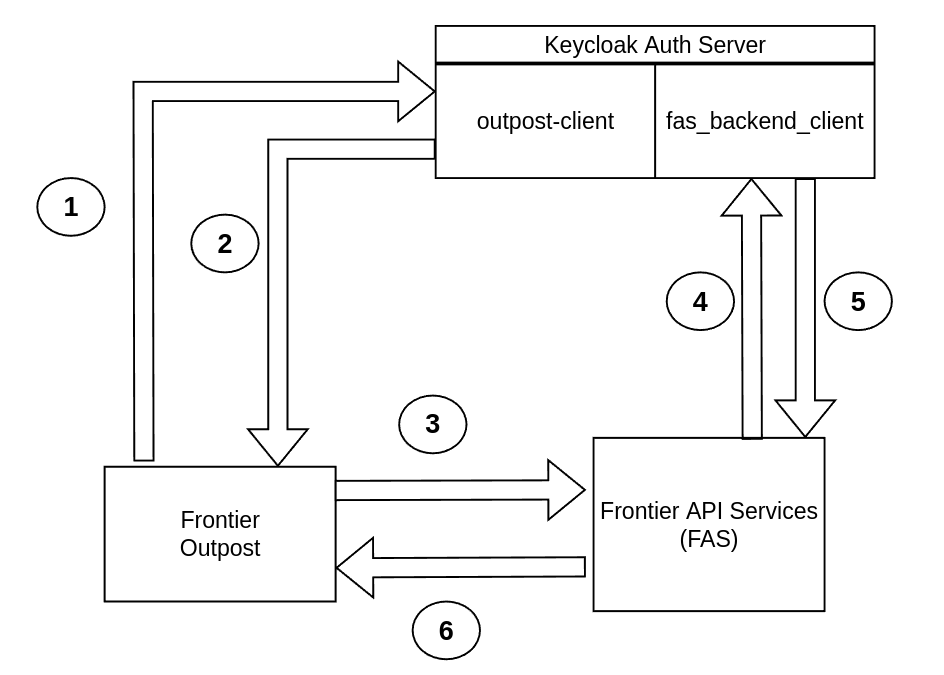
Above you will see the authentication flowchart for Frontier Outpost. The steps of the Frontier Outpost authentication diagram are:
- Step 1: The front-end client user attempts to authenticate to the Frontier Keycloak server through outpost-client to retrieve an access token for the Outpost application
- Step 2: The outpost-client will successfully allow the user to login to the Outpost application to make requests to FAS
- Step 3: Successfully authenticated Frontier Outpost users can make requests to FAS in the FMC cluster through the GUI
- Step 4: FAS will validate the token from the Outpost client user and verify the request to the FMC cluster through the fas_backend_client
- Step 5: The fas_backend_client will allow the Outpost client user to successfully make requests within FAS, as long as the user has the roles and permissions to perform such actions
- Step 6: FAS will send the request back to the Frontier Outpost user about any successful modifications that were made within their FMC cluster
Frontier Outpost will rely on both FAS Keycloak Realm clients for users to make changes in your FKP FMC cluster without the user being able to view the client secret from the browser developer tools upon Javascript. The client secret will be protected by FAS, which is where you will configure the fas_backend_client credentials to verify FKP user access tokens. This differs from the Frontier CLI that connects directly to the FAS back-end application.
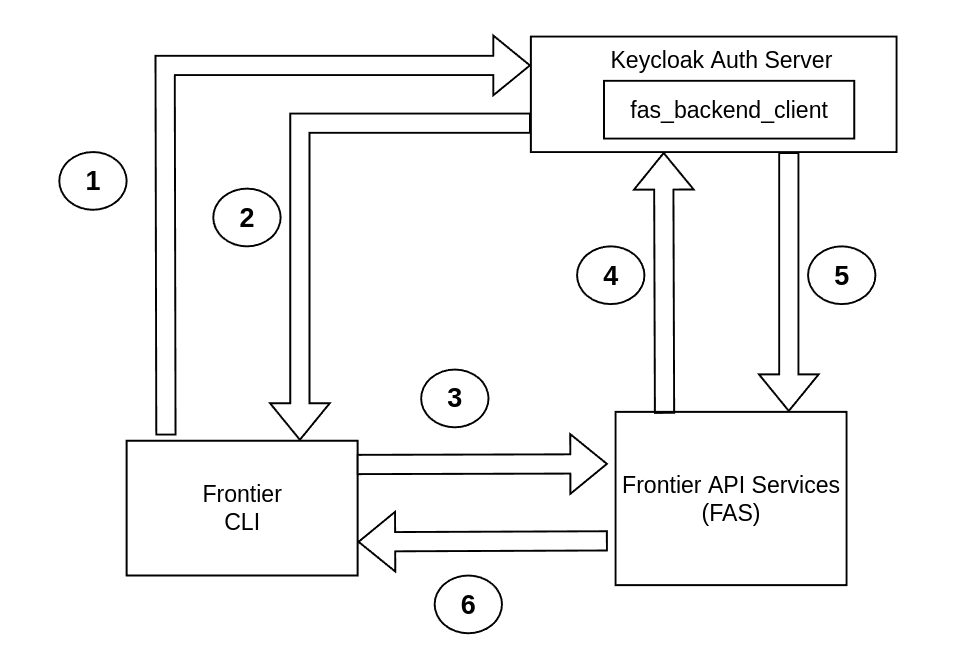
All security for Frontier CLI will be protected from the FAS server itself and solely relies on the fas_backend_client. The steps of the Frontier CLI authentication diagram are:
- Step 1: The front-end client user attempts to authenticate to the Frontier Keycloak server through fas_backend_client to retrieve an access token for the Frontier CLI application
- Step 2: The fas_backend_client will successfully allow the user to login to the Frontier CLI application to make requests to FAS
- Step 3: Successfully authenticated Frontier CLI users can make requests to FAS in the FMC cluster
- Step 4: FAS will validate the token from the Frontier CLI client user and verify the request to the FMC cluster through the fas_backend_client
- Step 5: The fas_backend_client will allow the Frontier CLI client user to successfully make requests within FAS, as long as the user has the roles and permissions to perform such actions
- Step 6: FAS will send the request back to the Frontier CLI user about any successful modifications that were made within their FMC cluster
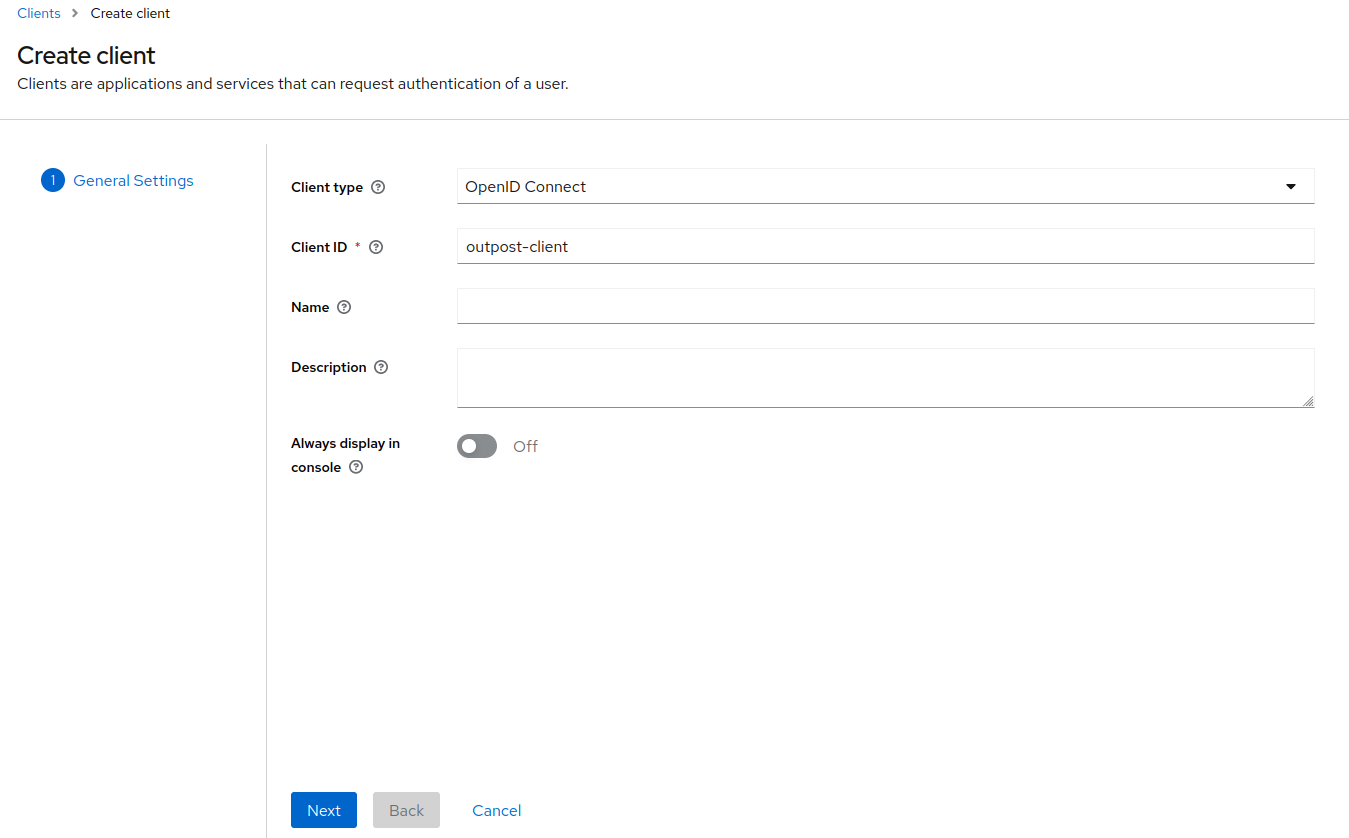
Create the Outpost Client
To setup the new client for Outpost user and administrator authentication, navigate back to Clients found on the sidebar navigation on your realm and click on the Create client button.
We will insert “outpost-client” as the name for this client and click Next on the bottom.
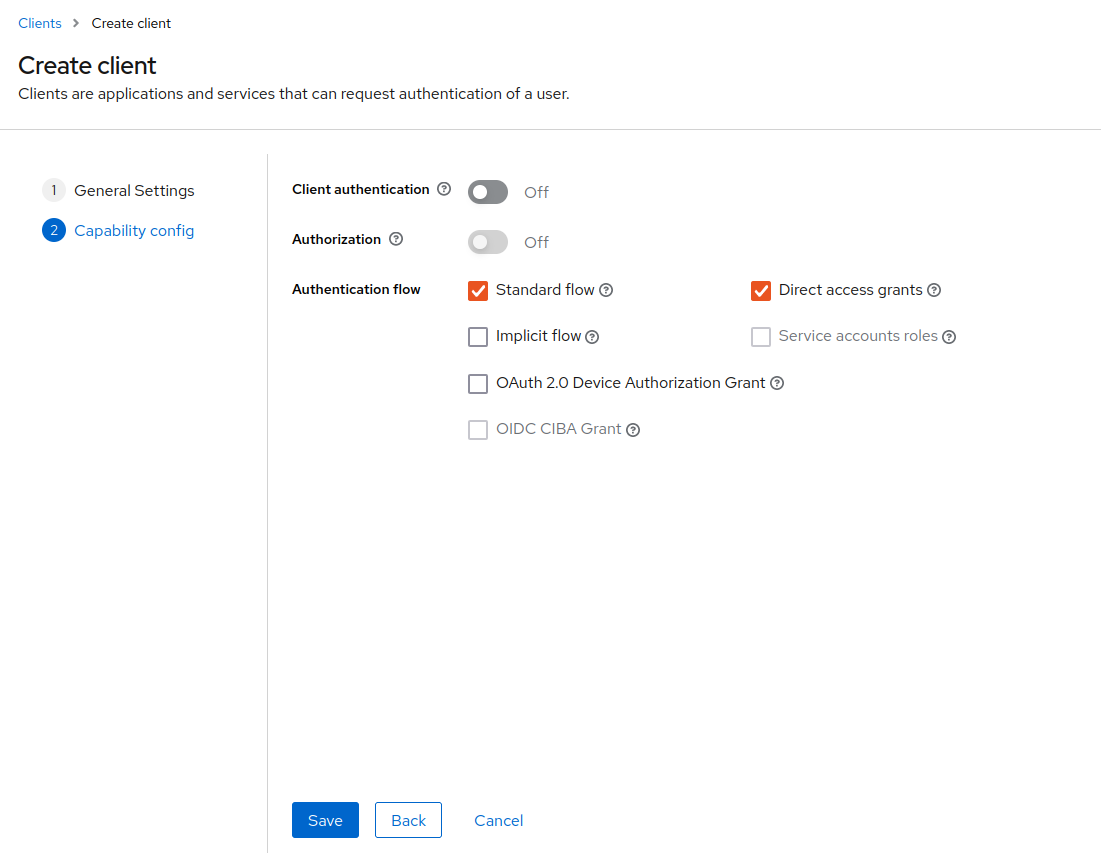
For this next part, we will not enable client authentication option. This will allow us to login into Keycloak using a specific front-end client that will further communicate with the back-end authentication client. The connection between both clients will place preventions of exposing the FAS client secret, which will be utilized to make requests from each FKP user within the FMC cluster.
Lastly, we will input the same addresses used for the “fas_backend_client”. This will ensure there are no conflicts with redirect URLs once the user has authenticated or logged out of the Outpost GUI.
We have completed the Keycloak setup for your FKP FMC Cluster. You will now be able to proceed with the FAS Setup Guide to allow your organization staff to deploy and manage workload clusters external from the FKP FMC cluster.